
For my final project I decided to build a set of LED backlit foam exciter speakers and hang them in my living room. A foam exciter speaker is a piece of foam, in this case a 2’x2’x1” board of polystyrene, with an exciter speaker mounted on the back, that is hung by thread or wire. An exciter speaker is an electroacoustic transducer, and produces vibration according to the input given, which in turn vibrates the foam it is mounted to. This vibrating foam then acts to amplify the sound of the vibrations, turning these foam boards into speakers.
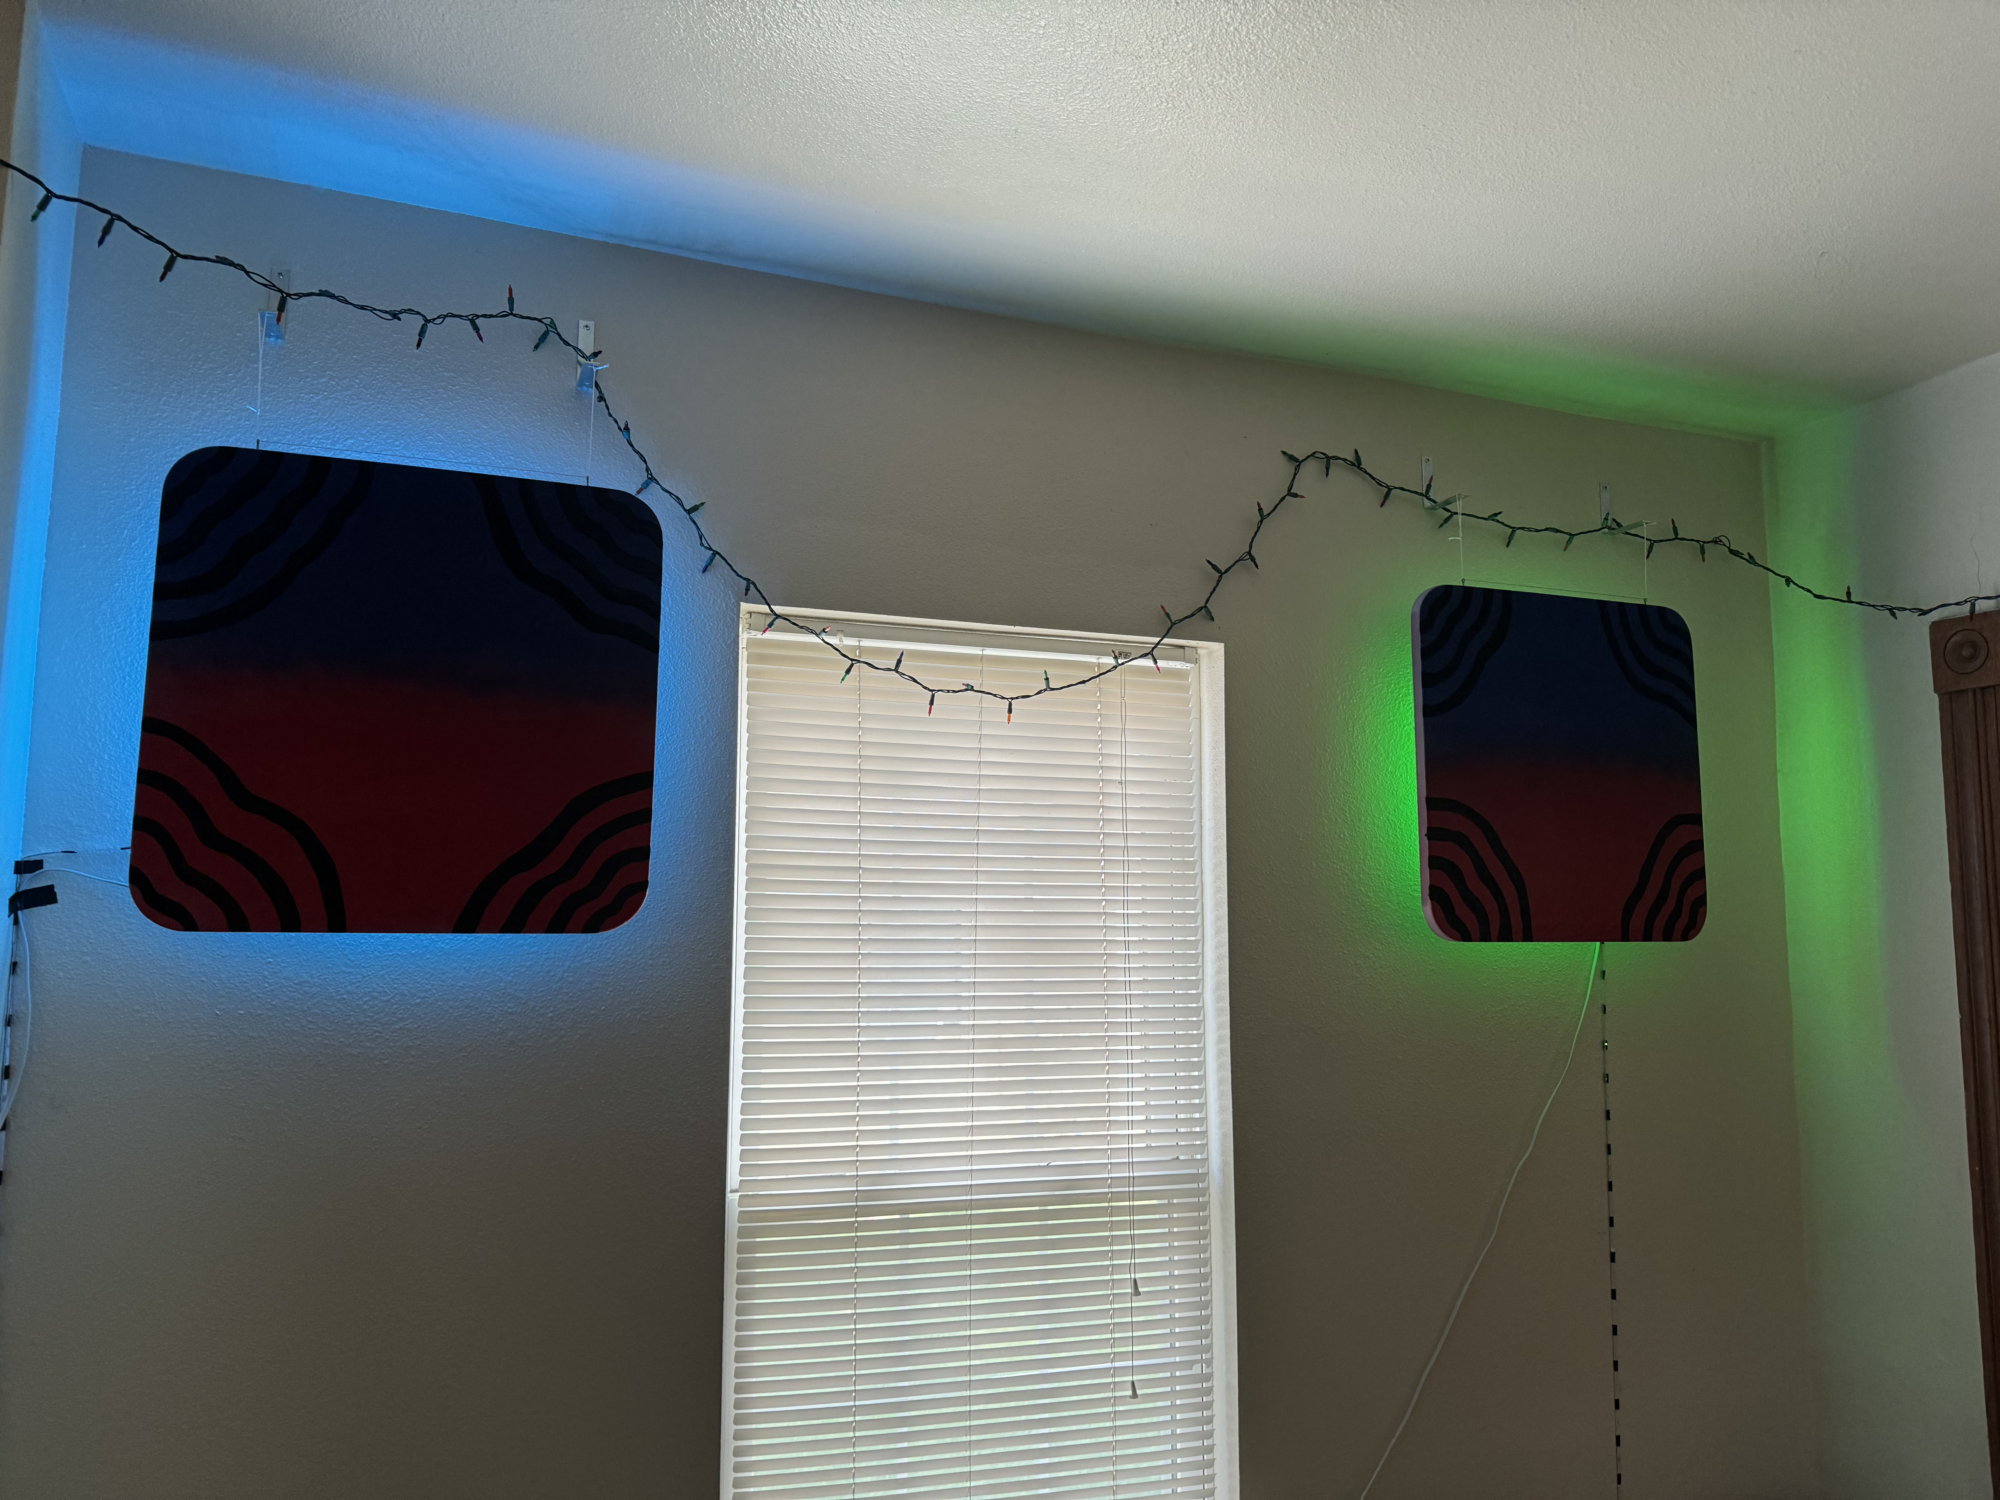
For this project, I wanted to achieve a mix of minimalism and abstract art with these speakers. My goal for this project was to have these foam boards on the wall that did not draw attention, but would look good when focused on. Then, when in use, I could turn on the LED backlighting to highlight the speakers and give them more presence in the room as they were playing.

Exploration:
For this project, I first started out by doing some project exploration, and landed on foam exciter speakers. I found that foam exciter speakers can be built for a fraction of the cost of high-end home audio setups, and produce surprisingly good sound quality for their price. At this time, I found that these speakers typically are left with the color of the foam, or painted over with a single shade to produce a very minimalist aesthetic. I had the idea at this time that I would like to try and paint a gradient into these speakers, to produce a minimal and abstract aesthetic.
Research:
Next, I did research on how to actually build these speakers, and the materials I would need to build them. I found some videos on youtube explaining how to build these speakers. One of these tutorial videos was “How to Build ‘The World’s Best Speakers’ – Are Flat Panel Speakers Really Any Good?”, by AmplifyDIY, where he outlines a process of building these speakers which I used. In this video, AmplifyDIY goes into the steps to making these speakers, the technical specifications, and shows the process and final result of these speakers. He also does a test of the sound, and comes to the conclusion that these speakers sound surprisingly good for the price.
At this time, I also had the idea to add LED backlighting behind these speakers on the wall, which I thought would create a cool highlighting effect, and draw people’s attention to the speakers when they were in use. I was also deciding whether to install these speakers in my bedroom or my living room, and decided on my living room, as my roommates and I had empty space in our living room that would fit these speakers perfectly.
Purchasing Materials:
Next, I purchased all of the materials that I would need for this project. This included the 2’x2’x1” foam polystyrene insulation panels, exciter speakers, speaker wire, paint, a bluetooth amplifier, cotter pins, thread, shelving mounting brackets, and 2 remotely controlled LED lightstrips.
Preparing the Foam Boards:
After I had purchased and had all the materials in-hand, I first started by preparing the polystyrene foam panels for the speakers. This process started by cutting the corners of the foam boards to rounded corners, which I did by first tracing a semicircle using the lid of a yogurt container, and then cutting off the foam with a utility knife.
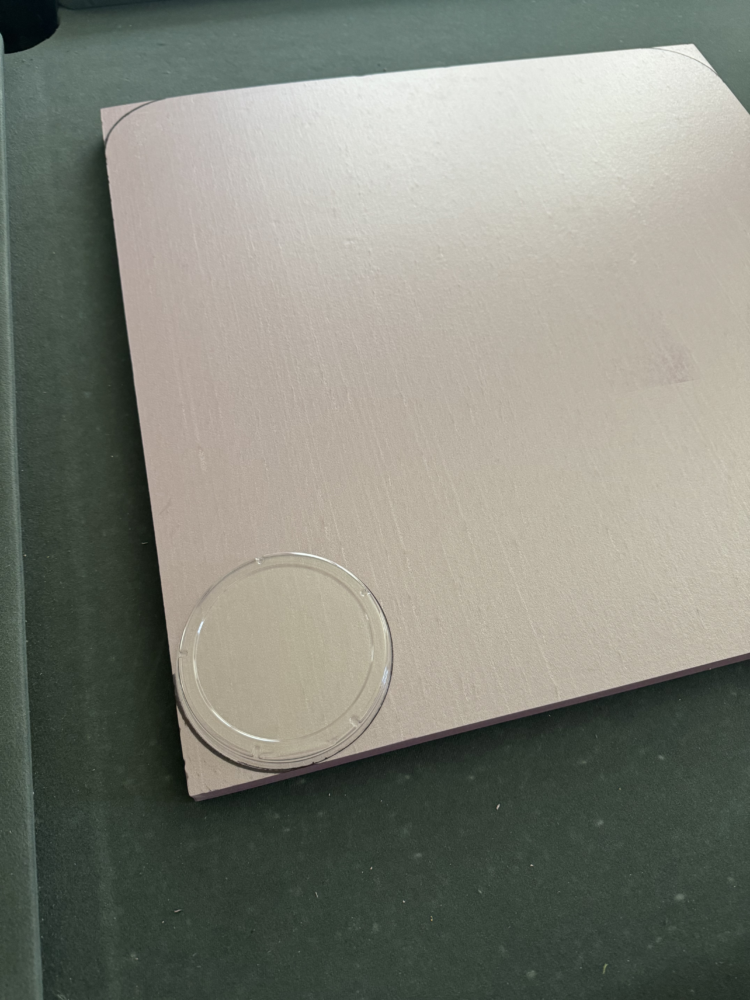
After I had cut out the corners of these panels, the edges were rough to the touch, and the rounded corners were not very cleanly cut. These were not incredibly noticeable at first, but could be seen or felt upon closer inspection. To fix this, I used sandpaper along the edges of the foam to smooth out the roughness, and shape the corners to a more rounded shape. This was the longest and most tedious process of this project, as it took me about 2 hours to sand these to a point I was happy with the result.
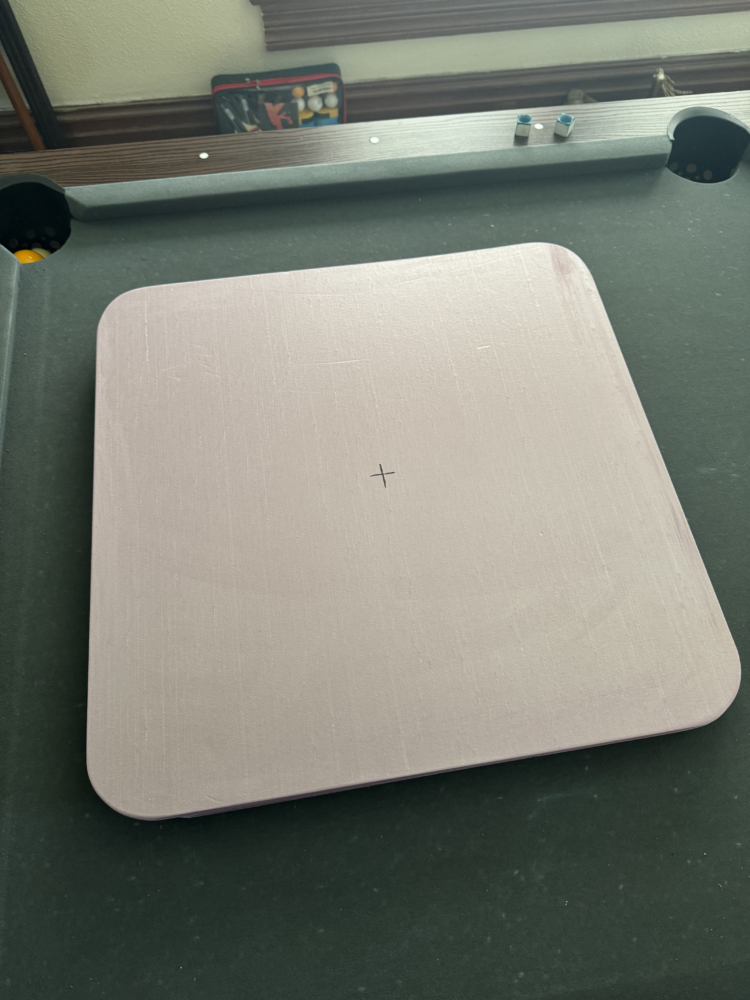
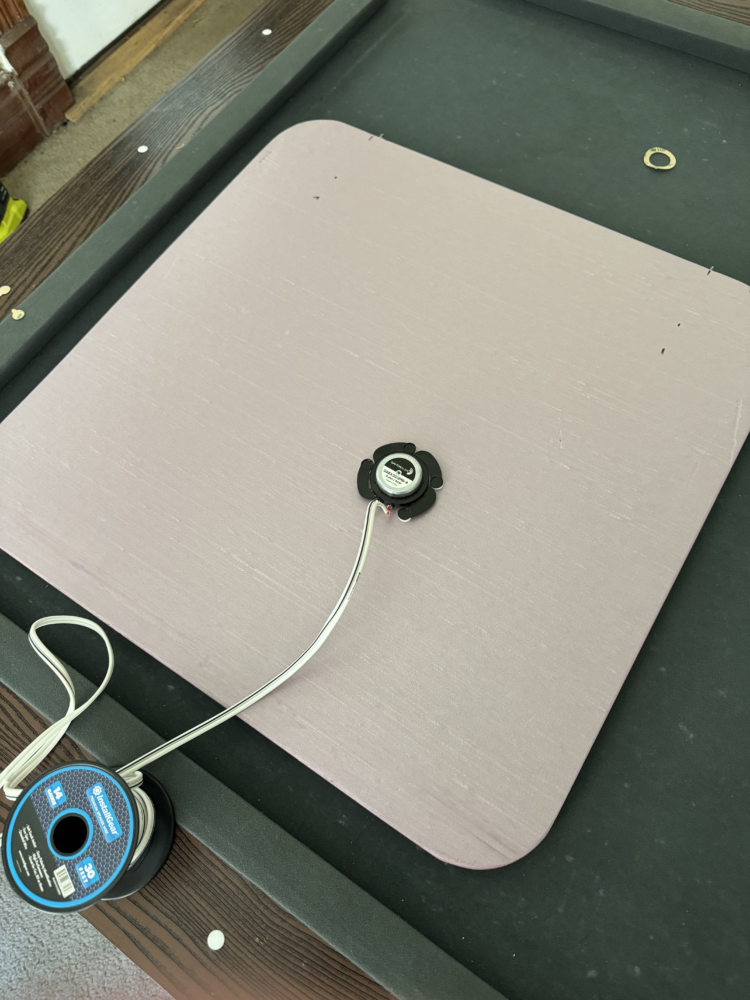
Once the shape of the foam panels was finalized, I measured and marked the positions of where the exciter speakers would be mounted to the back of the panels. According to tutorials I read online, the geometry of the panel and the location of the exciter on the back of these panels would result in certain frequencies of noise being muddled or dampened. This is the result of the vibrating waves of the exciter rippling and interfering with one another as they traveled through the foam, which can be modeled with complex audio equations. Fortunately, the tutorials I used had done these calculations and determined that this effect could be minimized by placing one exciter speaker in the center of one of the boards, and the other exciter speaker at a location 2/5ths of the length of the board from the bottom and the side, resulting in the second speaker being off-center. The idea behind this is that each speaker will have frequencies of sound that will be muddled, but at these frequencies the other speaker will sound fine, reducing the effect to sound quality.
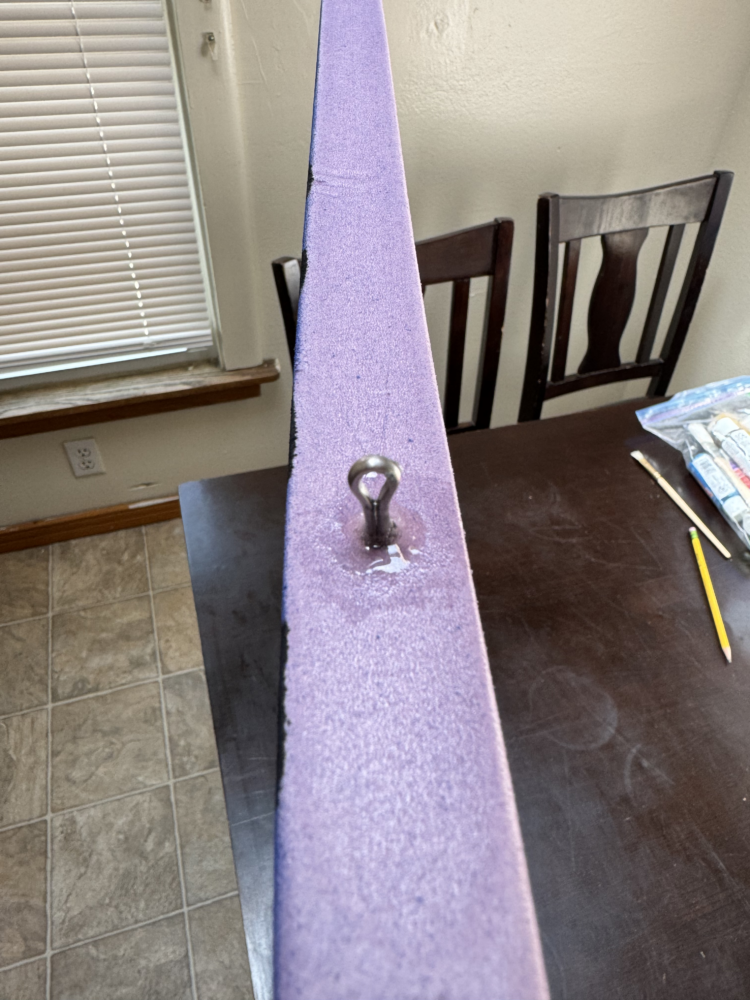
Once I had marked the locations where the exciter speakers were to be mounted, I then used a drill to drill out holes where my cotter pins would be located. Cotter pins are pins with a loop at this end, which I would use to hang the panels with thread. Once I had these holes drilled, I used epoxy to fill the holes and secure the cotter pins in place.
 Next, I painted the panels with spray paint. I had originally wanted to have a gradient from red to blue on these panels, and had hoped to keep them at muted colors by applying very light layers of spray paint over time. The goal of this was to keep the aesthetics of these panels as minimalistic, but have some elements of abstract art in the painting. Unfortunately, when I went to paint these, the paint I had bought showed up much more vividly than I had anticipated, and my plan to add small layers over time did not work well, as the paint was very bright on my first layer. This resulted in the panels having more of a two-tone look to them, which was not the aesthetic I was aiming for. At this time, I decided that I could embrace the abstract art aesthetic, and decided to add black curves to the edges of these panels. I think that this change moved my aesthetic away from the minimalism I was aiming for originally, but in my opinion made it look more abstract.

Mounting the Backlit LEDS:
While the paint on the panels was drying, I moved on to mounting the LEDs on the wall. To do this, I first measured out the locations of where I wanted to mount the panels, and threaded eye-bolts into the wall in a square that is 8 inches smaller than the panels I was using, in order to have them hidden behind the panels later on. I then wrapped the eyebolts with the LED lightstrips, and plugged them.
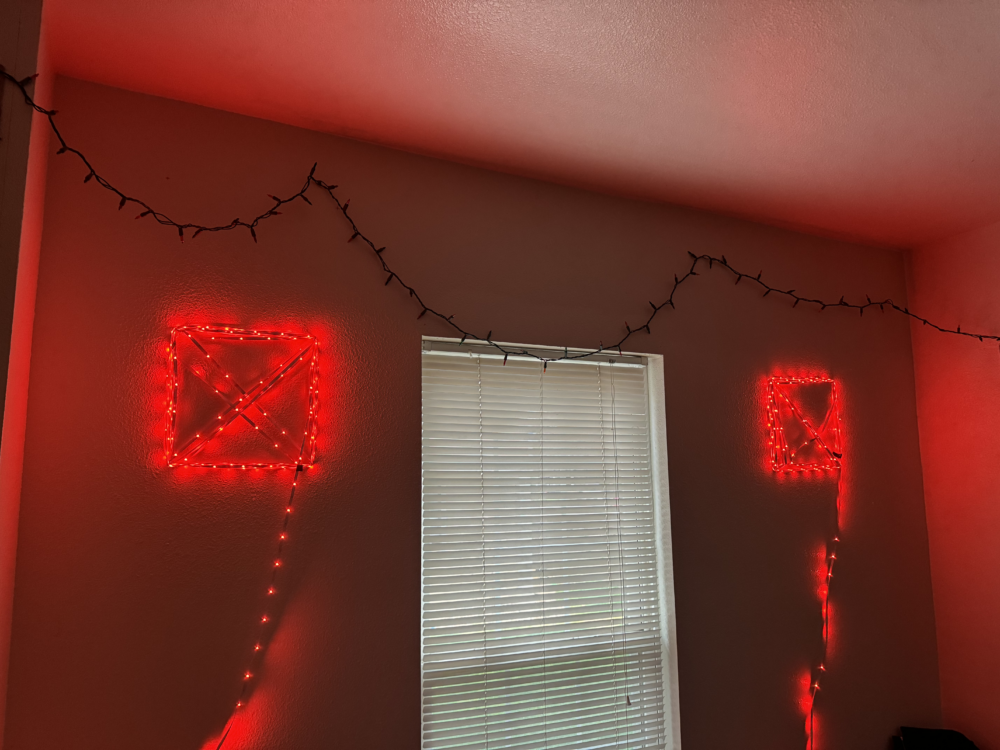
Installing the wall brackets:
Next, I mounted the brackets that the foam panels would be hung from. Because these panels are constantly vibrating and act as the amplifier of the exciter speaker, the amount of interference with other objects needed to minimized, so I decided to hang these speakers with thread to keep them from touching other objects. To do this I used four 4”x4” shelving brackets, and mounted them above the LEDs.
Connecting the exciter speakers and wires:
Once the paint on the panels was done drying, I installed the exciter speakers on the back of the panels. These speakers came with adhesive strips that allow them to be stuck onto the surface of the foam
Next, I started to connect the speaker wire from the exciter speakers to the bluetooth amplifier. This bluetooth amplifier is a little module that I stuck to my wall, that allows for someone to connect via bluetooth, and play music, and control the volume of the speakers. Once this amplifier was connected, I was finally able to test the audio of these speakers to make sure that they worked.
Hanging the speakers:
Finally, I was able to hang the speakers from the wall brackets using some thread, and start listening to music. The sound quality of these speakers is very clear considering how much these cost to build, and the ease of creating them. They have a good range in the mid and high end frequencies, but unfortunately produce very little bass, which is to be expected from a relatively small exciter speaker and foam board.

Conclusion:
In the end, I am very happy with how these speakers came out. I think they make a great addition visually to our living room space, and they sound good for what they are. Although originally I had planned on a more minimalistic aesthetic with these speakers, I am still pleased with the more abstract aesthetic that they fit now, and very happy with the effect of the LED backlighting on them. If I was to do this project again differently, I think that I would try to make these speakers more minimalistic by using muted colors to begin with, or would paint these to a single muted shade. Now that I have these speakers, my roommates and I will continue to use and enjoy them in our living room. Additionally, we have also talked about possibly buying a subwoofer to broaden the range of frequencies we can play to make a complete sound system in our house.
1 Comment. Leave new
“Great job on your final report! I enjoyed reading about your foam exciter speakers project. It’s impressive how you combined creativity with technical skills.”