
Part 2 of the report details the actual creation process of the Levitating Globe project, illustrating each phase from conception to completion within a condensed three-week period. This section includes a timeline graphic, a description of the fabrication process, and concludes with a reflective overview of the project.
Timeline Graphic
The timeline graphic has been simplified to highlight the primary activities over three weeks, focusing on key phases without specifying days.
Timeline Overview:
- Week 1:
- Exploration of magnetic levitation technologies and steampunk design principles.
- Skill acquisition in CAD software and electrical basics for circuit design.
- Initial design looping and feedback collection.
- Week 2:
- Procurement of materials and components for fabrication.
- Base construction and globe assembly, including 3D printing of base parts and machining of gears.
- Integration of the levitation mechanism with electromagnetic coil winding and circuit setup.
- Week 3:
- Final assembly and adjustments, including mounting the globe and tuning the levitation mechanism.
- Comprehensive documentation including sketches, flowcharts, and a video presentation of the final product.
Fabrication Process
The fabrication of the Levitating Globe was executed through several meticulously detailed steps:
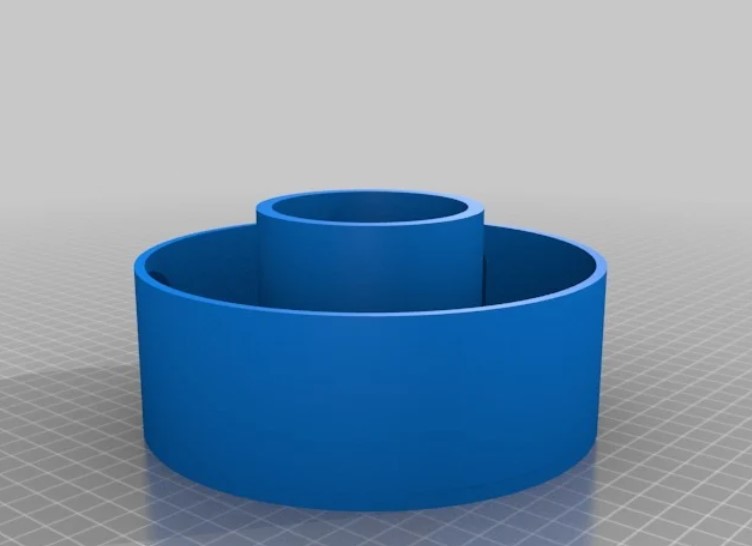
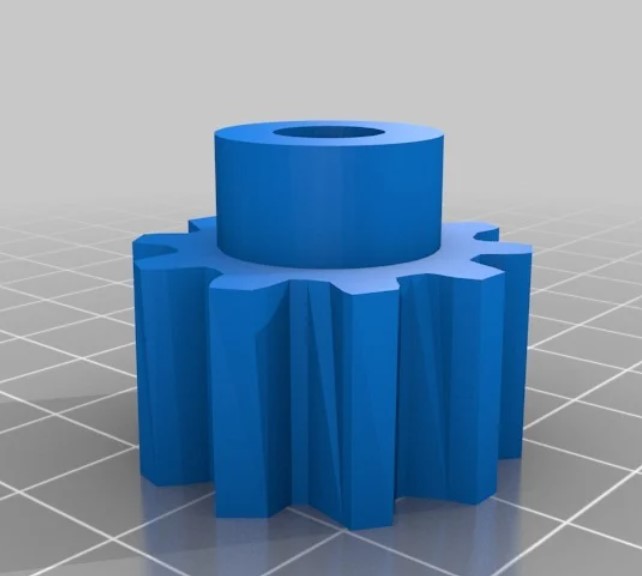
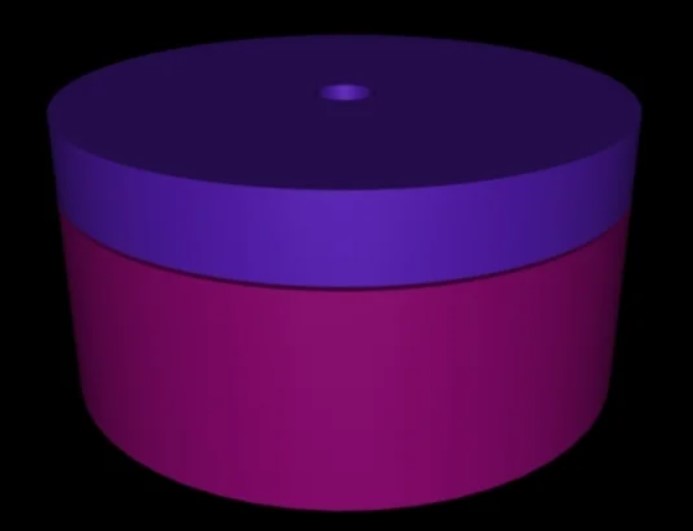
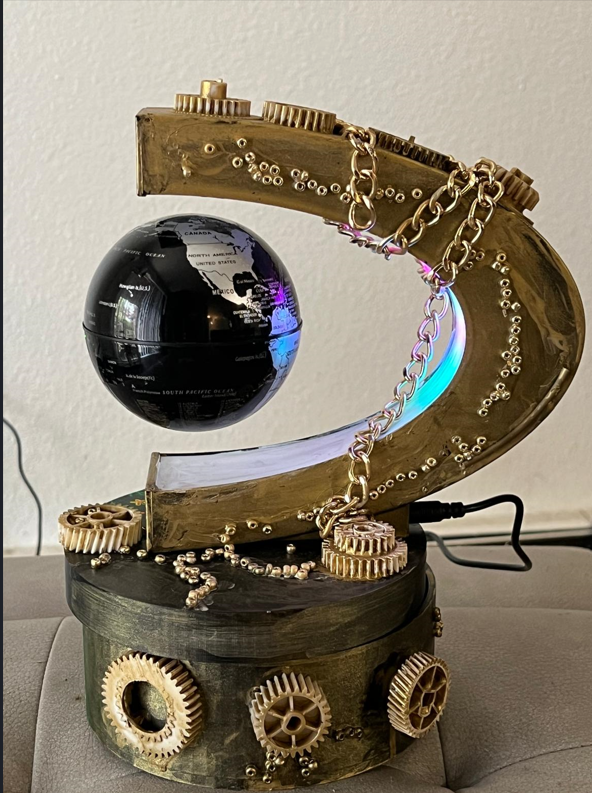
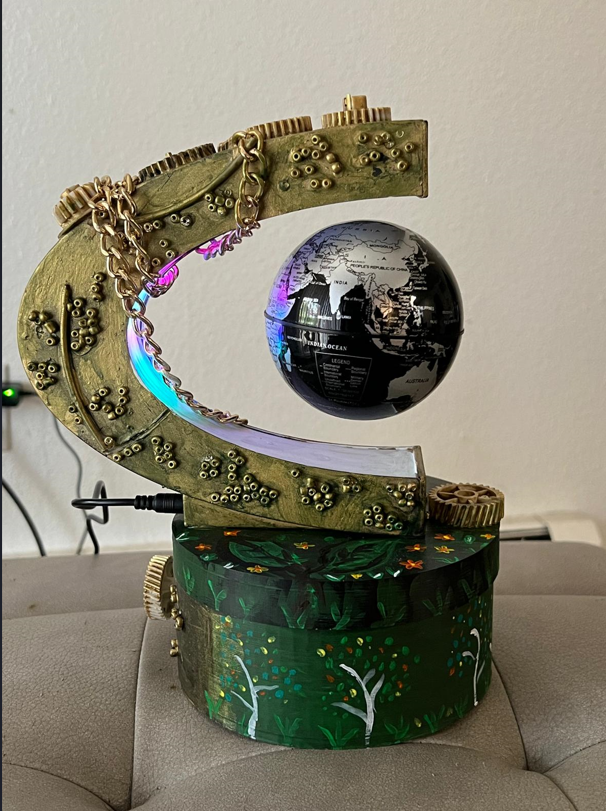
Base Construction:
- Material Creation: The base parts were 3D printed using bronze and copper filaments for aesthetic cohesion.
- Gear Assembly: Pinion gears were machined and fitted into the base for smooth rotation.
Globe Assembly:
- Globe Selection: A pre-made globe was chosen for its intricate cartographic details.
- Modification: Lightweight magnets were installed inside the globe for levitation.
Levitation Mechanism:
- Electromagnetic Coil Winding: Coils were wound with precision to create a strong magnetic field.
- Circuit Integration: The electronic circuit controlling the magnetic field was soldered and tested.
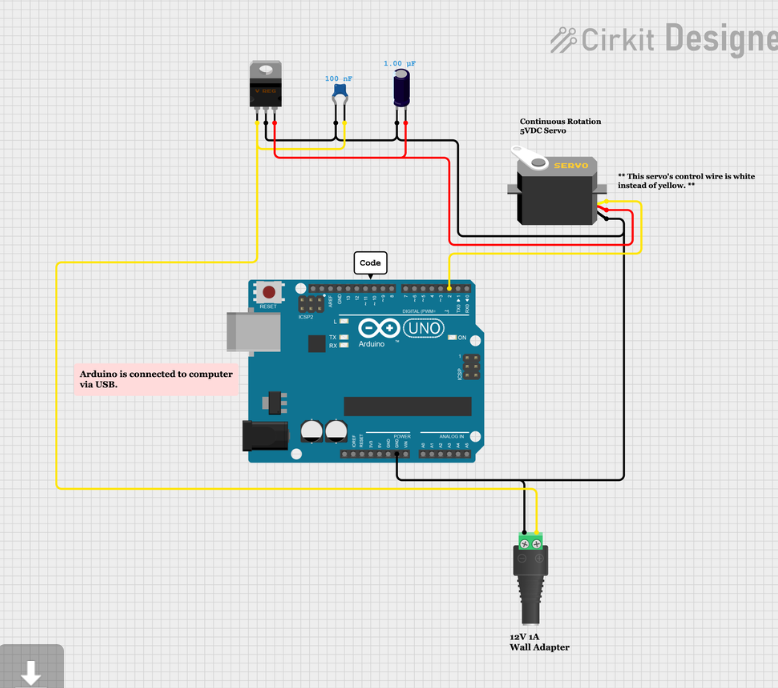
Electrical Components for Rotating the Base:
- Arduino Board (e.g., Arduino Mega): Serves as the central control unit.
- Continuous Rotation Servo Motor: Used for the base’s rotation.
- Jumper Wires and Breadboard: For connections and prototyping.
- External Power Supply (5V or 6V): Provides necessary power for stable servo operation.
- 100 nF ceramic capacitor:
- 1 uF electrolytic capacitor:
- 5V LDO voltage regulator:
- Power Supply For Arduino nano
Assembly:
- Mounting the Globe: The globe was positioned within the C-shaped armature.
- Final Adjustments: Levitation distance and stability were finely tuned.
Conclusion
Despite the compressed timeline, the Levitating Globe project successfully merged steampunk aesthetics with advanced magnetic levitation technology. The project’s rapid development phases highlighted both challenges and innovative solutions, particularly in achieving robust levitation.
Reflections:
- Design Modifications: Future iterations would benefit from a more rigorous testing phase.
- Future of the Project: The globe is slated for exhibition at technology events, highlighting the fusion of art and science.
Aesthetic Focus:
- The project’s intricate metalwork and natural motifs were well-received, effectively capturing the essence of the steampunk theme blended with natural elements.
Base Design

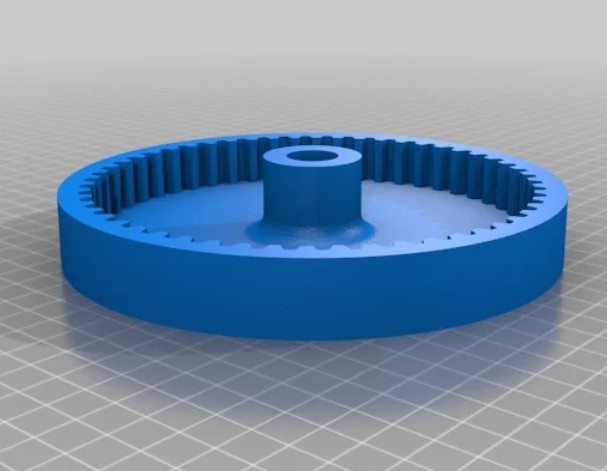
Top Part design
The wiring
2 Comments. Leave new
Grreshan, your breakdown of the Levitating Globe project is fantastic! I’m amazed by how you blended steampunk vibes with high-tech wizardry. The timeline graphic really helped visualize the journey from concept to creation. Great Job!
Great job Grreshan! Super ambitious project and it’s really cool to see you got it done!! it looks really good. I like the use of an arudino here! all of the cogs and baracoles really tie the whole piece together! Great job on getting the globe to suspend, i like looking through the process of how you did it and I’m impressed!