
Timeline
While I would not consider my initial timeline overly ambitious, it was definitely not helped by my lack of electronics experience, relative inexperience with surfacing, and delayed project switch. Despite all of this, I am still happy with my final result. The timeline below shows an ideal/initial schedule for my project, ignoring the time dedicated to switching to a new idea and the time lost on the previous idea.
 The following image shows a more accurate timeline to what really happened. It includes the initial project choice and initial design time, followed by the second project choice and new initial design phase.
 As you can see, this change set me back significantly. However, I do think that this was the right choice as I learned much more from this project than I would have otherwise, and it allowed me to modify the scope of the project fairly easily and still attain a satisfactory final product.
Something to note is the difference in iteration phases between these schedules. The initial schedule is following a MVP plan, where I would have attained an initial physical design, integrated basic electronics, then refined the physical design, followed by integrating more complex electronics, finally followed by refining the aesthetics of the design with a physical product.
In reality, I completed physical design iterations which both looked good and felt good, purchased complex electronics late, never integrated them, refined the aesthetic design while forgoing the physical functionality, then adding final aesthetic touches in the computer model for the final product.
While this was not the original plan, I feel that for the scope and purposes of the class, it is definitely acceptable.
Integrated into the design and prototyping phases was the 3D printing, surfacing practice, and electronics sourcing. These all took significant time and effort.
Process
Due to my project heavily relying on CAD, I think it makes more sense to discuss the fabrication process in this sense. While I did print versions of the mouse to check for fit in hand, this was fairly simple for me. However I want to avoid understating the 3D printing aspect of this project. While the considerations and work put in to optimizing for this manufacturing method comes as second nature to me now, that is not to say it is simple. I could easily talk for thirty minutes on the considerations and steps taken in the design of this project for 3D printing, but that is mostly beside the point and I believe most people would find irrelevant. Just to skim the surface, Part splitting, feature orientation, wall thickness, curvature orientation and more all were considered and addressed in this design and the prototyping.
I used a sort of ‘master modeling’ for this project. At its core, this technique involves the insertion of parts into new parts instead of assemblies. While the utilization of master modeling was slightly unique for this project, ultimately it was for the same computational performance benefits which this method offers. Additionally, it allows for more logical handling of external references and relations.
The way in which I utilized master modeling for this project was primarily for separating between iterations or major design steps. Due to the many small revisions, changes, and fine geometry necessary to create what I wanted, the feature trees for the design iterations independently spanned multiple vertical pages. This resulted in substantial rebuild times, so it became more effective to insert the current body into a new part at major steps in the design, when I knew I was likely going to leave my work until the current point unchanged.
Like many other students, I ran into the problem of striving for perfection. I started over many times, abandoning previous work in the hopes of creating a more refined, efficient model. While I was able to create a better version, frequently the benefits were minor in comparison to the amount of time required to enact them. Despite this, I am thankful for all the skills this allowed me to practice and learn.
Conclusion
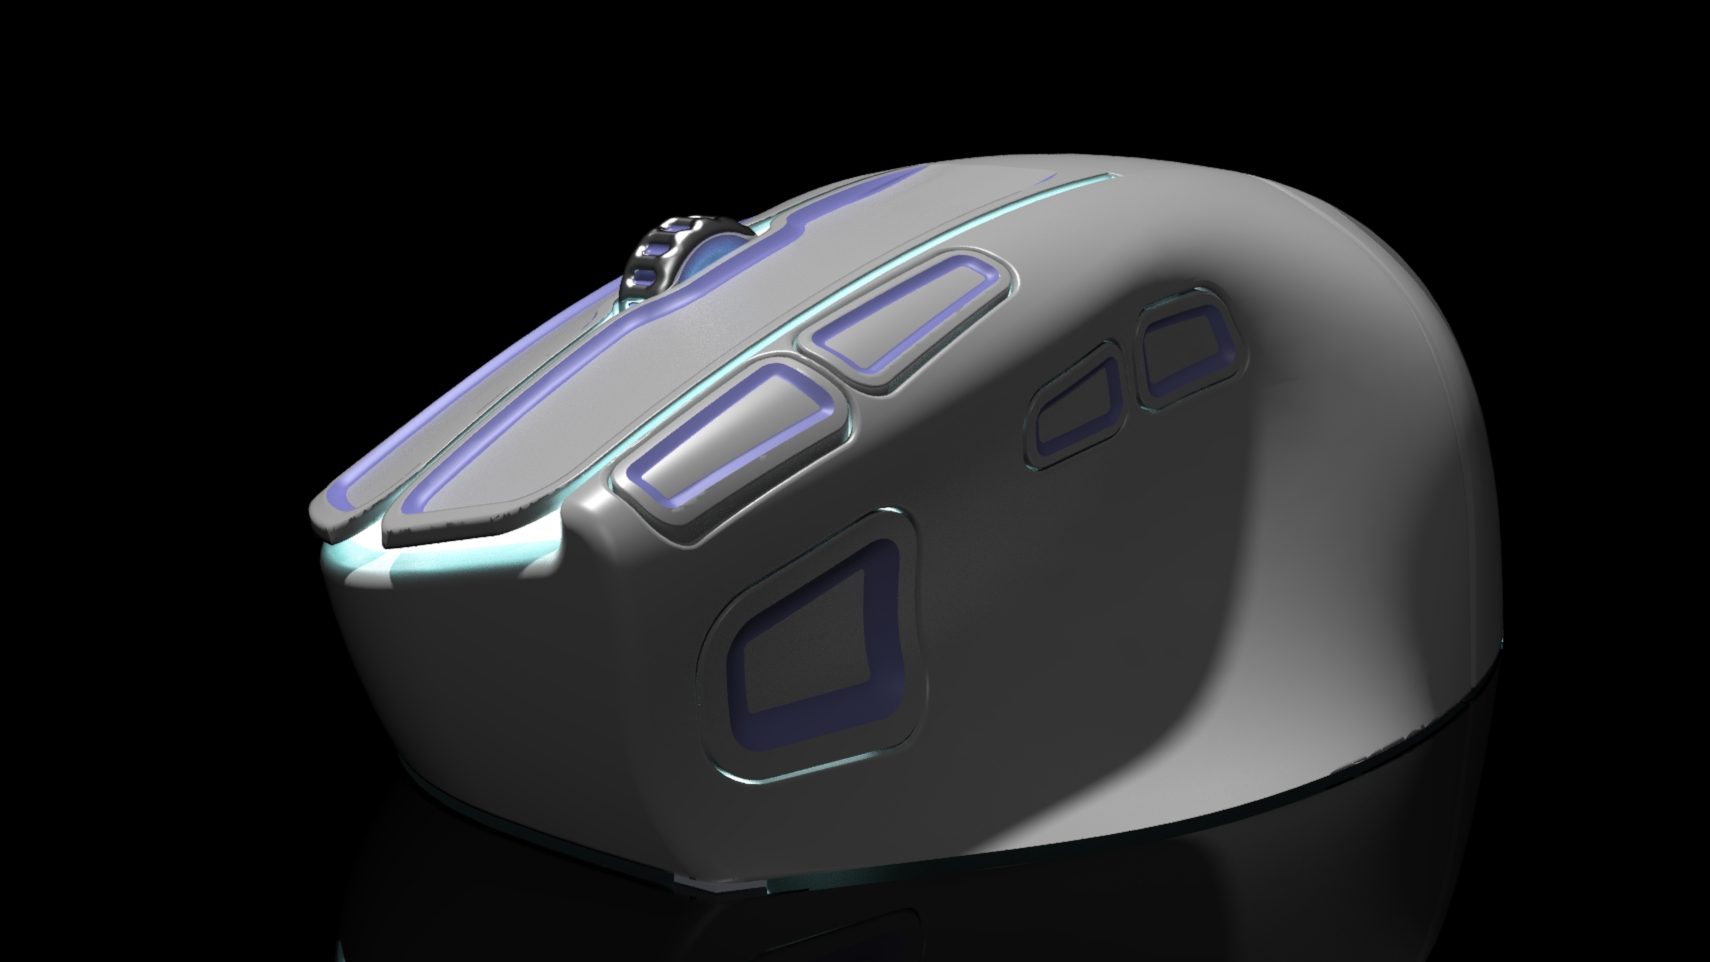
While I strayed far away from my initial vision of having a functional yet pretty mouse at the end, and only have a really nice looking virtual model, I am happy with where I ended, especially considering the scope of the project and class. It was hard for me to let go of the functional aspect of my model, but knowing that this was not the focal point of the project helped. Ultimately, I think that the route I took, and focusing on creating an aesthetically pleasing virtual model over a functional real design allowed me to have a final product which looked better, which was the goal. It reduced the stress I had, and I was able to stop worrying about certain design aspects being fully functional or realistic. For example, most of the buttons are actually floating, and not held in place by anything. While there is light emanating from inside the mouse, there are no actual components modeled inside as of right now. Additionally, The multiple colors in one body would be extremely challenging to accomplish well with 3D printed parts. Being able to ignore this, and just do what I think looked good, made the project turn out far better in my opinion.
Links
The following is a list of links discussing various aspects of the project, and different media uploads.
https://www.linkedin.com/posts/peter-w-arnold_here-is-a-decent-render-of-the-mouse-from-activity-7190791655745019904-Rv3S?utm_source=share&utm_medium=member_desktop
https://www.linkedin.com/posts/peter-w-arnold_enjoy-this-teaser-animation-i-made-using-activity-7190460103945289728-BtGw?utm_source=share&utm_medium=member_desktop
https://www.linkedin.com/posts/peter-w-arnold_some-more-screenshots-of-the-computer-mouse-activity-7186068873035558912-V826?utm_source=share&utm_medium=member_desktop
https://www.linkedin.com/posts/peter-w-arnold_heres-what-i-spent-most-of-st-patricks-activity-7175312646118780929-3pia?utm_source=share&utm_medium=member_desktop
1 Comment. Leave new
Hi Peter!
Your project turned out great! I know that you are a skilled CAD user and you did well to create a unique mouse. I think the renders turned out great and the animations are excellent. How long did they take to set up?