
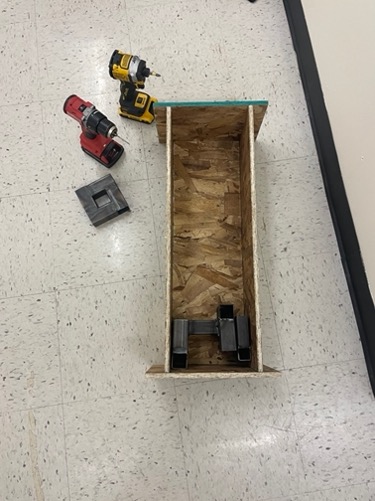
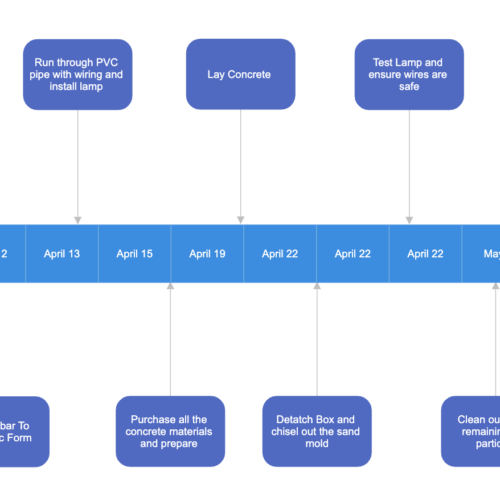
When presenting my manufacturing I will present a number of images in hope to better explain this entire process. When I initially designed my box I knew I must know my overall dimensions as they determine weight, cost, and drive logistics for getting to expo. Therefore, I created a wooden box that acted as my concrete mold and would restrict the concrete into my desired dimensions. Below I invite you to see my initial wooden concrete mold.
 With the mold created, you can easily visualize how I will pour the concrete into the frame. The concrete will be flush with the open face, being the back wall of the lamp which will have the outlet output. Next, I created a rebar structure that I inserted into the wooden frame, shown below.
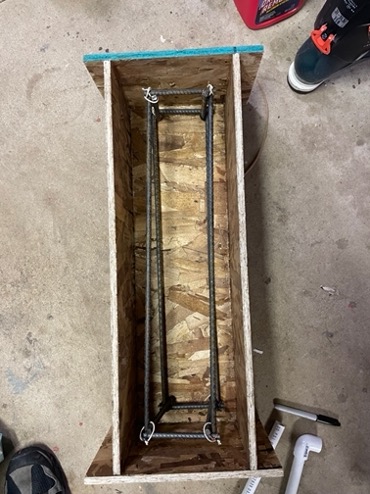 Here, the rebar will not only be holding the lamp and tubing in place, but it will offer extra tensile strength to my lamp. The next step in my process involved routing the cable for the lamp and figuring out where the light will be oriented. You can visualize this by looking at the below image.
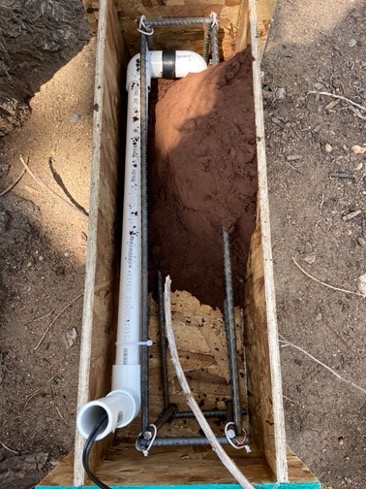
 Now I think that it is easy to visualize how this lamp will look once the concrete is fully poured. You can see that I zip tied the entire tubing onto this rebar structure so the wire will be rigid and we won’t have any torsional forces on it once the concrete is poured. In addition, the PVC socket that connects to my Edison bulb is fully sealed by electrical tape, hoping that when I do pour the concrete we won’t have any excess seeping into the piping. The next step was to prepare my sand mold that would leave rebar exposed and the “pocket” in which the lamp will rest.
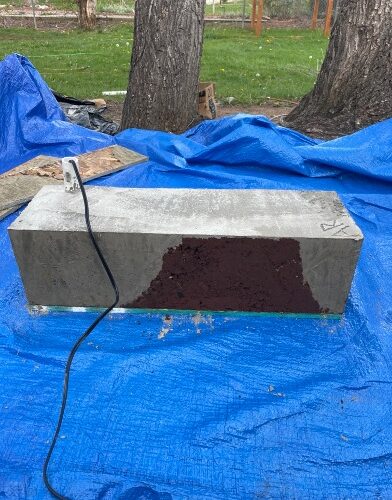
 Now I hope that the process becomes much clearer from this step forward. After the sand is in the desired mold location, we are able to pour the concrete. It is important to mix the concrete until you reach a “pancake batter” like consistency. This is integral because it allows the concrete to not dry out too fast and stay structurally sound when it’s hardened. Below you will find images of the concrete in the form.
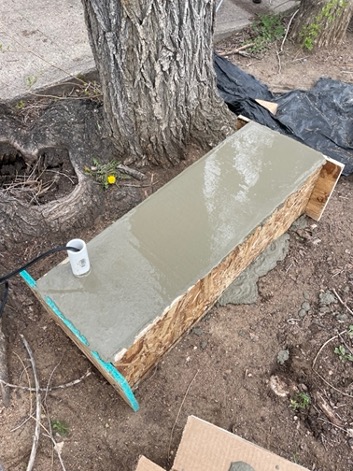 It is important to note that most concrete is filled with aggregates that are often rock, sand, or a mixture of the both. When these aggregates are present, it is often that we sacrifice surface finish. Therefore, I stayed away from this and went with a finishing sand mix that gave me the glossy finish you see above. After a few days of curing I had my finished product!
 After finishing digging out the sand cavity that you see above I had my final product!
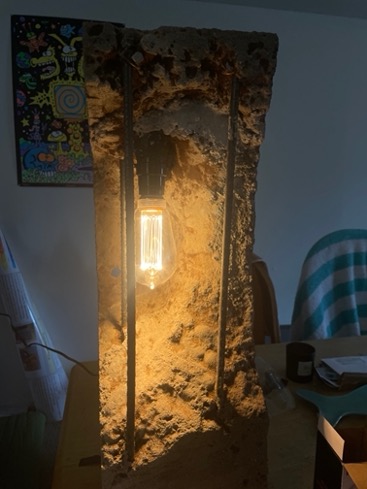 To conclude, I am incredibly proud of my final product and am relieved that the concrete stayed intact. My final product weighs about 150 pounds and I will need two people to help me move it to the expo.
2 Comments. Leave new
Wow this came out very cool! I also made a brutalist lamp but took a very different approach to the aesthetic so it is interesting to see what you decided to do. How heavy is this thing?
Hi Alex!
Thank you for your kind words, the lamp is about 150 pounds!