
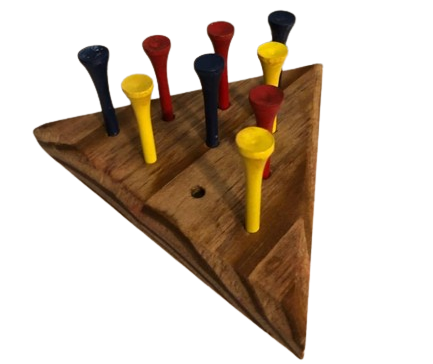
After going through the process to pin down what I actually wanted to make, I was able to start stylizing my design to fit the ‘home-style’ aesthetic.
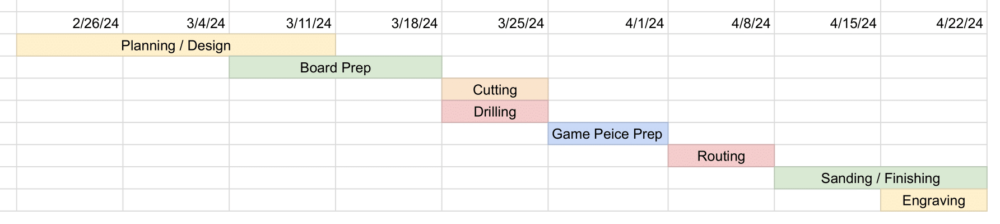
As mentioned before, the decisions that led to this design were mainly due to my struggle with timelines. I had originally kept this more open ended for my final artifact, anticipating that this timeline is quick enough that I could just repeat it several times, maybe even overlapping processes of different game boards. I will further discuss the processes of the title blocks shown in the schedule below. Keep in mind that I had not finished my upcycling project wither which was my true passion project, so I was being very conservative with my availability.
 I started this project by looking for spare wood that had a nice grain and thickness. At the wood shop that I work in, I have had ample opportunity to collect potential materials. I ended up taking a couple spare 6ish inch sections of an anonymous 2×4.
To transform this wood into games, I had to first prep the scrap wood. To do this, I took them to the band saw to cut the thickness of the board in half. This notably leaves the resulting halves uneven and rugged. I thought it was best to rectify this until after I piece the halves back together to make a wider thinner board than what I started with.
To do this I used a jointer to cut the sides that will make contact with one another. This way, the sides to be glued have full surface area to make contact and bond. It also ensured that the final glued piece would have a squared seam. Once the pieces were squared, I got some paper, wood glue, and brush. I glued them together and set good joints with clamps and avoided warping by placing weight on top.
Letting the glue set a day, the board was ready to shape. To begin, I sent the boards through the planar until both sides were even. I was mindful to not plane the board too thin as I plan to use a quarter inch router bit to finish the edges. I have attached a photo below of the planed boards. These are what I would call, a prepped piece of wood which is now ready to start taking on its final shape. 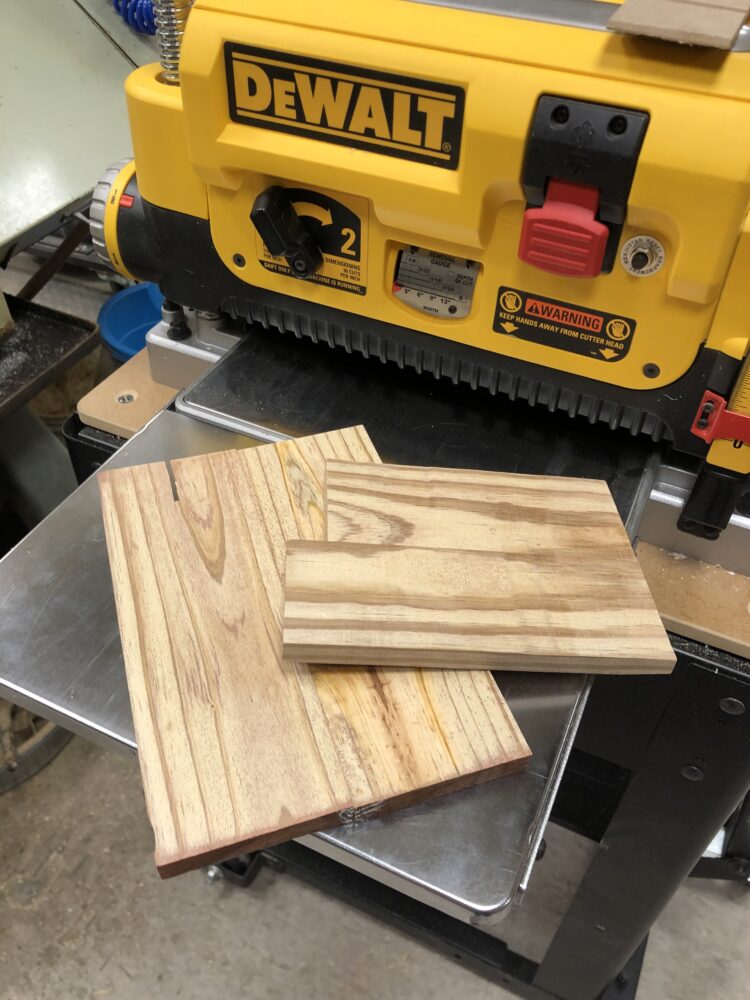
Remembering that I only ended up completing one “Tricky Triangle” game board, its was this moment in the manufacturing process that the fate was sealed. The bottom board pictured on the planar above was taken out of my wood stash and whisked away to someone elses project. Without enough material and without enough time to repeat the cleaning, joining, planning prep process, it became final that my artifact would only be the one game.
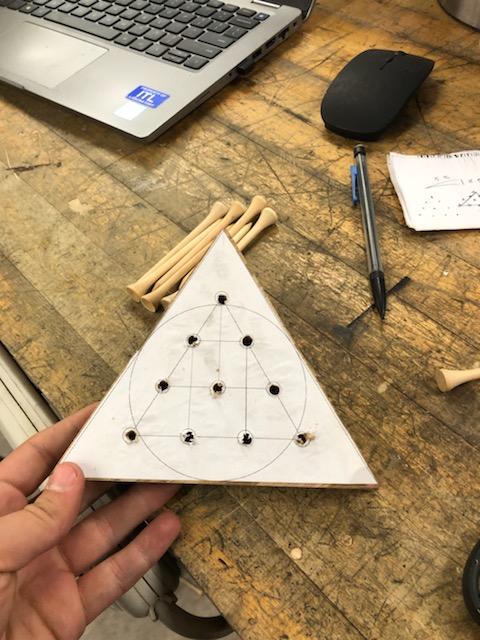
I then cut the smaller board to be 5.5″ equilateral triangle. To do this with precision, I took the board to the miter saw and set the cut angle to 30 degrees, knowing that the interior angle so an equilateral triangle is 60 degrees. Because these were very fast and easy cuts to make, I started to drill my hole pattern in the same week. To get the holes in the correct orientation without using a computer aided mill, I created a paper template in solid works. This way the template can be a 1-1 size with the 5.5″ triangle I had cut out.
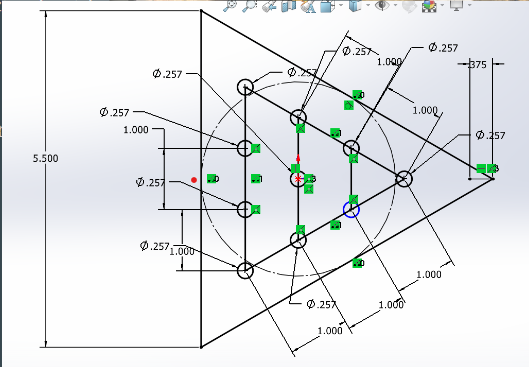
After printing this template out, making sure that every hole had intersecting lines for alignment, I cut and glued that paper to the board. I was not concerned about gluing the paper to my artifact as I planned to just sand it off. Taking the board to the drill press, I set a stopper on the quill’s depth. This way, I could ensure that every hole was just over 0.25″ deep and the game pieces would sit uniformly.
Now that the board and its pawns were compatible, I started working on those. I started with a used bag of wooden golf tees. Initially, the pawns were about 3.5″ long, which was a very disproportional height to the 5.5″ board. So I cut about and inch and a half off 9 pieces, knowing that I would take off more on the sander. To clean the inserted edge of the piece, I sanded each one until they sat on a table at an even height. This was all the machining I needed to do for the pawns. As briefly mentioned, I took a rotary sander to the top of the board to get rid of the paper template. At this momnet in fabrication, teh board looked like following.

To better match the aesthetic I was going for, country homestyle, I decided to finish the top edges of the board with a 45 degree chamfer. Using a test piece to dial in the height of the bit, I used a router table to achieve this chamfer. After this I was very happy with its high quality and yet timeless appearance, thus it was time to add finishing touches. Before I could do so, I sanded the board again but this time with a very high grit.
To finish, I coated the board in linseed oil. This natural finish is a lot more organic and homestyle than if I were to stain it. I appreciate how the oil only accentuates the woods natural grain. As for the game pieces, I also went with something that upheld the overarching aesthetic. As such, i painted them with spray paint ten primary colors, which is a common choice for game set manufactures.
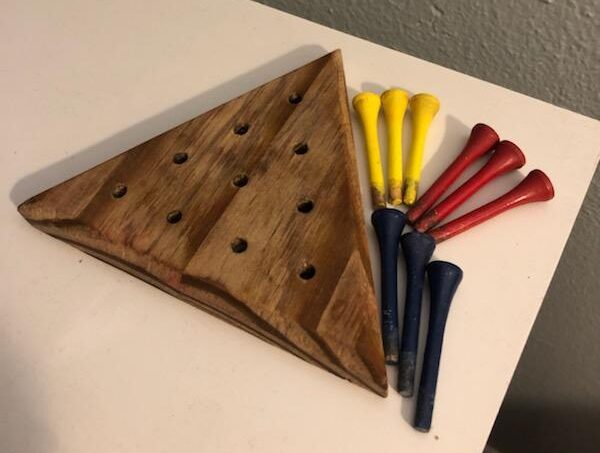
After I finished everything I decided to engrave the rules onto the back of the board using a laser cutter. This was just for fun and functionality of my artifact.
Compared to my original idea, a complex and beautiful chess board, I have come a long ideological way to arrive at a game you would see in Cracker Barrel. I however am very happy how I still produced a timeless piece.
1 Comment. Leave new
Hey Riley, I really love this project! If you were to do it again do you have any changes you think you’d want to make?