
Making my final product combined a number of processes from the initial brainstorming and concept generation stage all the way to the final completed assembly that I have today. To make my plan for the project, I decided to split my process into the following categories:
- Brainstorming and concept generation
- Sketching
- Modeling
- Individual Part Manufacturing
- Assembly
To fully explain my approach to making this project, I will describe each individual element and how it contributed to my final product.
During the brainstorming and concept generation stage, I focused on trying to figure out what I wanted my artifact to be. I knew that I wanted to build something that would be some kind of artistic piece that I could appreciate every day, and see regularly. Since I sit at my desk every day to work, it made sense to build something that I could place on my desk as a display piece. I also knew that I wanted my piece to have a dynamic element, something that could move meaningfully and add value to the final product. The last piece of criteria that I came up with was that I wanted the piece to somehow represent space, since that is a subject area which I find very interesting. I decided from all of this that I would build a desk sculpture with a moving element representative of parts of the solar system.
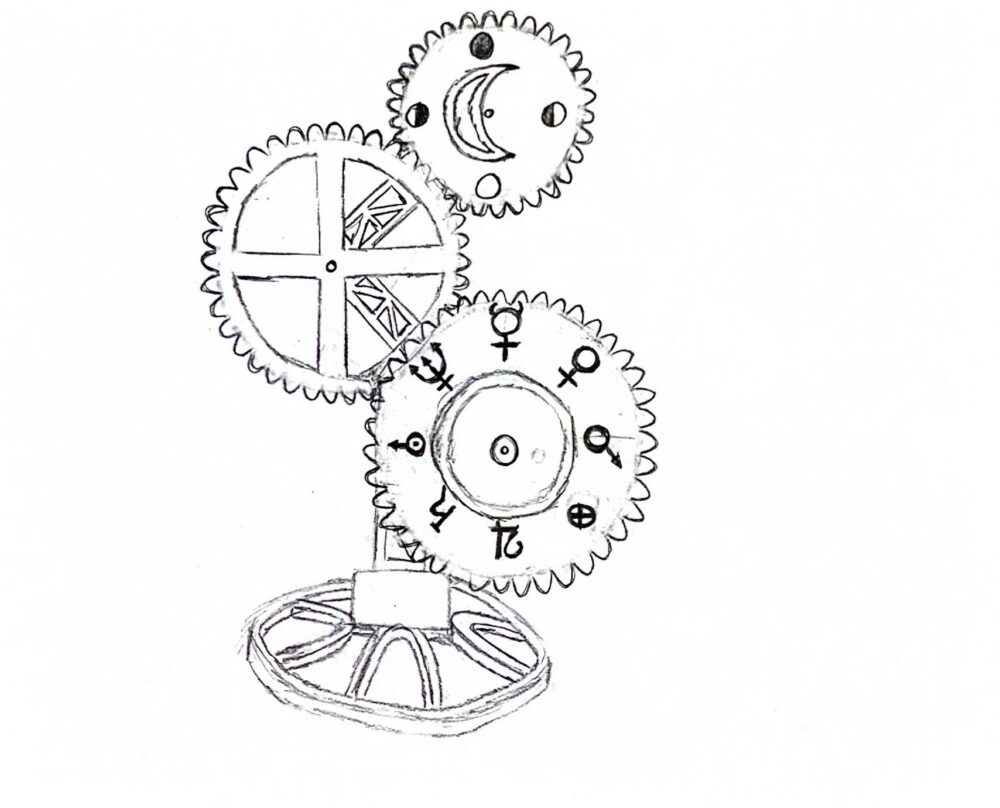
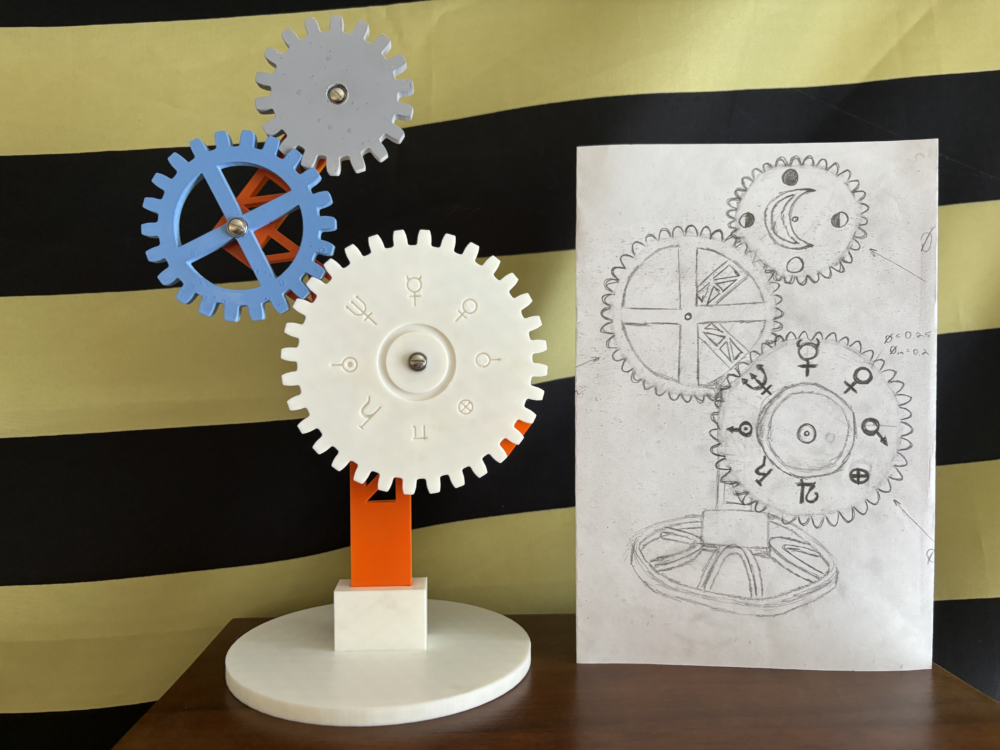
To really figure out what I wanted my project to look like, I started sketching ideas. Since I knew the symbolism I wanted to include, which is discussed in post 11, I just started by incorporating all of these elements into one cohesive piece. What resulted is in the sketch shown below. The sketch shows a three-gear gear train sculpture with symbolism related to the solar system, described in previous posts. It is about 12 inches tall, an ideal size for a desk piece.
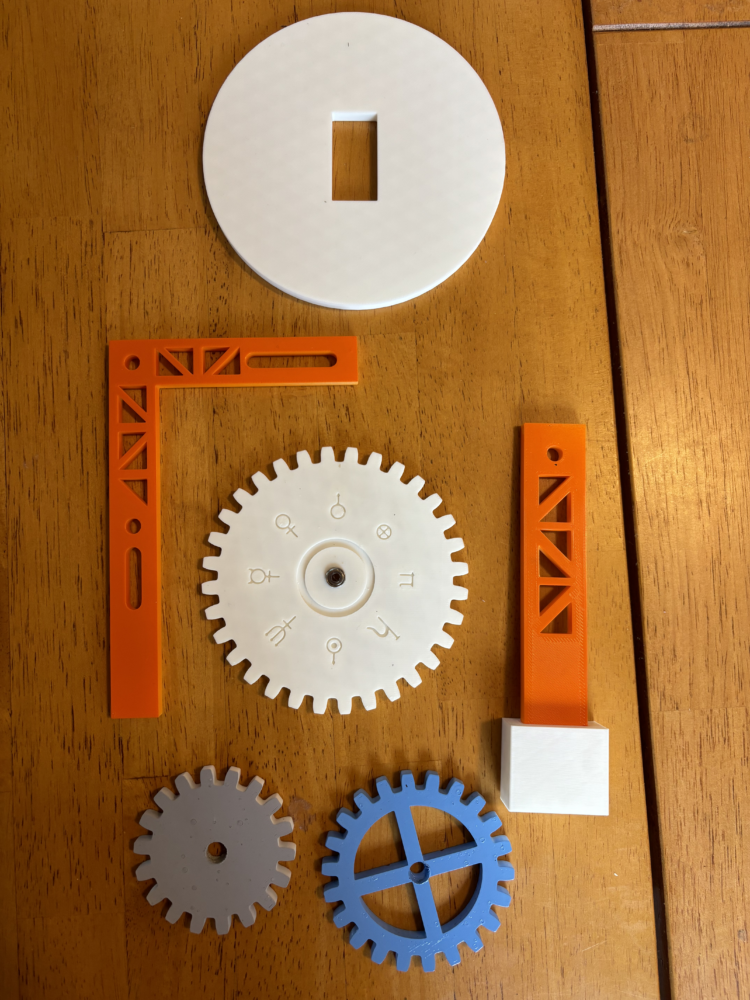
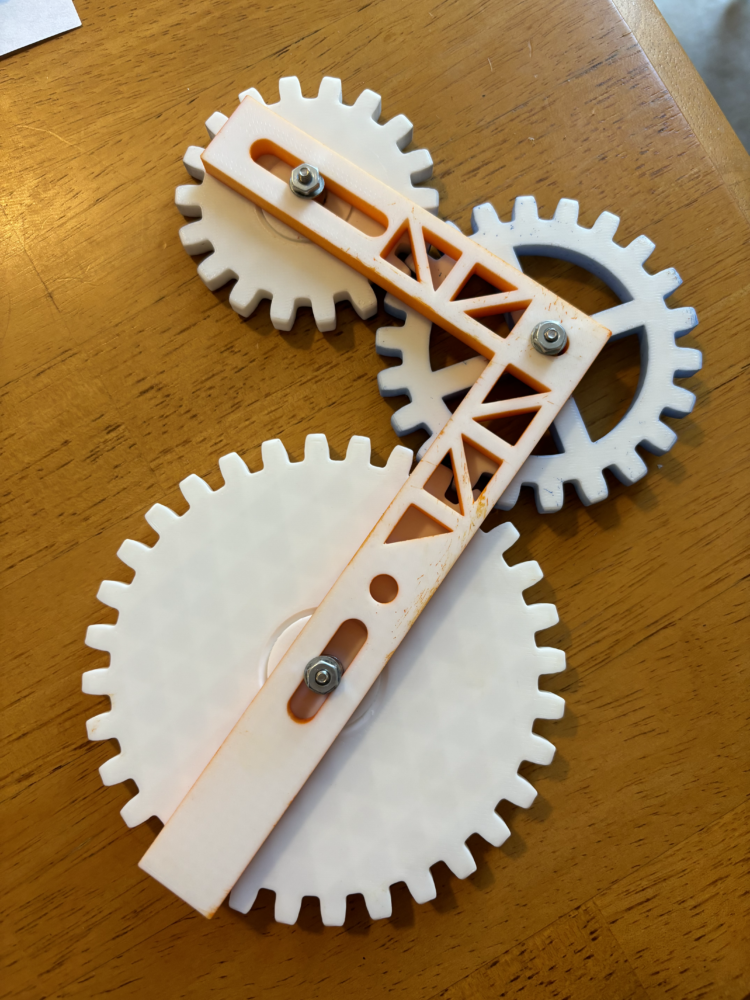
 After sketching my design, I went to CAD to fully model the parts that I would need. The assembly consists of seven main parts with additional hardware. The parts list includes:
- Sun gear
- Earth gear
- Moon gear
- Upper support arm
- Lower support beam
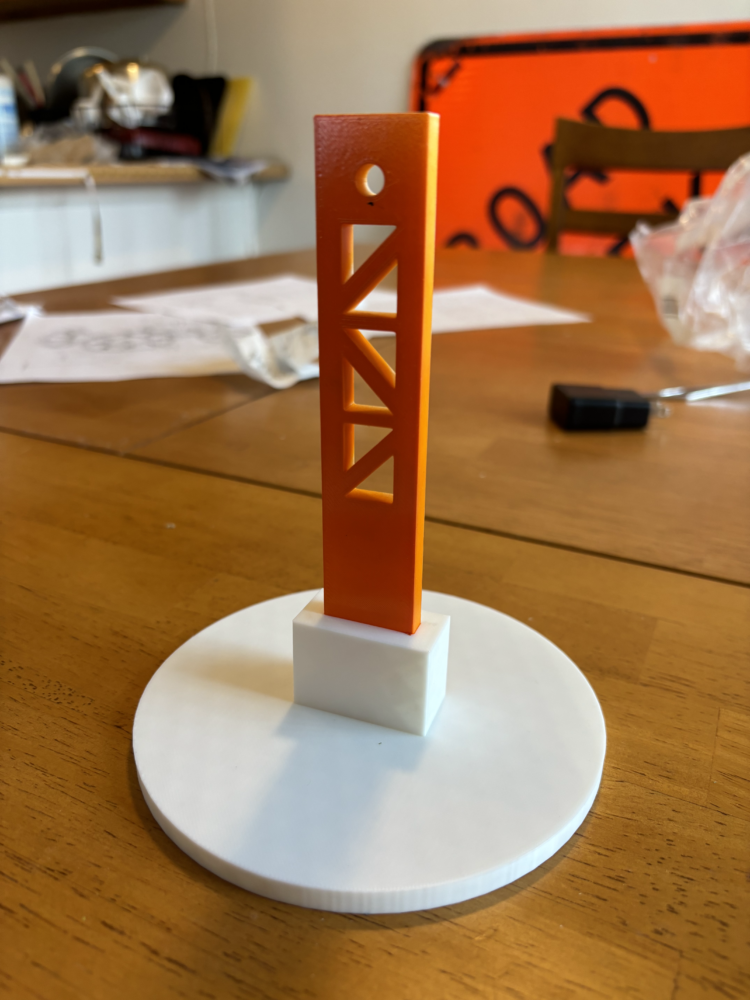
- Support block
- Bottom stand
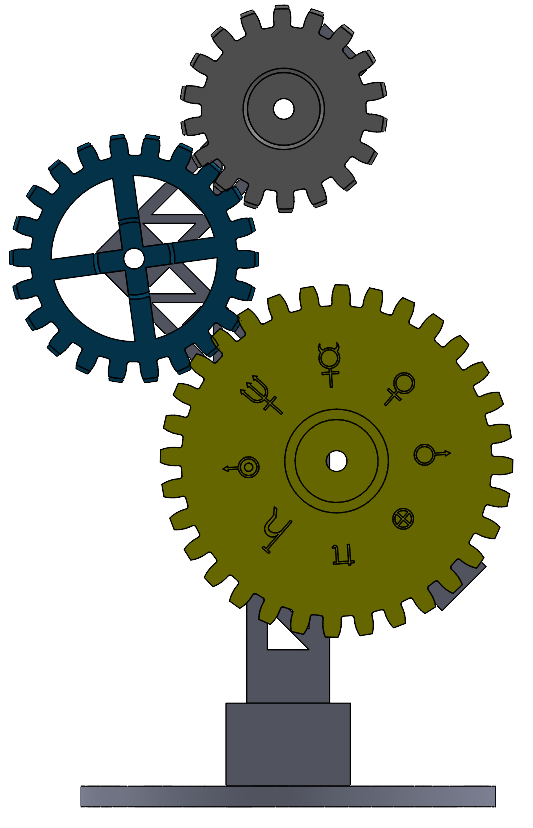
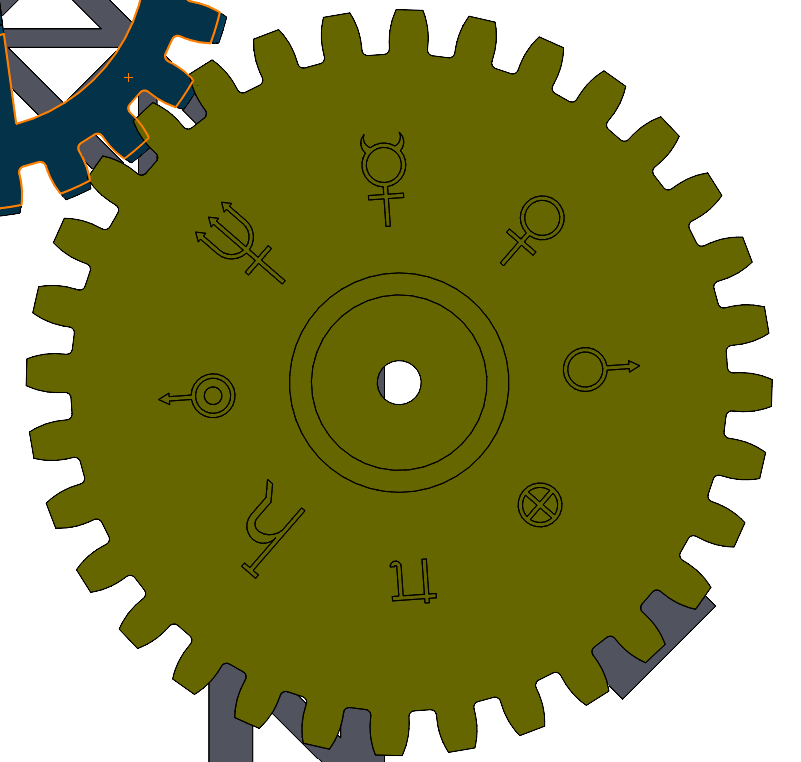
To design the gears, I adapted spur gear CAD models taken from McMasterCarr to ensure that the pitch of the gears was correct. This is very important since having the incorrect pitch means the gears will not be able to mesh properly together, and they won’t work as a gear train. Since the CAD modeling tool I used did not have a built in gear design tool, this was the best way to make gears that I knew would function seamlessly. Modeling the Sun gear was the most difficult, since it included some smaller, more intricate design details with the symbols. To make sure these were made correctly with uniform sizing and spacing, I divided the surface of the gear into 8 slices and made equal size rectangles in each which I would put each symbol into. To make the individual symbols, I used a combination of simple geometries along with freehand drawing curves for more organic features. This was challenging since without measurements for the curves on the symbols, it was difficult to make them completely accurately. While the process did take some time, I was happy with the result.
Making the other two gears was straightforward. The only complications on the Earth gear were the cutouts to make it look like the Earth planetary symbol, which were not difficult features.
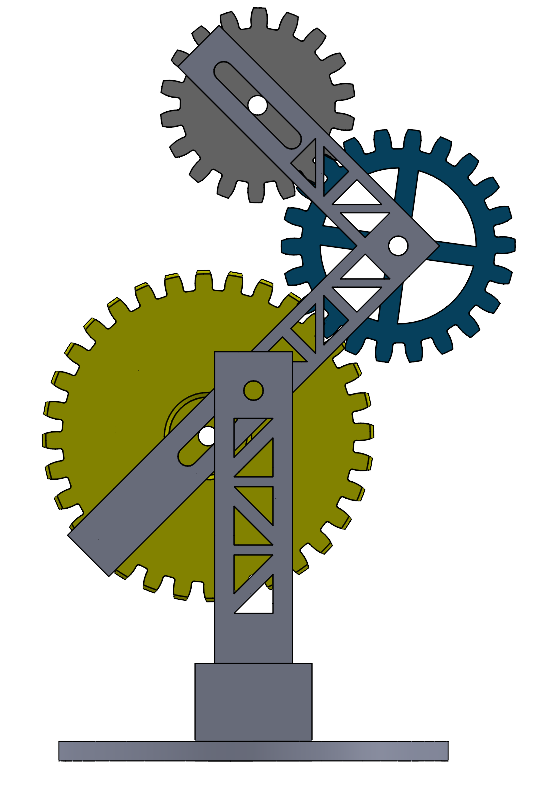
To model the support arms, I started by making the pieces solid and adding the features needed for functionality. I added the hole for the Earth gear, and the slots for mounting the Sun and Moon gears. I then used the remaining space for styling. To style the pieces, I added a truss-like design to them. This was also a functional feature, since it saved print time and filament.
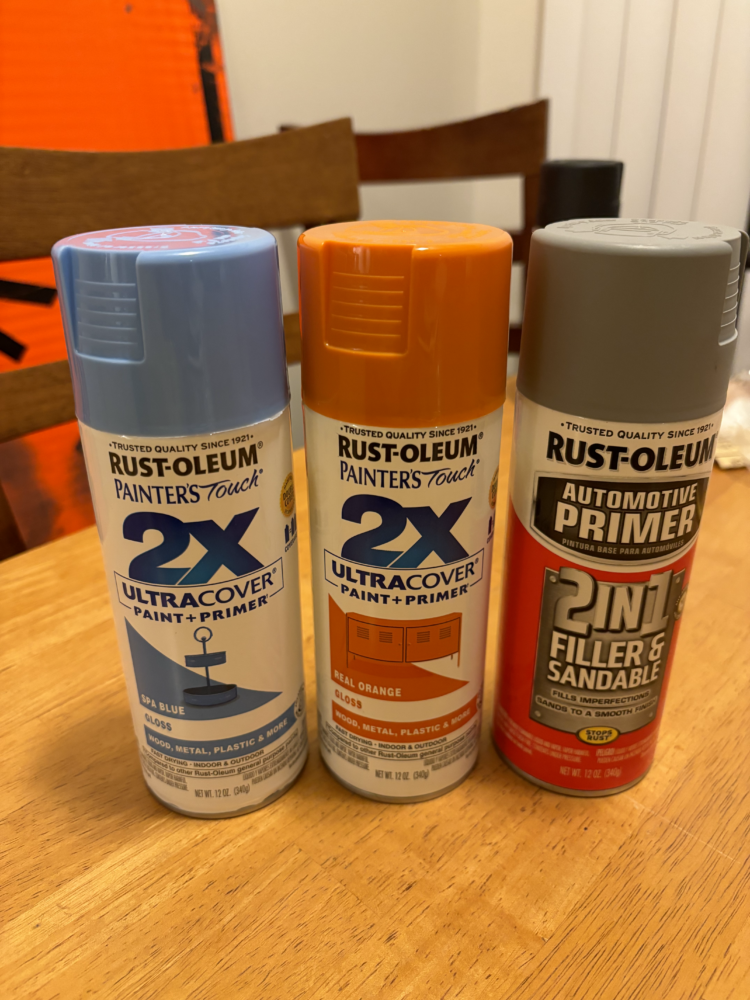
After modeling the full assembly and making sure that everything fit together in CAD, I printed the individual components using a 3D printer. The printing process was straightforward since I designed my pieces to print without needing support structure, the reason why I went for a more modular assembly. I was very happy to see that all of the parts came out smooth with little no cleanup needed, and that the gear teeth and symbols came out perfectly. I decided to print with white filament, since I planned on painting the pieces, and I figured this would be the best color option to add paint to.
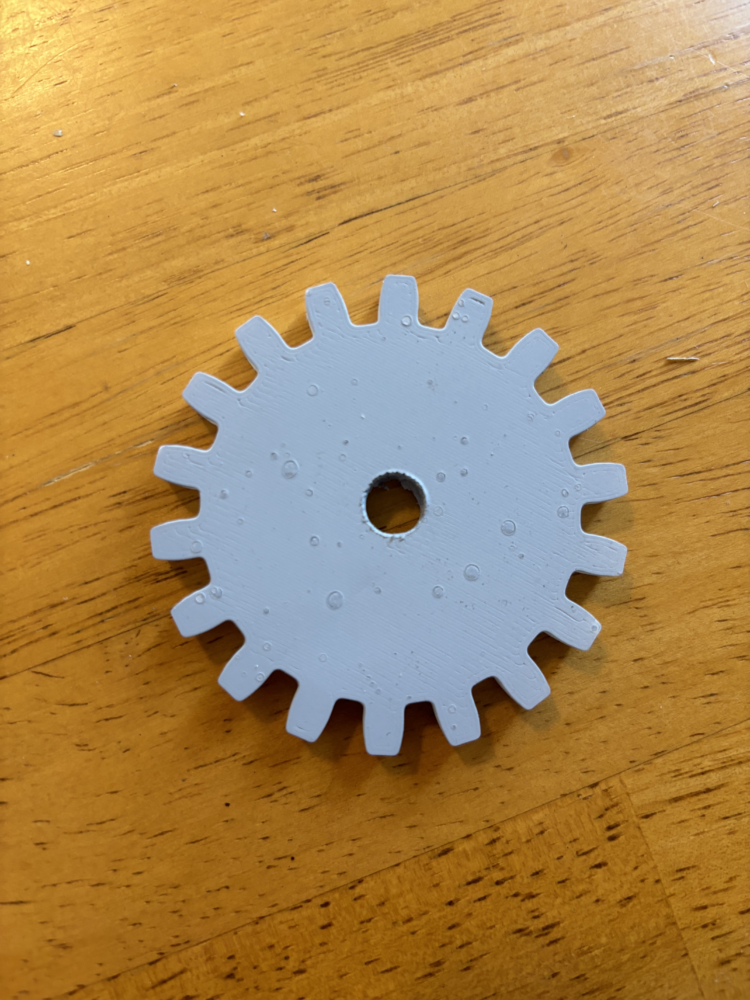
After printing, I had to paint the individual components. I chose to use a pale sky blue for the Earth since the Earth appears this color from space at far distances, a matte gray for the Moon to give it a dusty gray look, and a bright, vibrant orange for the support structure reminiscent of the bright orange spacesuits worn by shuttle astronauts. These colors were meaningful but also complimented each other very well, which is why I picked them. Spray painting the pieces was a simple process. The only complication I decided to add was to drop water onto the Moon gear while I was painting it to give it the illusion of having craters. This idea worked, but if I were to do it again, I would use larger droplets of water from a higher height to make the effect more noticeable.
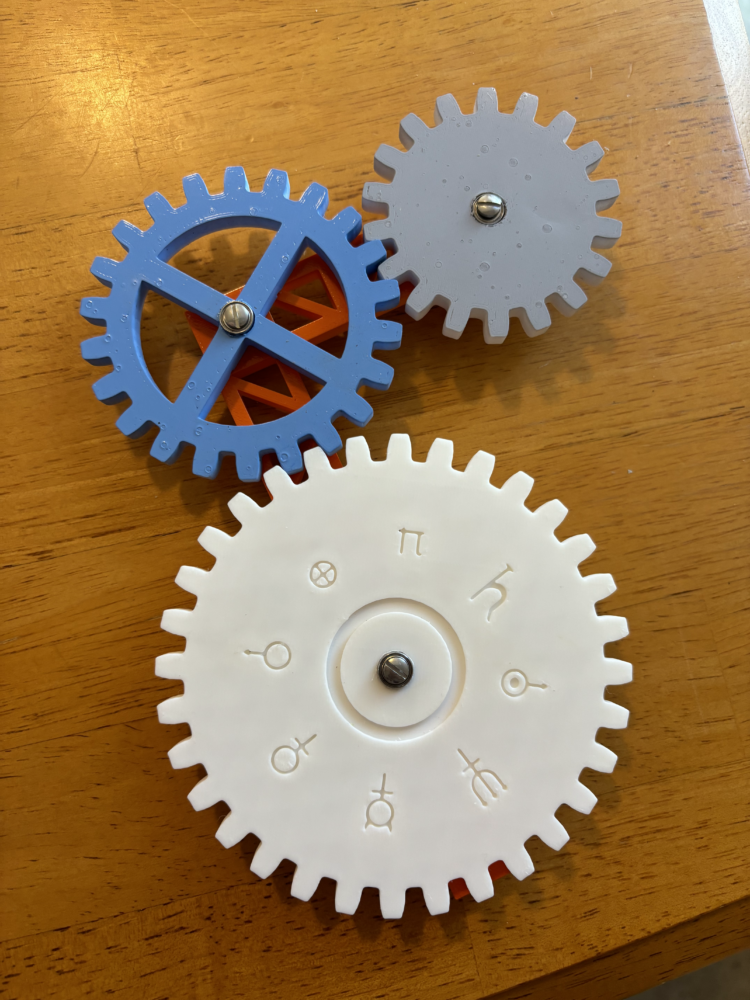
The final part of the building process was assembly. To assemble the final artifact, I used bolts, nuts, washers, and bearings. Since I wanted the gears on the sculpture to operate smoothly, I inserted bearings into the center of each gear. Then, I bolted each gear into its respective position on the upper mount arm, being careful to position the two slot gears into a place where they would mesh together correctly. After making sure the gear train worked, I tightened the bolts, and assembled the bottom portion of the sculpture. The bottom part was purposely designed to not require fasteners, since I wanted it to have a cleaner look. It assembles by inserting the lower support beam into the support block, and placing the block into the cutout in the bottom stand. Then, the upper gear attachment can be joined to the lower support assembly, making the final product.
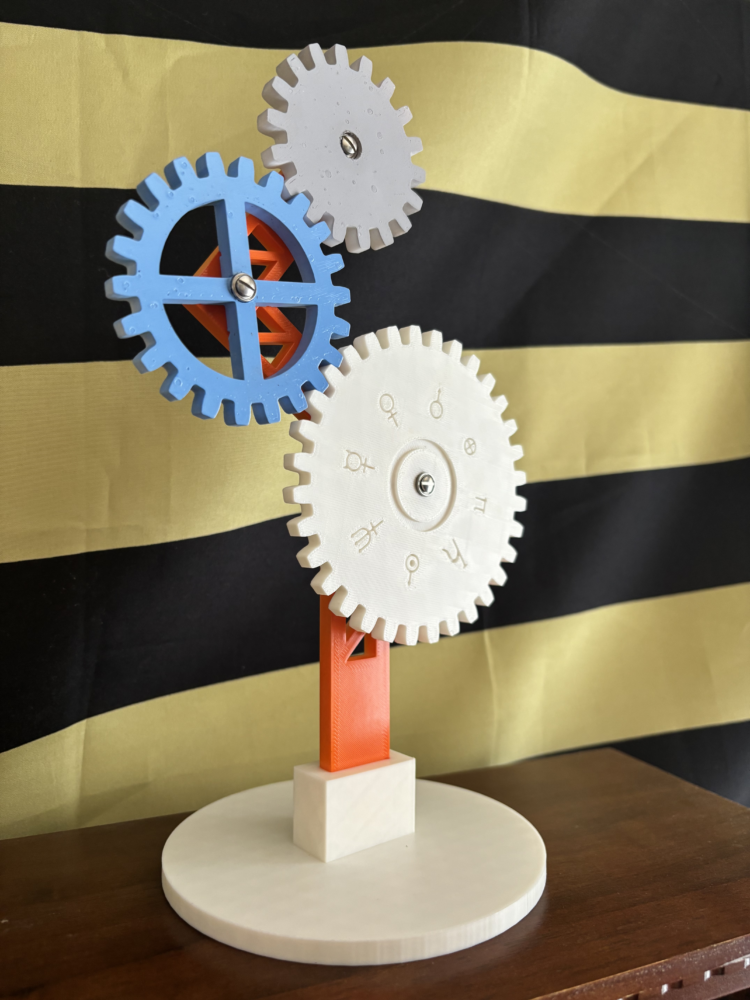
I am very happy that my final product looks just like my initial sketch. I think this is a testament to my creative design skills, but also my ability to carry my vision throughout every stage of the project. I am pleased with my final artifact, and it looks very nice as a desk piece. I will appreciate it for years to come.