
I’m really pleased with how it turned out, and it’s actually very comfortable to sit in. the ropes stretch nicely and conform to your body as you sit in it. I’ve left it in the lobby of the Atlas building for the last few days (partially because I haven’t gotten around to bringing it home yet) and every time I walk in the building someone is sitting in it studying!


I had to make a few design changes to my original design in order to make it easier to fabricate. My original design was made entirely from metal, and I had intended to either weld the joints or machine connectors that would bolt the Fram together. Each of these would have been wildly time consuming if feasible at all. Each of the joints would involve 3 tubes connecting, which would make welding difficult, and for CNC machining I would have to model and develop tool paths for 4 unique joints.
I decided instead to use wood for most of the frame, and to insert the bent metal sections into holes drilled in the ends. This would allow me to avoid all of these problems while still creating the form I wanted with the climbing rope wrapped around curved end segments.

I went back to rhino to model these design changes. I went with a cross construction of two 2×4’s for the wood, as this is an easy size of wood to find, and they would be strong enough to hold both the weight of a person and the internal tension of the ropes in the chair. I moved around the curves to make sure they aligned with this new design and my same grasshopper definition from my previous chair still worked to model the flow of the rope.

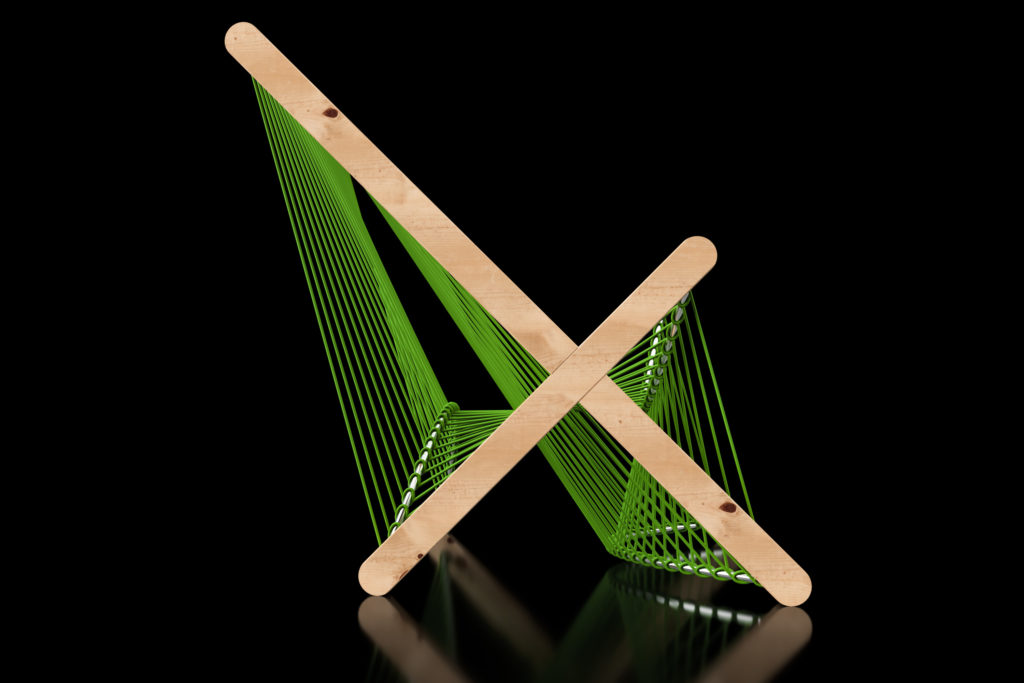
I made sure that all three curved segments had the exact same curvature so that they would be easier to fabricate. I also made sure that as many angles as possible were symmetric, so that I could make fewer different types of cuts and drill angles into the wood. Every hole is drilled either straight in or at 60 degrees, and the angle relative to the board is always either 30 degrees or 45 degrees. Here’s a rendering of my final design.

At this point it was time to fabricate. I used the 3d model to laser cut a template as a guide to bend the pipes to. I used the pipe bender in the ITLL and bent the tubes by hand. It took a little bit of work to get them to the exact curve I needed, but it got easier on each subsequent pipe. I ended up making one extra at the end and throwing out my first one where I bent and unbent it too many times so that it didn’t look smooth and continuous.

Here are all three of my bent pipes next to each other. I was surprised by how similar they ended up even being bent by hand.

Next it was time to create the wooden frame. I first built a jig that I could use in the ITLL drill press. It held the boards at a 60 degree angle, and I could screw in different pieces of scrap wood at the angle I needed relative to the board axis.

It looked a little bit weird to be using a drill press with a huge plank sticking out of it, but It was remarkably stable and allowed for precise holes. I measured how far the drill bit would go into the board, and made sure I left a quarter inch buffer so that I didn’t drill all the way through.

With all the pieces were ready, it was time to assemble them.

The tubes were press fit into the holes, then I drilled screws on the angled side to keep them from sliding out. The screws don’t take very much force when the rope is wound, but they prevented the frame from falling apart before it was tensioned.

With the frame completed, all that was left was the tedious process of winding the rope. I could refer back to my CAD model here to remember how the rope was supposed to wind. I wrapped it twice around each tube in order to space out the ropes.

I realized that one rope was not enough. Thankfully we had a second rope on hand that was also past its useful life as a climbing rope. I cut this one in half and used it on both sides of the blue rope. Once Everything was wound, I started in the middle and pulled tension out of each rope, feeding the slack forward in the weave. At each end I ended up with almost a full extra wrap of the chair. Then it was ready to sit!

Here’s one of my roommates, Leah, demoing proper sitting technique, just moments after construction finished. And below, Grant analyzes the comfort factor of dynamic climbing ropes.

I’m really pleased with how this project turned out! However, I realized a few things in the design process. For one, this chair turned out way bigger than I was expecting. It’s like a massive throne. In the future I could include a human for scale in my modeling software. Also, I learned that I need to design for manufacturability, even in a more artistically focused class. Just because something looks pretty in a render doesn’t mean that it’s actually feasible and/or possible to make it that way.
Either way I love the chair I ended up with, and I actually like how oversized it is. It will have a permanent place in our climber house for years to come.
9 Comments. Leave new
The chair looks amazing first off! I’ve never such a chair before. Having the ropes looking like two surfaces intersecting each other was a really good idea and implementation of your aesthetic. Mostly I am wondering how you were able to get the perfect tension on the strings where the chair is not to stiff or soft.
The unique shape of this chair is very aesthetically pleasing. The size of the chair is really big, but seems perfect for relaxing and having coffee outside. What material would you use for the metal not to bend if you were to do this again?
This project is awesome! I think you really achieved the modernist aesthetic you were going for. Did you consider any other ways of winding the ropes around the support rods? It could be cool to weave a design into the chair using the ropes.
Such a cool project! This was extremely impressive that you were able to design this and actually make it comfortable to sit in. That makes sense that it was a little too large for what you wanted but seems like a great first try anyway. I feel like I want one!
Where did your inspiration come from for building a rope chair? You said meters, rather than yards: is this a climbing convention? Are the rest of your dimensions in metric, too?
Awesome chair. Needs to go in the chair book. How did you actually finish off the rope off? Great Job.
Nice job on the project pivot. You ended up with a great product. You have one of the most unique projects Ive seen! Well done Jack.
The rope chair is a really cool idea and ended as an awesome final product, looking very comfortable. Did you consider adding anything to the side pieces to introduce an aesthetic that would capture the spirit of climbing?
I am impressed by how fast you changed your design. The final design is super awesome and I am very impressed. I love the combination of the curved pieces of metal and the straight lines of the ropes. The renderings are awesome! Also even though you changed pretty late you can tell how much work went into the project. I can’t wait to see this at expo and sit in it!
For your presentation style, I would avoid saying the word ‘like’ because it can be a little distracting from your presentation.