
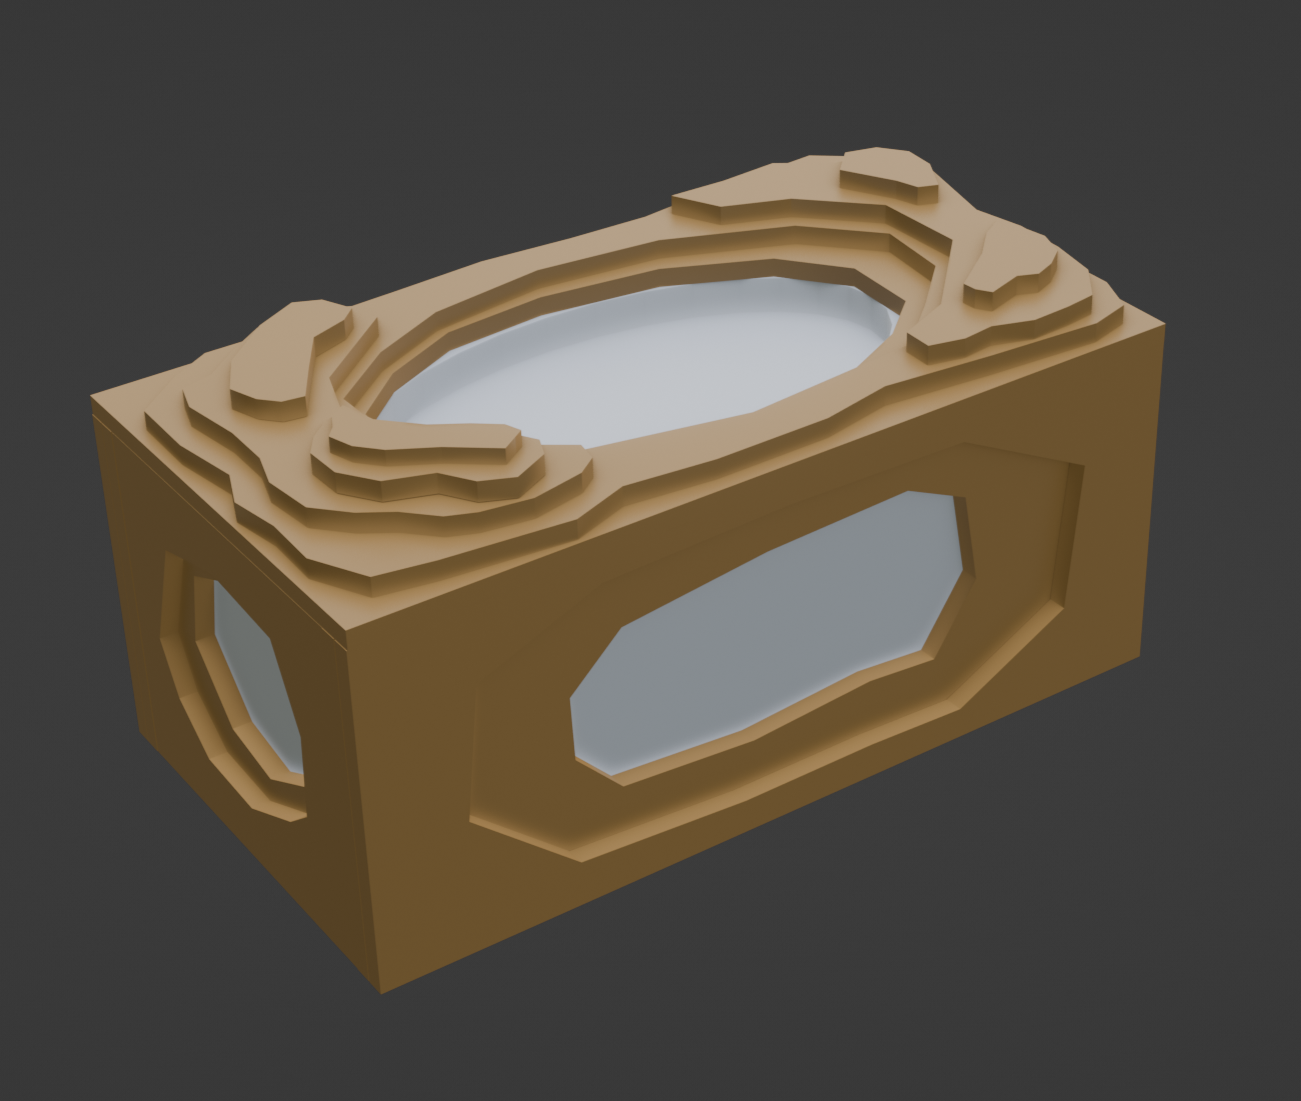
After much consideration, I scraped the original model and created a new one from scratch. In hindsight, the corners of the topographic layers were not the best decision regarding appearance — the original intention was to make it easier to align the corners. Still, then, that defeats the whole purpose of the project. The new rendition adds more variation to the topographic landscapes and an additional layer to all sides, improving aesthetics and increasing structural stability (being made of cardboard and all that).
I am more content with the result this time around. Adding additional variety in contours to the landscape helped break down the cover’s symmetry and gave it a more natural feel.

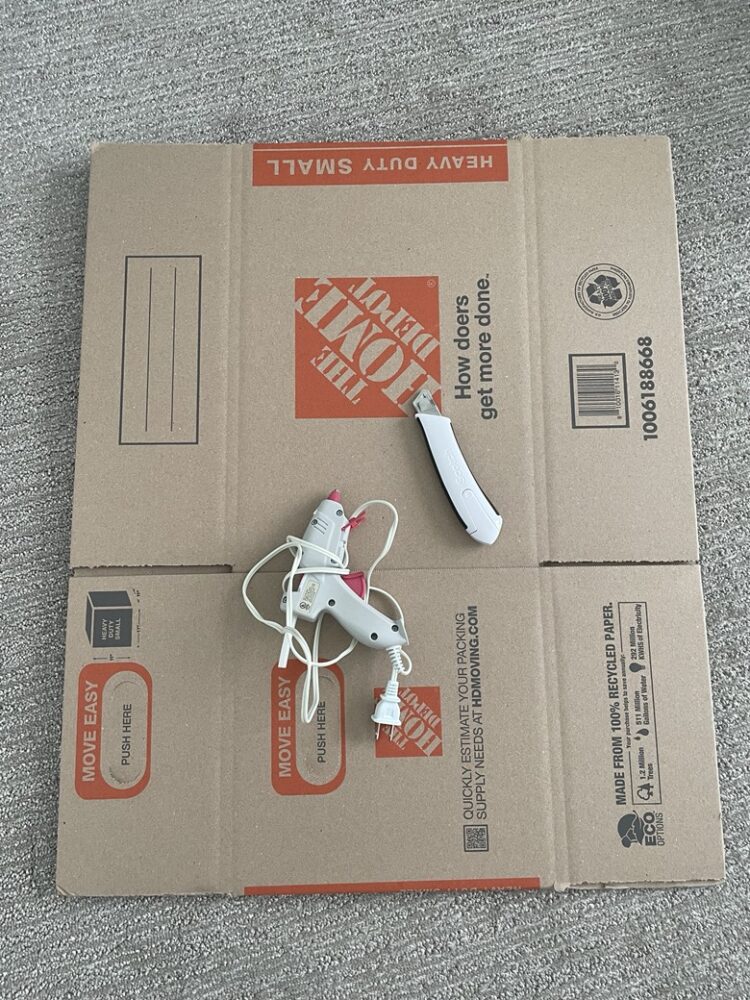
I have also gathered the necessary materials: cardboard, an X-ACTO knife, and a glue gun I found in storage. All this should be sufficient for the upcycle project, but I do have additional cardboard in reserve should I need it.
Hands-On Tutoiral: https://www.youtube.com/watch?v=hGcKYuCfqDI&ab_channel=KyleSinko
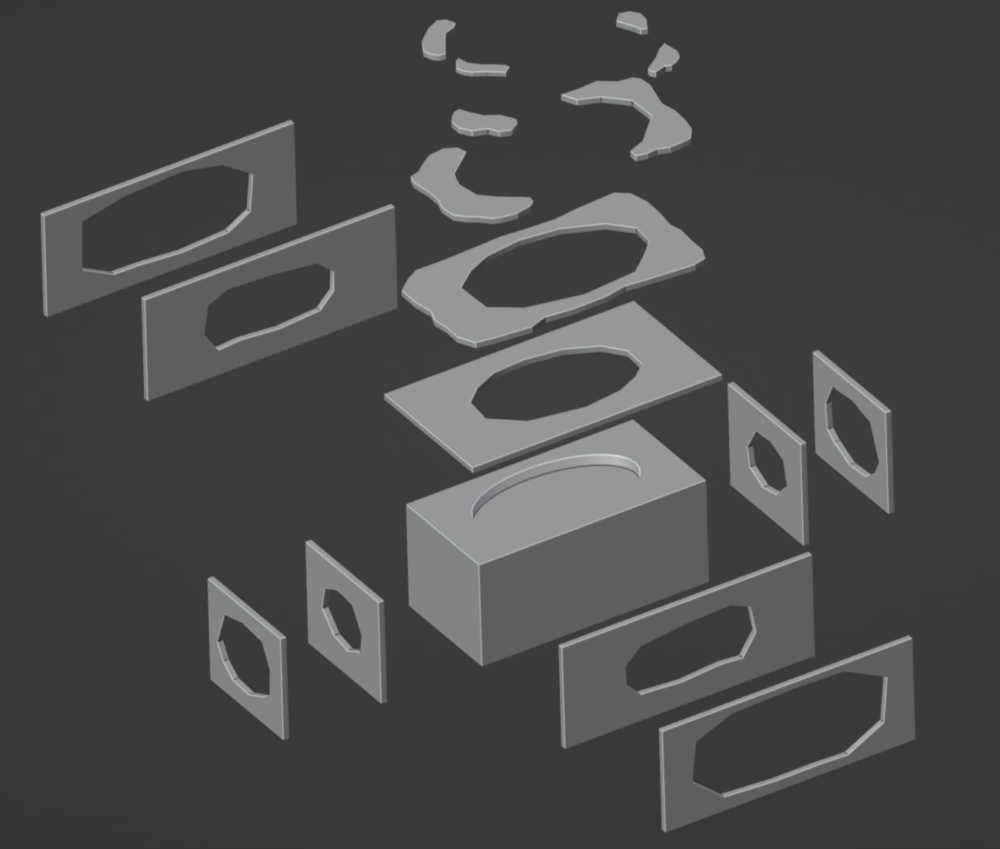
Given the relative size of the project, I believe that one of these doubled-layered moving cardboard boxes should suffice for the cover. I also have an X-ACTO knife that will be used to cut the pieces through. Again, I’m not looking to replicate the Blender model strictly — excluding the dimensions to encase a tissue box for obvious reasons — so I have some leeway regarding shaping the topographic layers.
Laser Cut Instructions: https://www.youtube.com/watch?v=65M3cASdU3E&t=989s&ab_channel=JoelRamirez
Above is one of the videos I found during my research, which entails using a program called Rhino as a reference to shape and assemble the physical topographic model. The tutorial uses a base surface as a reference to create the first topographic layer, with each subsequent layer referenced from the previous one. The process should be relatively simple to convert to Blender, which will likely entail making a reference plane in the dimensions of a separate piece of cardboard as a work surface.

However, If that does not work for any reason, the backup plan is to use Adobe Illustrator or Inkscape — likely the former since it is free — to mark each topographic layer in red to be cut. With the instructions provided in the video and on the ATLAS website, it should be relatively straightforward.
References
[1], [2], [6]: Blender 4.0 – https://www.blender.org/
Laser Cutting Resource: https://www.colorado.edu/atlas/research-creative/documentation/laser-cutter
4 Comments. Leave new
Hey Vincent, I really like your plan for this project. I have never used blender or rhino before so it is pretty interesting seeing what you can use these programs for. Do you have any plans to decorate the box after you finish the construction? It may be fun to some some decor work on it.
Blender is definitely a helpful program to quickly create mockups and whatnot in a short period of time, though I have not heard of Rhino prior to this project. Regarding the idea of decorating the cover after construction, I’m gonna abstain from doing so as I want to keep the plain look of it.
Hi Vincent, I think the newly designed topography looks great! If you do laser cut these layers for the case would you leave the burnt edges the laser cutter would leave?I think it could totally work for this project but it’s always a difficult thing to control.
I have seen the warning regarding the burn off of material should I use the laser cutter. However, I have already made progress to the cover with manually with sharp tools so I do not plan to utilize the laser cutter for this iteration. In the future, I do want to make a new version that would use something else aside cardboard — provided I have the time.