

So far in this project, I have collected all of my materials and begun the crafting process, however I have already recognized how I would improve my procedure.
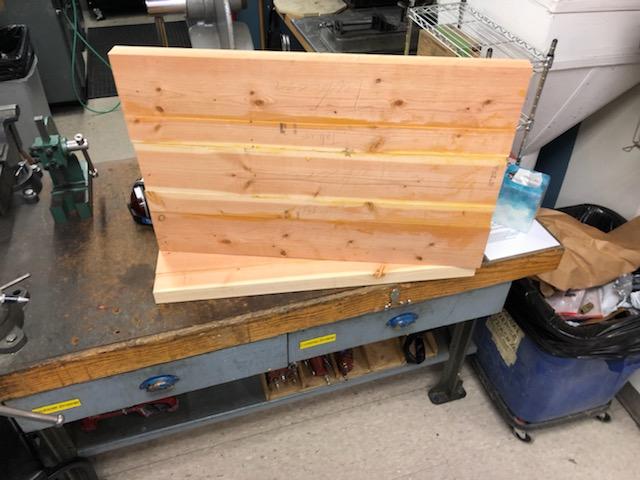
I have glued up the 2×6 8ft wood boards into two large blanks. The backing for the shelf, that will include the inlays for the mirrors, was glued up and squared up to be 30″ x 19.5″. The shelf has been glued up, squared, and planed to be 30″x 10″. I plan on shaping these so they have smooth curves that mirror one another. So that when the back reaches is peak, the shelf will also be at its widest point.
 My next steps for this project are to plane the backing using the 20″ planer at the Idea Forge. I anticipate that I will have to reduce 19.5″ dimension for extra clearance through the machine. What I should have changed in my order of operations was to cut out a rough shape of my mirror windows and do some preliminary edge work, before I glued everything together. This would’ve meant I had to take more time and care during the gluing process to avoid gaps and asymmetry. Doing these process first would’ve made the rest of this project go faster and smoother as the work piece would not be so large as it is now. I also reckon there would’ve been less waste as I wouldn’t have to remove so much material in an unrecyclable way. I also would’ve shaped the edge boards of both the shelf and the backing before I glued them up. This was I could’ve layered the smaller pieces while woodworking and they would directly mirror one another. These are things I will remember for next time.
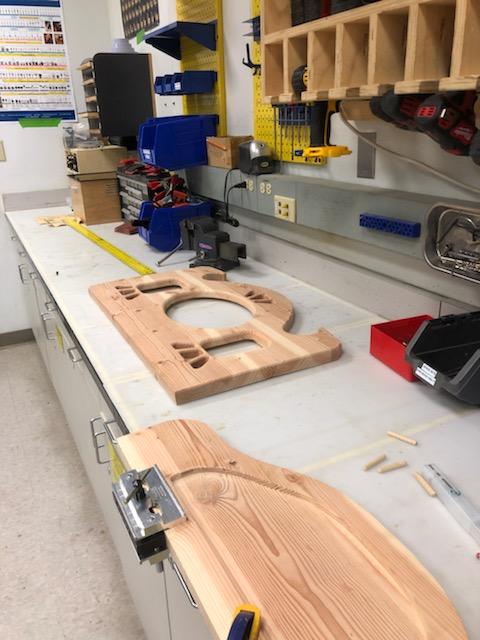
From here, I plan to make a jig for the mirror inlays. Using the laser cutter in the ITLL and some 0.25″ MDF board, I will cut the inner shape of the mirrors out to use as a guide for a plunge router. This will leave a lipped inlay for the recycled mirrors to sit securely in while not being seen fully form the front. With the help of Mark the ITLL shop manager, I will run the CNC router to get a nice curved oval through cut out in the front. If all goes well, the oval will be directly over the same center of that the inlay references on the back side. During this same CNC process, I will also cut out windows for the side mirrors.
Drawing and dimensioning reference lines, I will begin shaping the back board and the shelf with the band saw and then possibly with a router and jig. Once these curves have been hand sanded to be satisfactory I will use the table router to put a filet around all edges.
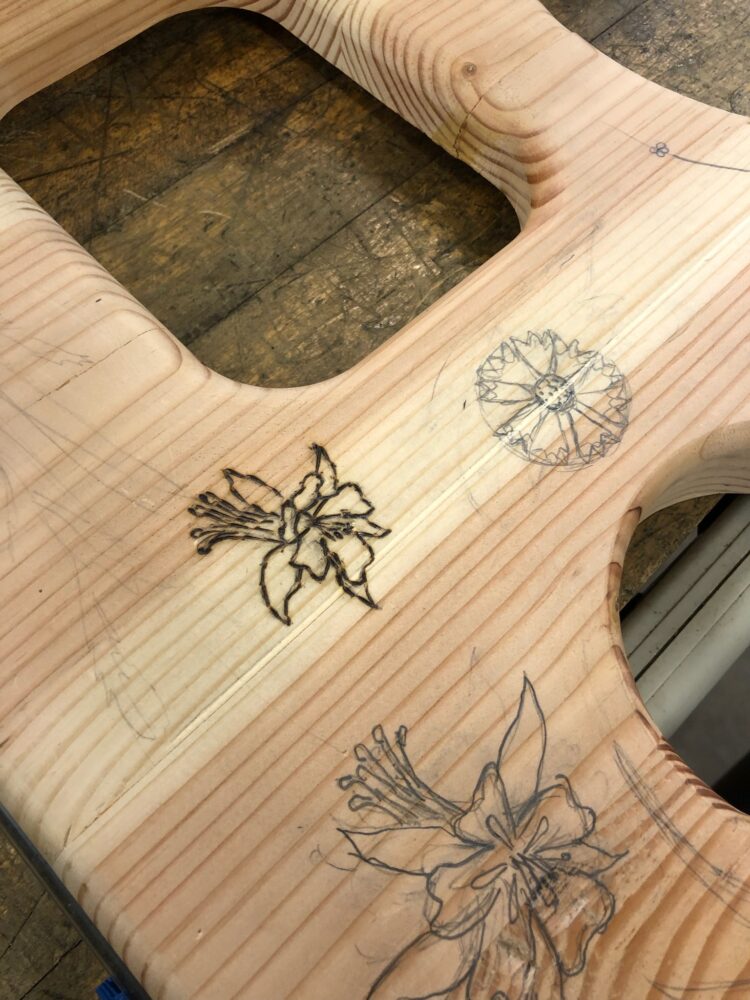
 When all wood working is done for both separate pieces, I will join the shelf to the back board with alignment dowels. I still need to decide if I will wood burn designs (little dudes and critters) into the piece as I should do this before it is all fully assembled. After all is said and done, I plan on staining it a darker, richer color. Although this project is a large time commitment, I am very excited and I think it will be a lot of fun to learn along the way.
3 Comments. Leave new
[…] Upcycle Progress – Woodworking […]
This sounds like a really cool project, it sounds like you are putting in a lot of time and effort in the woodshop to construct and assemble everything. I am excited to see how it comes out! Do you have any pictures from the shop of the progress so far? Also, it sounds like you are learning a lot since you included the section about changing the order of operations for next time.
Hi Riley, excellent work. I am very excited to see how your project turns out. I think that you did a great job explaining fabrication and timeline for your project. The only suggestion I have is maybe include some pictures next time so I can actually see what you have been working on! Other than that great work and I’m excited to see how it turns out.