
A couple of years ago, I came across a DIY project on YouTube where someone repurposed an old iPod to run Spotify on it. This inspired me to create the Raspberry Jam, a Spotify music player integrated into a retro TV.
The aesthetic that I aimed to capture was cassette futurism. This style implements boxy, utilitarian, and 1970s-80s technology. I have always enjoyed using older technology due to its tactility, simplicity, and charm. The Raspberry Jam aims to solve a problem when I am working on something at home. I could easily take out my phone and play music over my speakers, but I oftentimes get distracted and just end up on my phone for too long. I wanted to make some sort of music control device that was independent of my phone but still retained good functionality for music playback. I have a device in my car called the Spotify Car Thing that connects to my phone via Bluetooth and allows me to control my music. Most newer cars have built-in systems for this, but the Car Thing works well in my older car. This was also another inspiration for the project as I liked how the entire device was centered around music and nothing else. It brought me back to a time when people carried music players like the iPod around alongside flip phones.
The main goals for my project were:
- make something that fits the cassette futurism aesthetic
- connect to my Spotify library
- allow for music control
- look good on a desk, not be too big
- connect to my speakers in some way
I have been able to hit all these goals. There are still some finishing touches I want to add, but I am satisfied with my project in both form and function. I plan on getting some physical buttons integrated before the expo so that the music can be controlled without using a mouse or my phone. Right now, I have to start the Spotify session on my phone and then select the Raspberry Jam as the playback device on the app. I have a wireless mouse paired with the Raspberry Pi so I have been using that to control the music. I can also use my phone to control the music but that sort of defeats the purpose of the project to begin with. Obviously, a mouse isn’t the most elegant solution so I hope to get the physical buttons working.
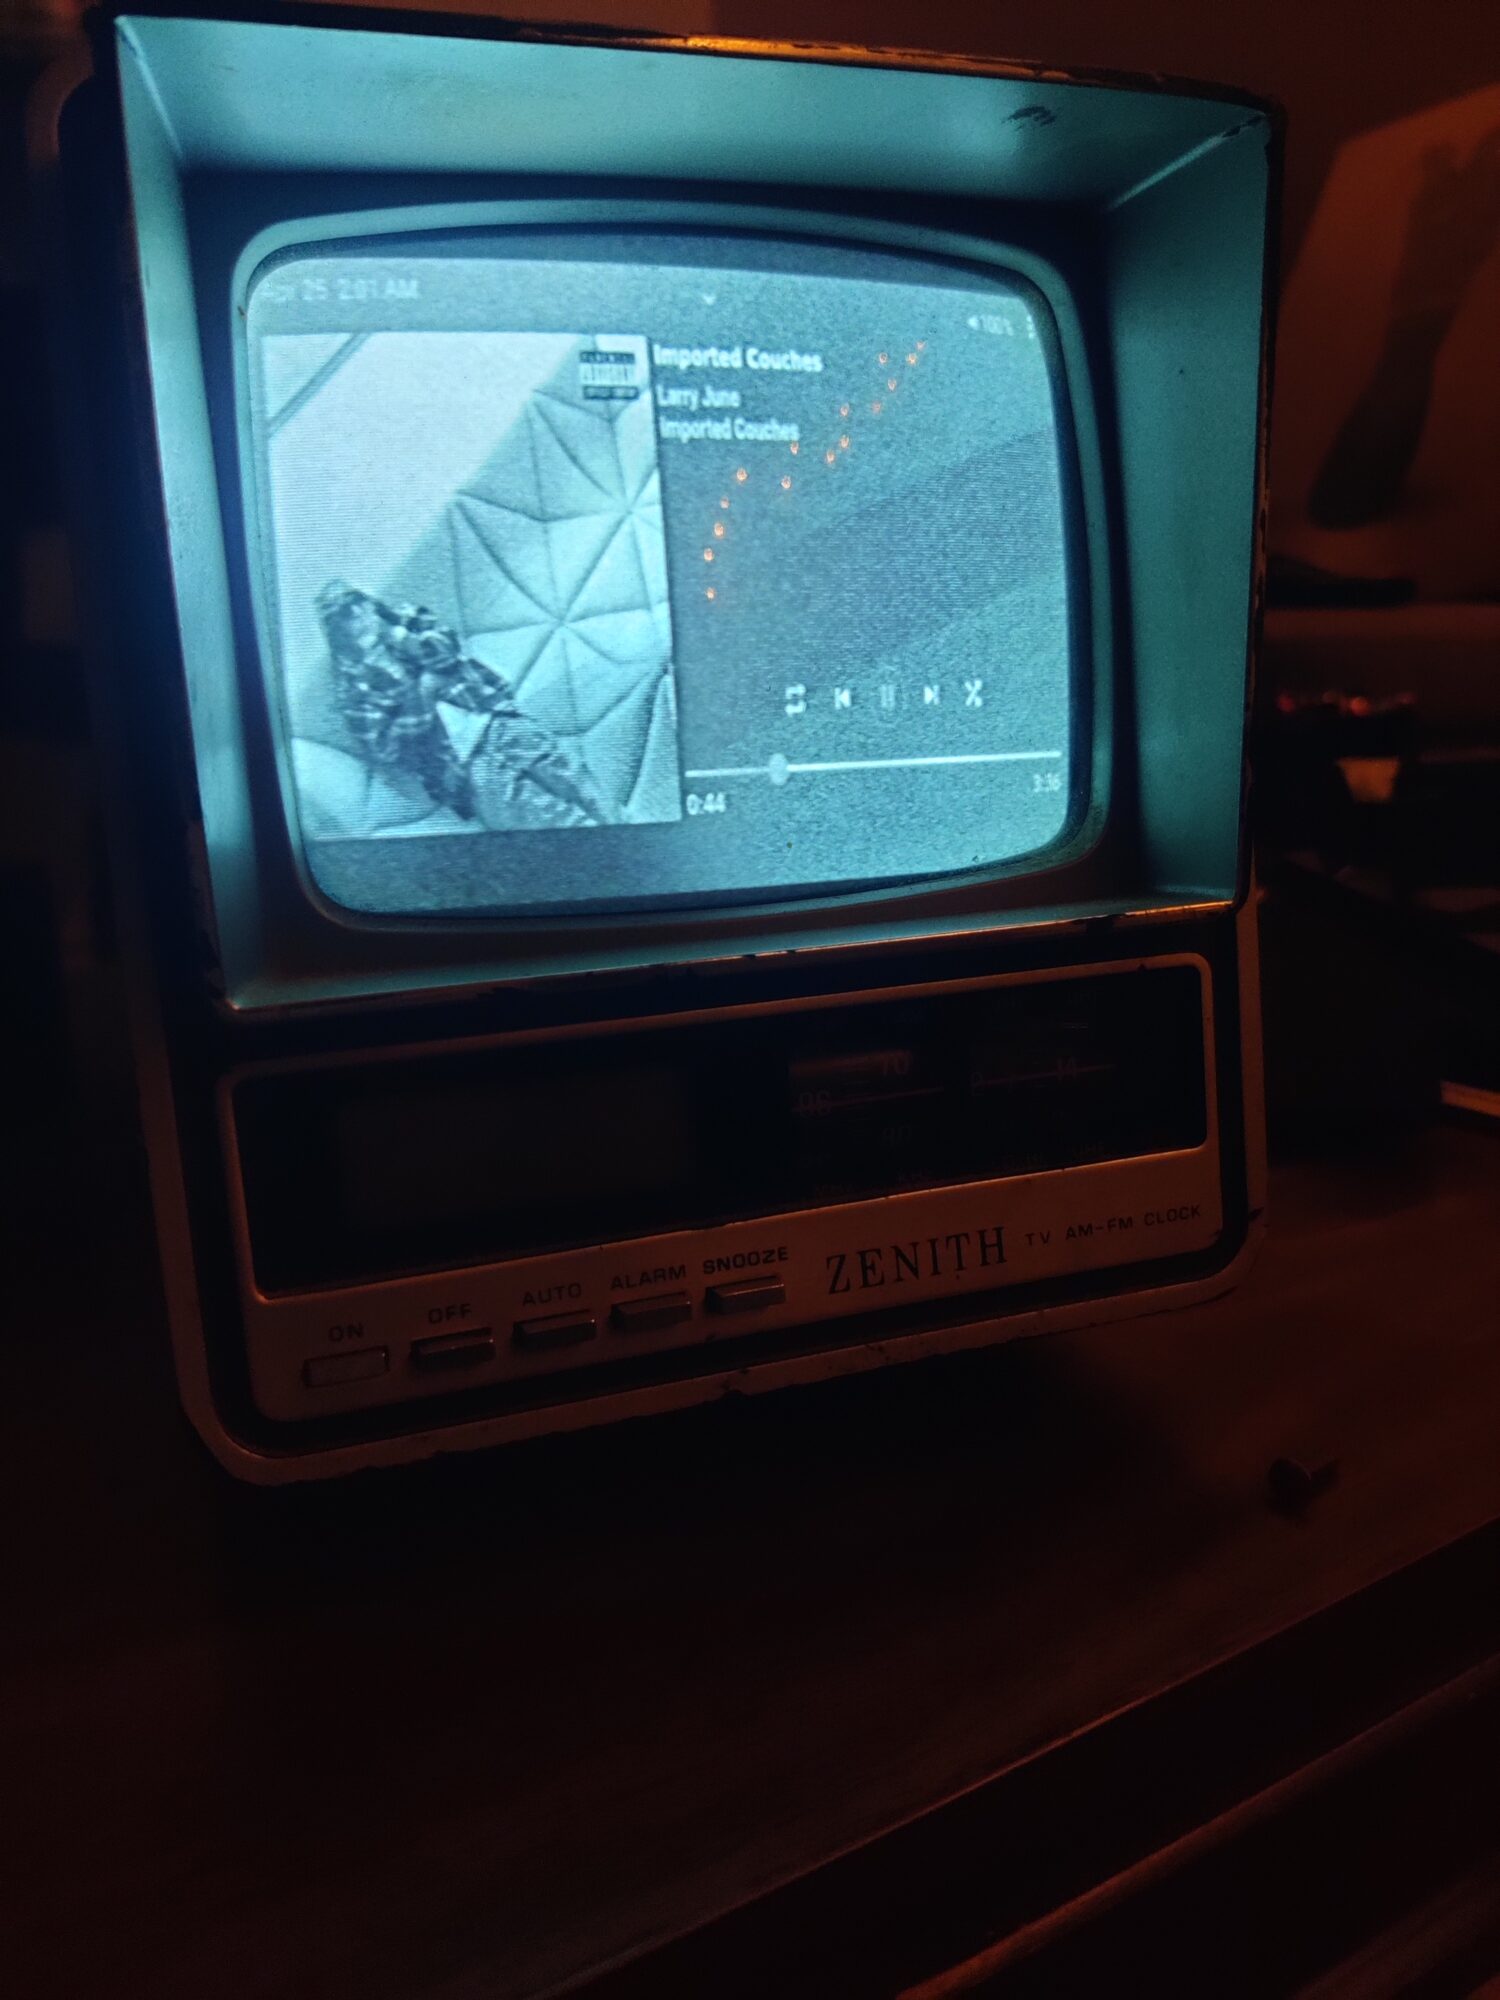
The TV I selected to use for this project is a 1983 portable black and white Zenith model. It has the capability to be battery-powered, but I will be using it with the wall adapter.

Zenith TV
It also has some alarm clock and radio functionality, something that I thought was really cool even though I won’t be using those aspects. In the image above, you can get a sense of the scale of the TV. Its face is about 5″ x 6″ and a good size for my desk. I think that the model I chose definitely fits the cassette futurism aesthetic with the squared-off shape, multiple controls, and information readouts.
The majority of the time spent on this project was devoted to getting the software and electronics to work. As I mentioned in the last post, I originally intended to use a software package called Modipy but ended up going with Volumio. There were not many aesthetic considerations with the software, but I did want it to be fairly minimal and not take away from the aesthetic of the TV.

Software UI
In terms of electronic hardware, I was able to find a lot of information online since many people have been trying to use older TVs to play video games. I understood the signal conversion steps and just found the most affordable components on Amazon.
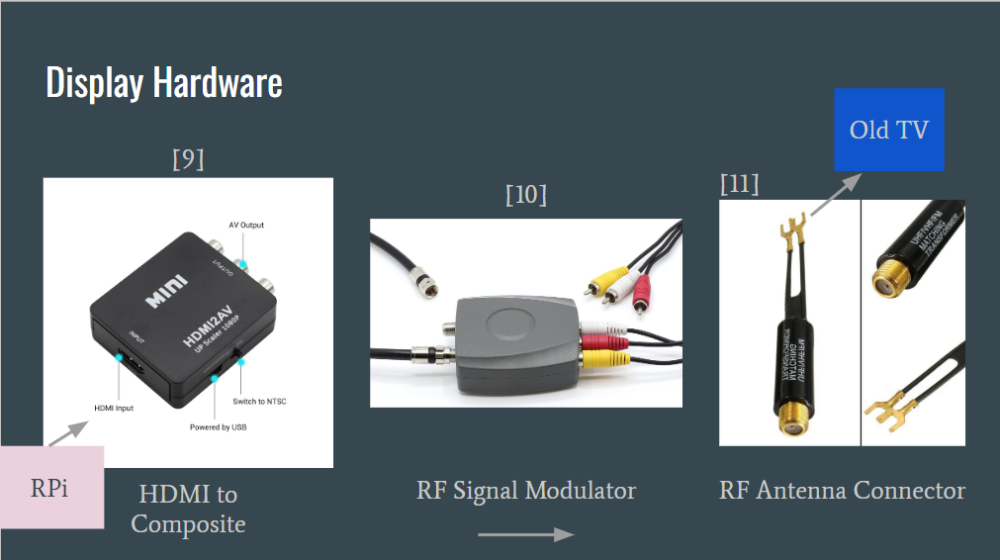
Signal conversion diagram
This was pretty straightforward and the only issue I encountered was a buzzing sound produced by the TV’s speakers even when no audio was being played. I did some research and determined that it was something called “ground loop”. I purchased a device known as a ground loop isolator and a new RF signal modulator to remedy this. After making these changes, I have been able to get rid of that sound and the TV is quiet.
In terms of hardware, I have been working to create an enclosure for the electronics that mounts to the TV. I originally wanted to try and mount components inside the TV but I found that there was a lack of space after taking it apart. My solution was to use existing screw holes for the TV’s normal back cover and create an enclosure that attaches to it. I first wanted to go with a fully 3D-printed option, but it turns out that creating a box on a 3D printer is not the most efficient method. The print would have taken over a day to finish in the ITLL. Due to this, I decided to create a structure that was mainly made out of laser-cut acrylic but implemented 3D-printed L-brackets to secure everything.

Front view of enclosure
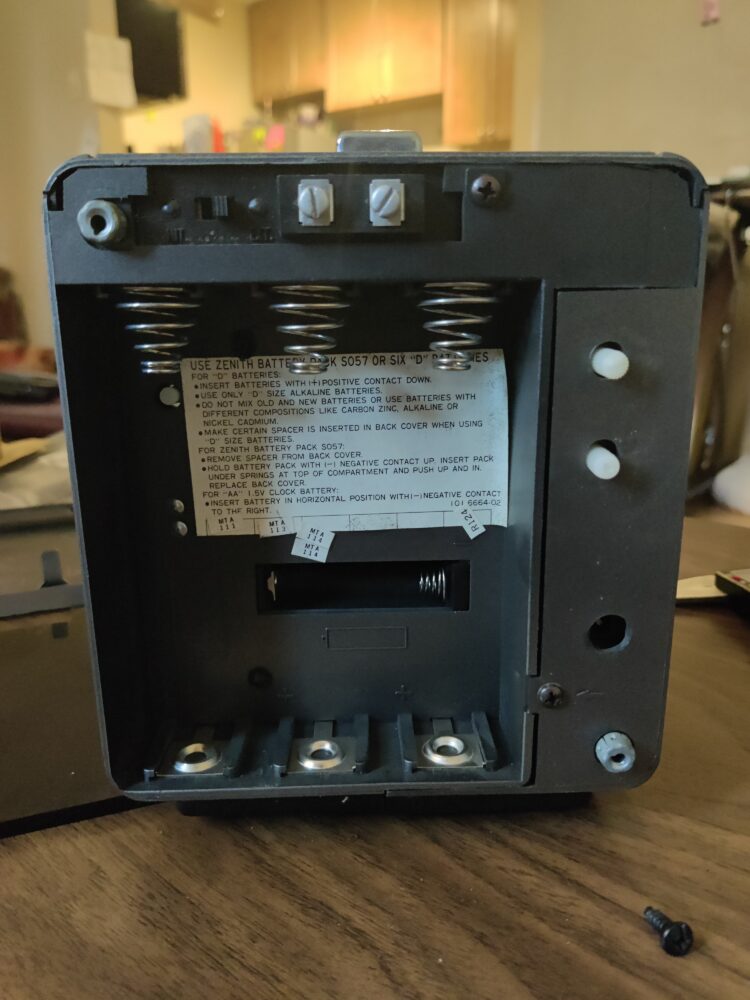
Back view of TV showing mounting holes
In the image above, the two grey screw holes are where I am mounting the enclosure. I didn’t want to drill into the TV’s body or modify it at all so I thought that this method worked well. The custom enclosure also follows the boxy cassette futurism aesthetic and I think that the blue 3D prints add a nice pop to the whole project.
I am currently in the process of attaching the enclosure and ironing out any kinks with the project. I hope to have everything fully complete by the expo and will be updating my progress in future posts.
3 Comments. Leave new
Hi Arjun, this is really awesome. I hadn’t heard of cassette futurism but I really like the aesthetic. This looked like a hard project to pull off with all of the electrical engineering required. I can’t wait to see this at the Expo.
This is so cool! I am a very big fan of cassette futurism and this project fits that aesthetic well. This is a very creative use of old technology that makes it useful again. Nice catch with the ground loop causing noise in the speakers, that’s a very common problem. Do you consider this to be more a proof of concept, or are you planning to use this to listen to music?
I do plan on hooking this up to my existing speaker set to play music but it will definitely be a work in progress in terms of adding more features and functionality over time.