

I would like to begin by recapping my plan for this project. I planned to make a desk lamp with a sunrise/sunset feature. This would help me quite a bit both waking up and falling asleep. I want my lamp to slowly darken over time at night to help signal that I need to be going to bed soon. I also want the light to be indirect and diffused, as I have noticed that things like that can help me get to sleep quicker.
The aesthetic I have chosen for my project is Scandinavian. Scandinavian design is almost an extension of minimalism. It includes natural tones more intentionally, and additionally focuses on creating a comforting environment. This is drawn from the Danish concept of “hygge”. Hygge, while not directly translatable to English, encompasses the concept of coziness and comfort. Scandinavian designers accomplish this through the use of warm tones, natural materials like wood, and clean lines.
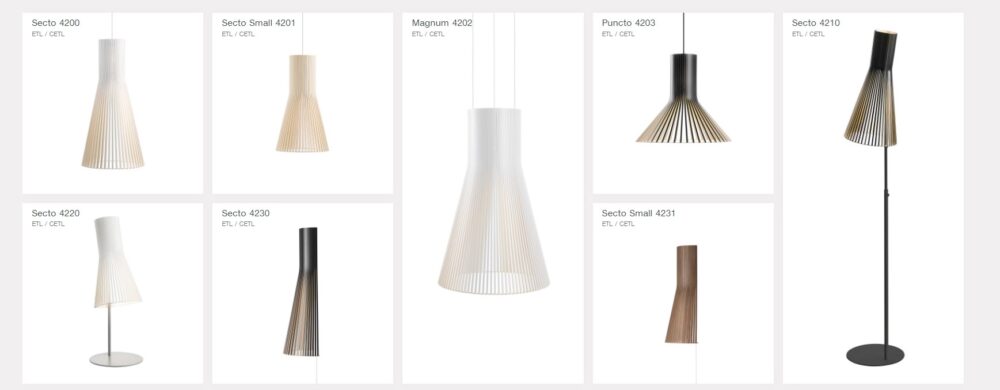
For my lamp, I am going to take inspiration from the designer Seppo Koho and his work at Secto Lighting. Secto is a design group that creates handmade wooden lighting, from Finland. I really enjoy their style of creation and find it to be very comforting. Shown below is some examples of their lighting.
For my lamp, I wanted the wood to be something workable but also something that will be visually appealing. After researching what wood works best in a laser cutter, I settled on cherry wood. Cherry is a very workable wood that has a unique characteristic of changing over time. Cherry is UV-sensitive, so as the wood is exposed to sunlight, it will darken considerably. I thought about artificially aging my wood, but I thought that I would appreciate experiencing the change in color over time.
I made a couple of rough sketches on my iPad, and ended up with the following as what I wanted to do.
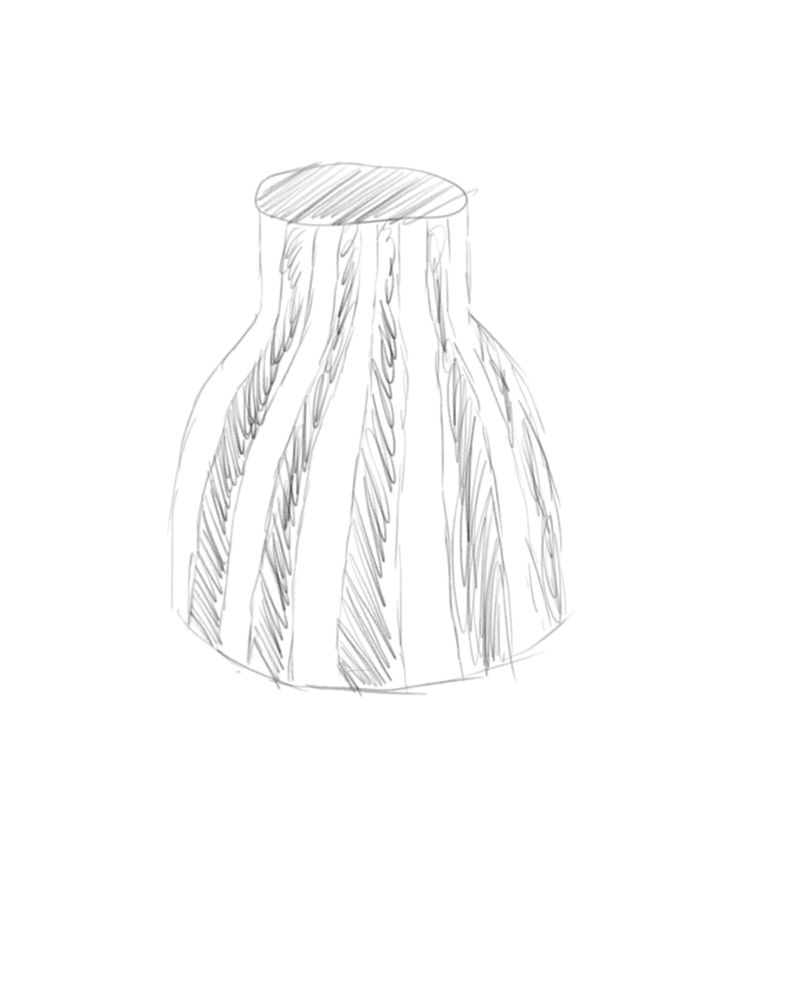
I am not the most artistically inclined, so the sketch is quite rough. From the sketch, I used SolidWorks to model the lamp. Not only did this help me get a clearer picture of what I was making, it also helped me plan for how much wood to purchase and allowed me to generate DXF files.
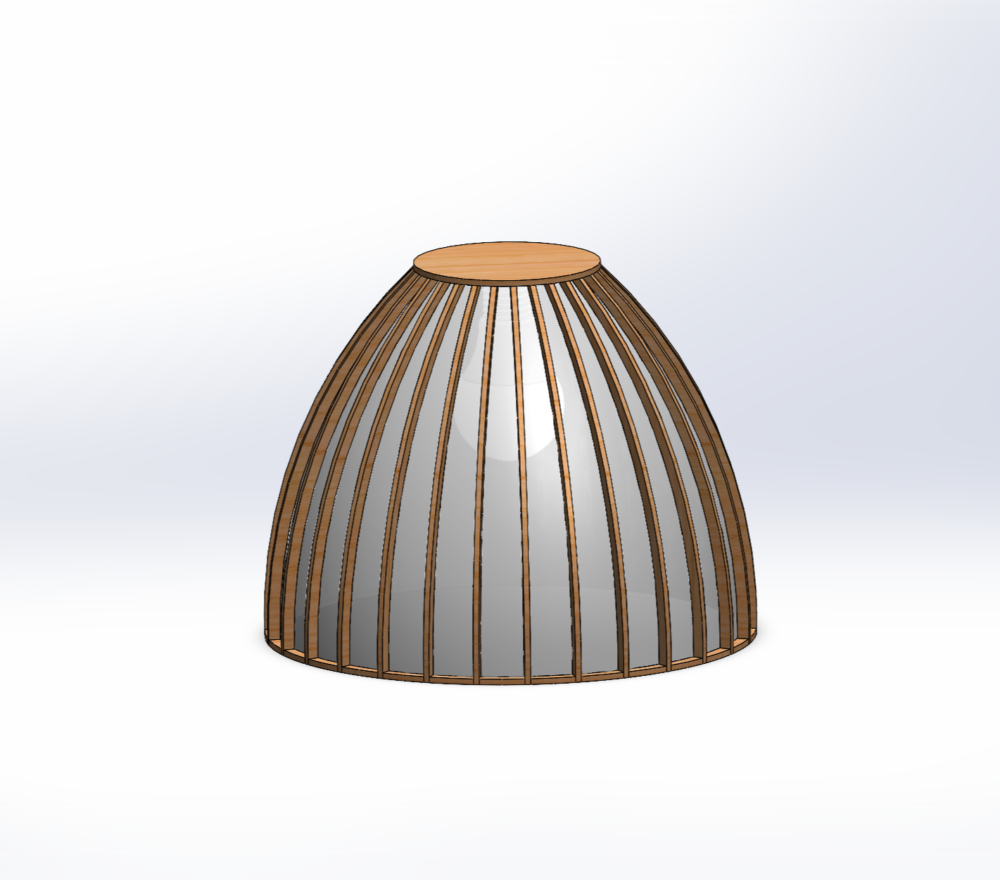
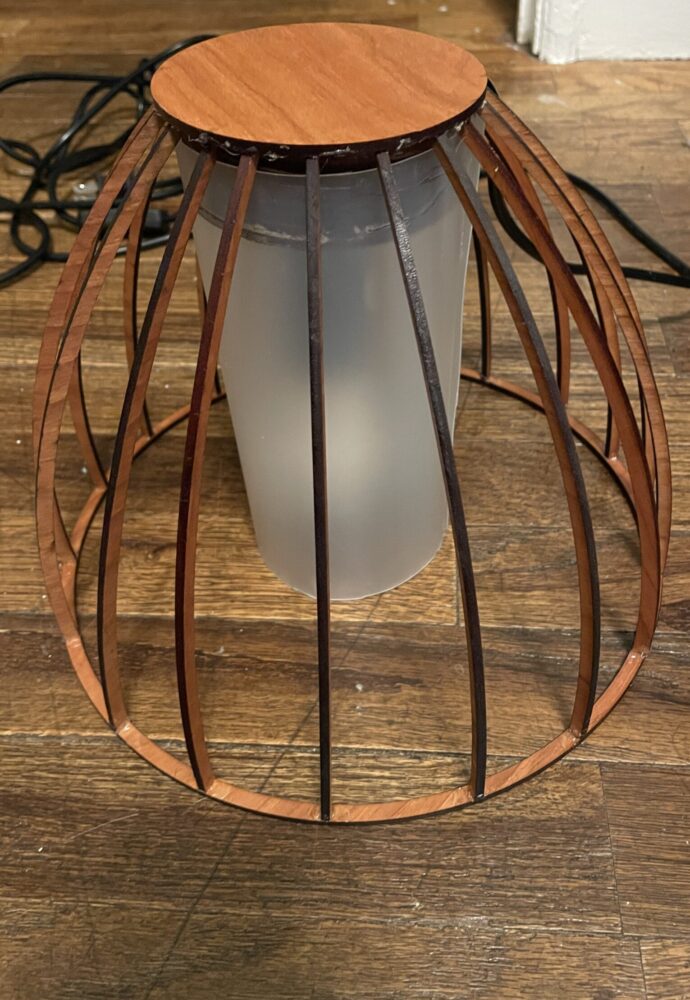
Here is a sketch of my final SolidWorks assembly. From here, I was able to determine how much wood I needed and was able to begin purchasing. After some setbacks during the shipping process and changing my design based on my woodworking skills, I was able to produce my final product, shown below.
References:
Secto Design: https://www.sectodesign.fi/en-us
2 Comments. Leave new
Hi Jonathon, I read your plans for the lamp and was so excited to see how it turned out. It’s awesome how you got the shape of the wooden strips just like the CAD. Is the lamp head going to be mounted onto a desk lamp stand or tall lamp?
[…] Final Report – What? […]