
Kinetic Wind Sculpture
by Alex Fitzgerald
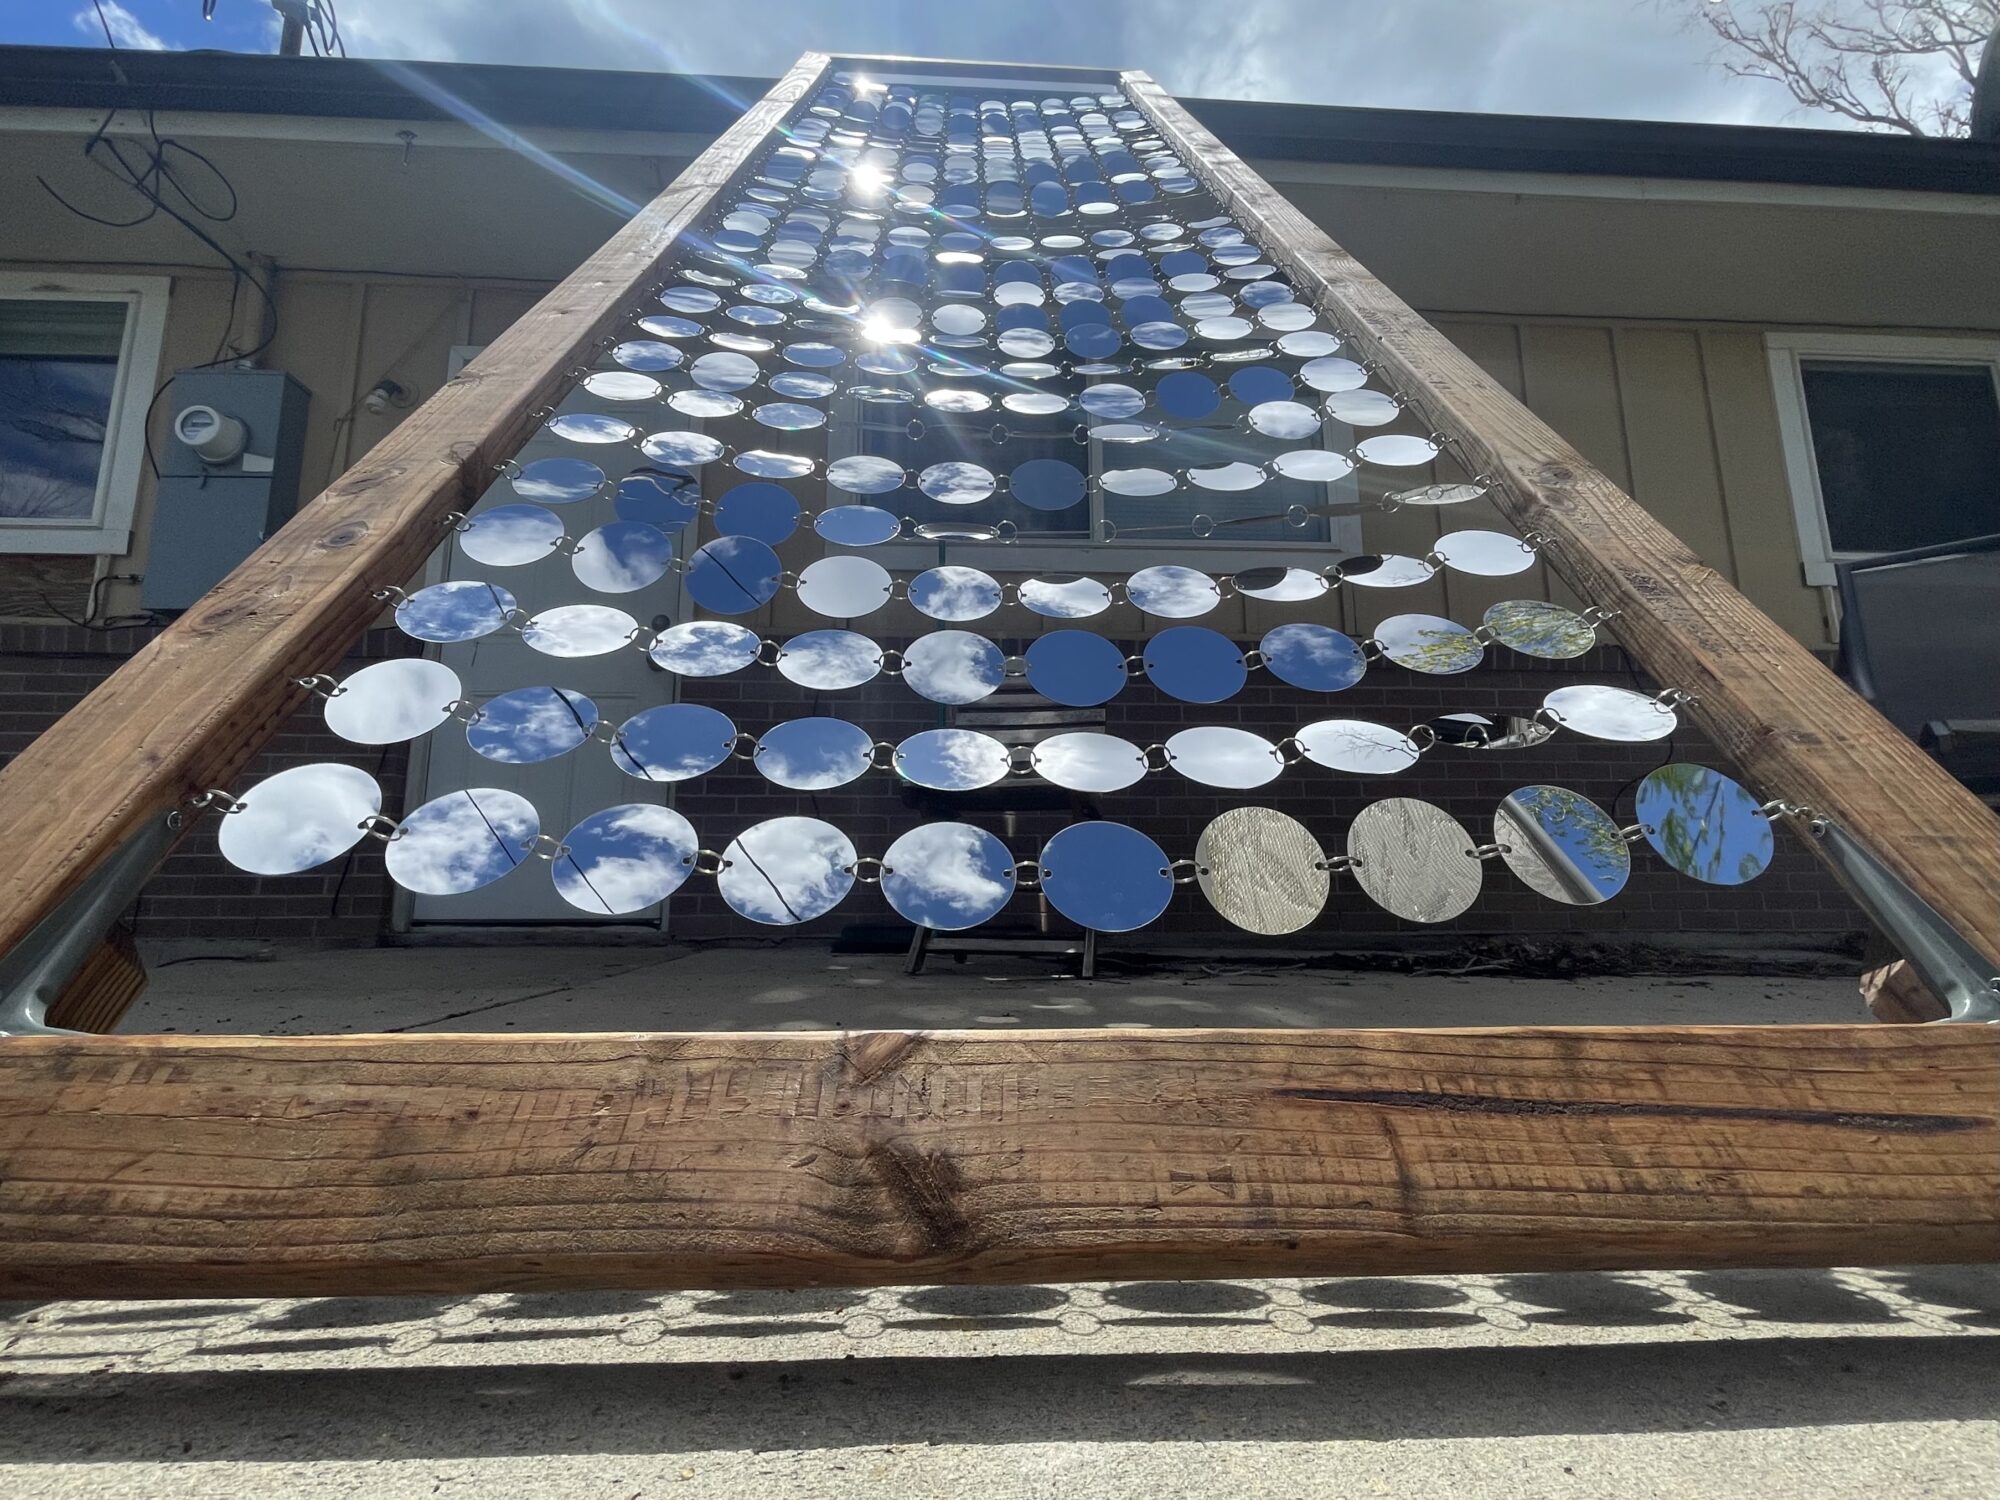
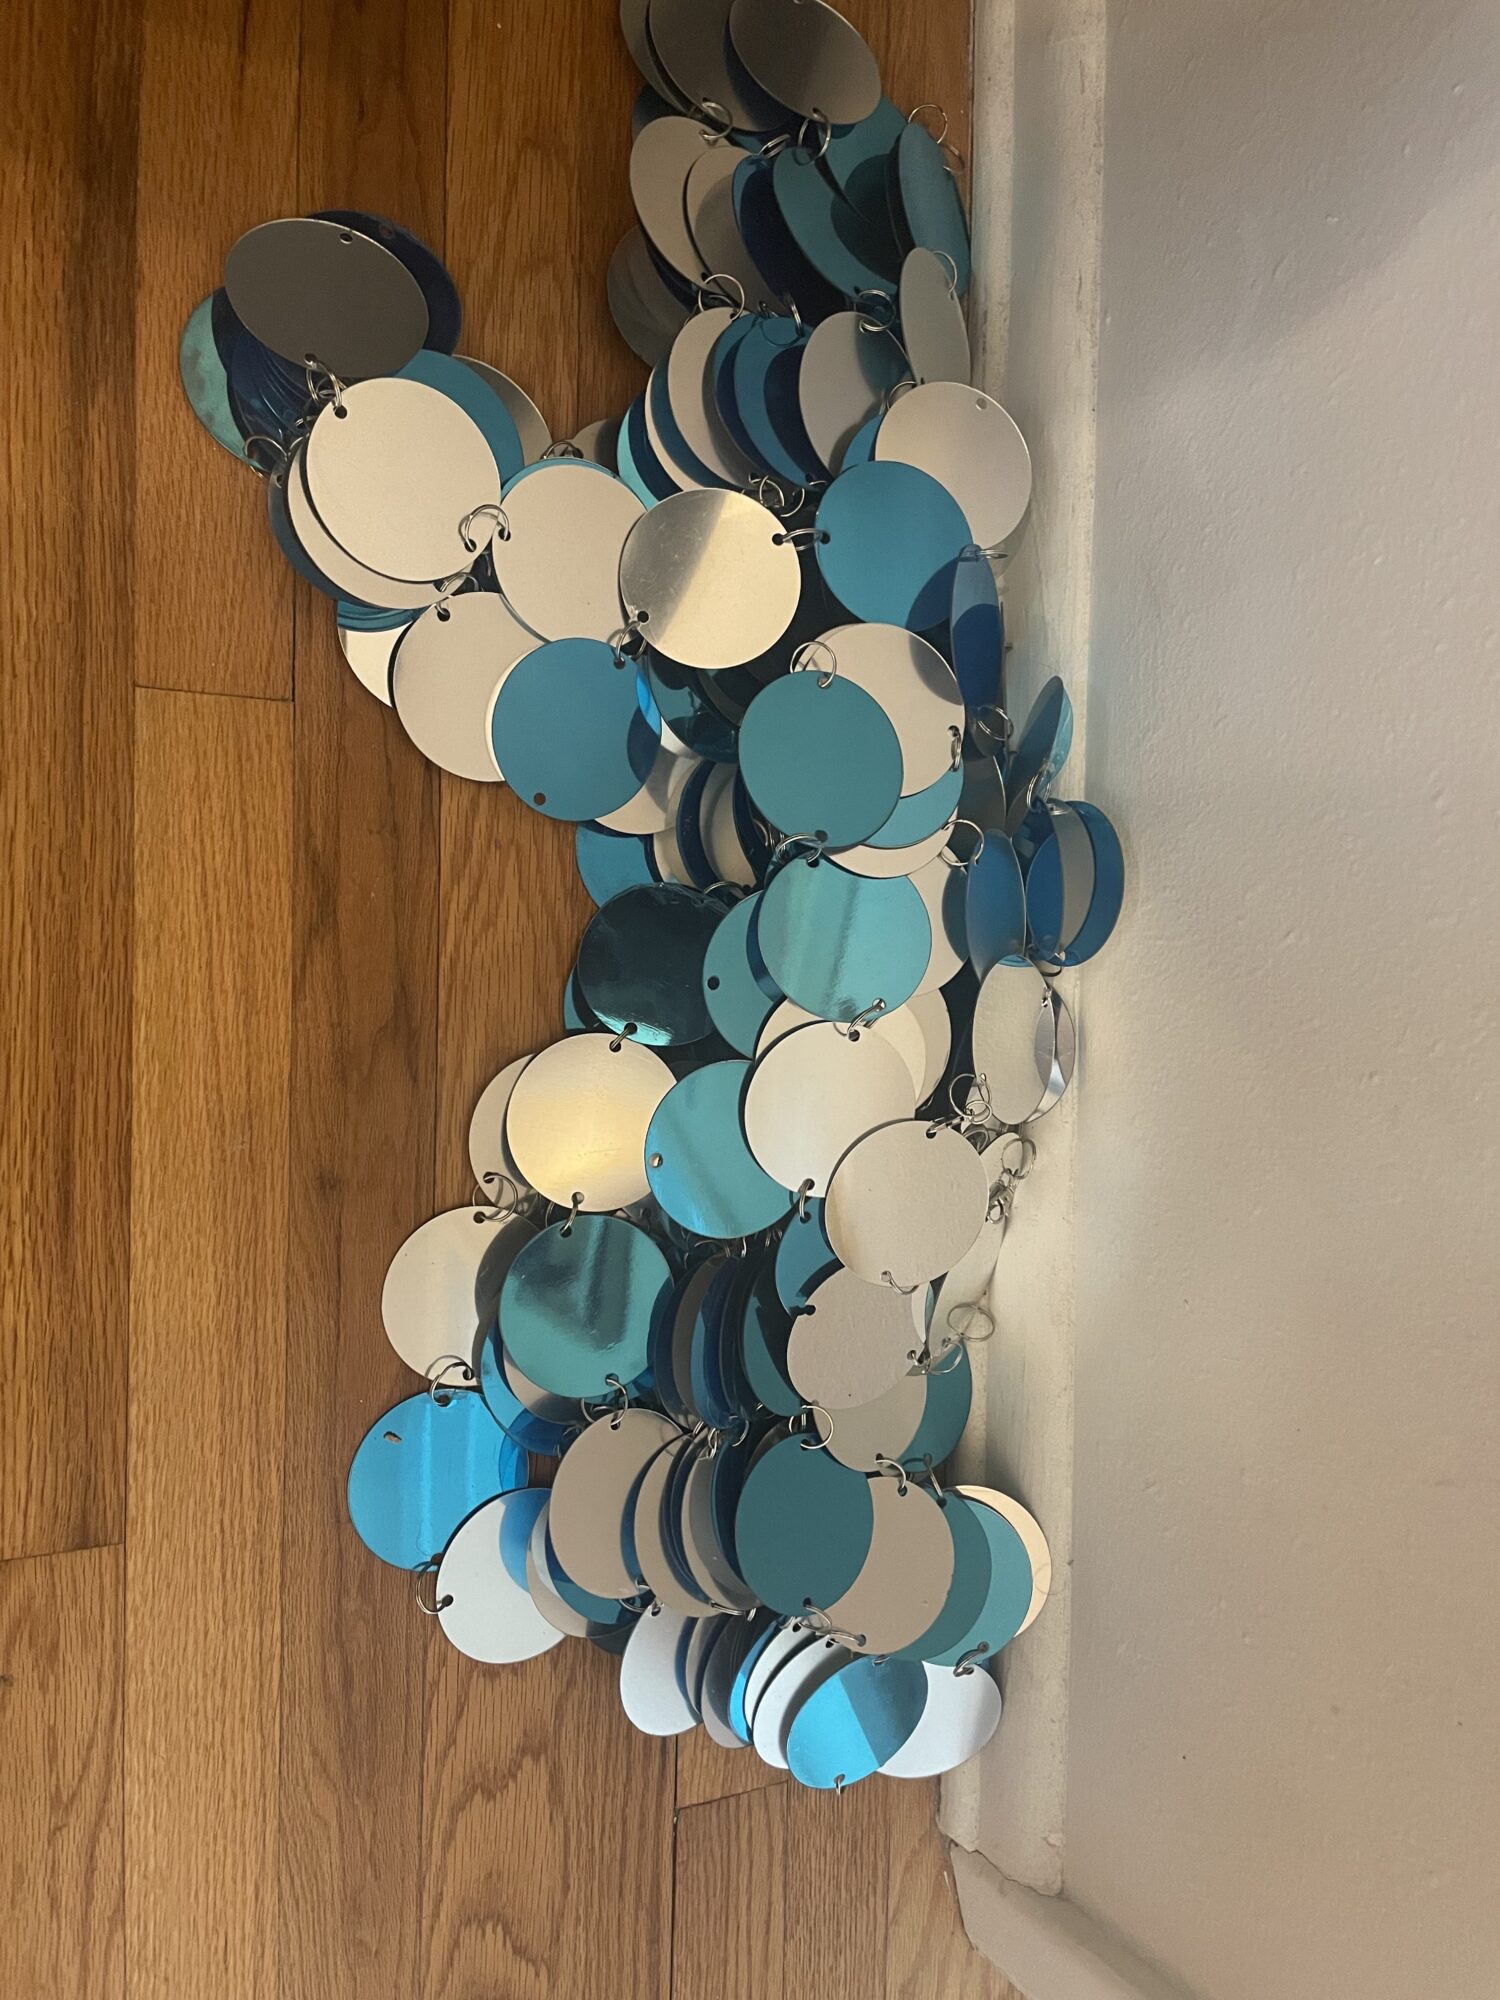
Kinetic Wind Sculpture in Vertical Configuration
Project Timeline
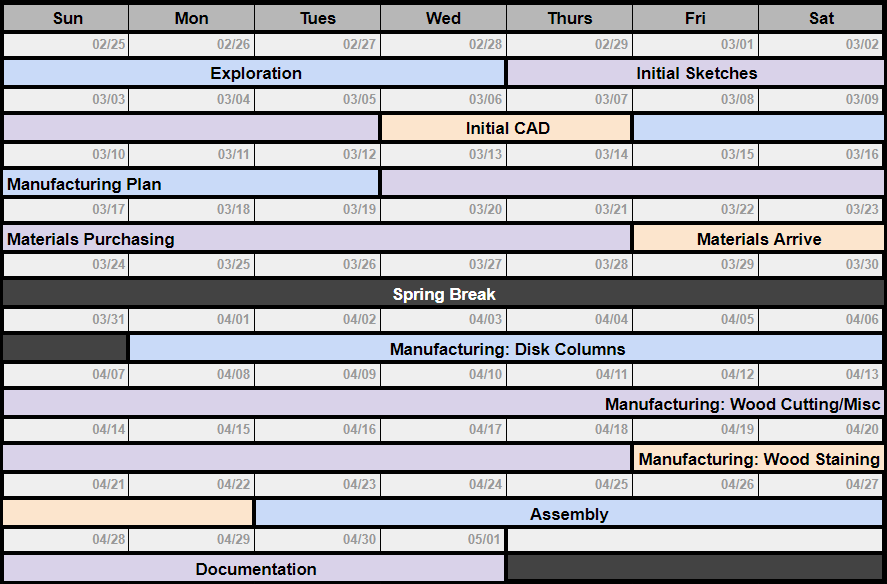
Project Timeline for Final Project
This project spanned 9 academic weeks. The first few days after being assigned the project I spent a few days brainstorming ideas for what I wanted to see as my end product. This included spending time narrowing my idea down to being a kinetic wind sculpture from other potential ideas as well as looking at famous kinetic wind sculptures that are already built. This is the period where I discovered Ned Kahn who is a famous artist who has created a number of kinetic wind sculptures around the world. After deciding on my aesthetic and the general idea for my project I moved onto creating some initial sketches for the actual design. This included looking at alternative aesthetics than my original.
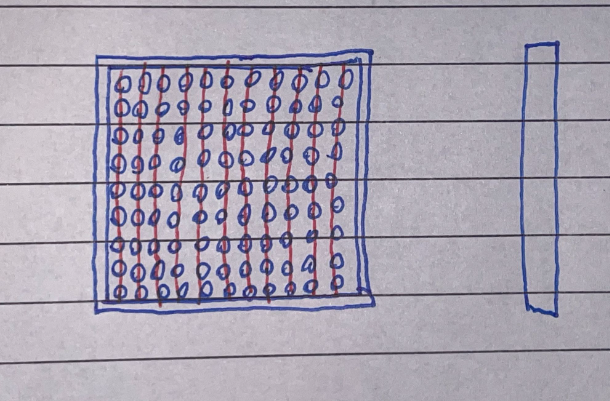
I came out of this stage of the project with a good idea of what I wanted the end result to look like. Next, I took my sketches and converted them into a Solidworks assembly.
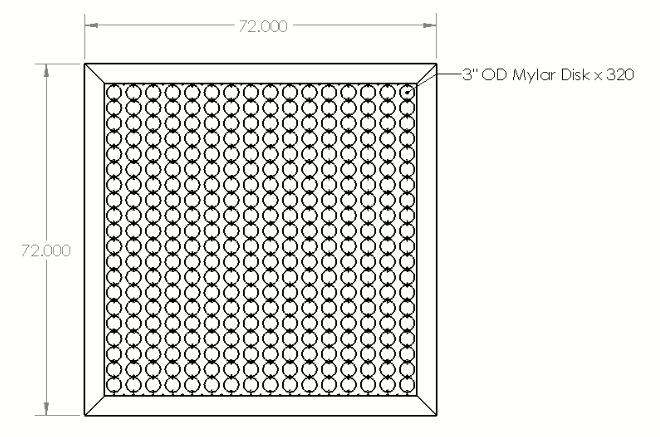
Using the CAD model for my design I moved to developing a manufacturing plan including looking into suppliers and lead times for the mylar disks. At two and half weeks into the projects I began ordering and picking up materials. I primarily used Amazon and HomeDepot to supply my parts. By the beginning of spring break my materials had arrived. Once spring break ended I began the manufacturing process first by creating strings or columns of mylar disks. Due to my budget constraints I opted to use keychain rings to attach my mylar disks. At the end of the tedious process, I had 30 columns each made up of 10 mylar disks.
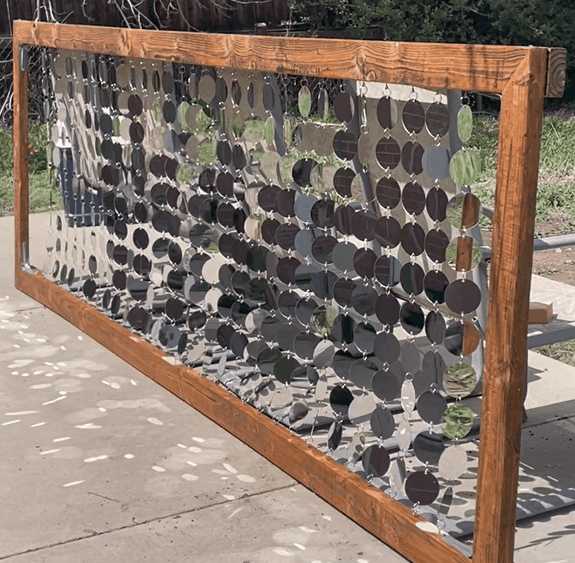
Using the built up columns to gauge the required height of the wood frame I cut 2″x4″ pieces of wood to roughly three feet by 7 feet. Unfortunately, my ability with a skill saw wasn’t great so I ended up with slightly mismatched angled cuts. This decreased the rigidity of my frame once I screwed the wood pieces together, To improve the frames rigidity I purchases some L brackets from HomeDepot. This greatly increased my confidence in the frame however, I also used some of the left over wood to create additional brackets which cemented my confidence in the frame.

Once the frame was built I applied a sealer to the wood to prevent moisture from destroying it. Originally I planned to apply a layer of black paint to the frame to better fit my aesthetic but due to schedule constraints I opted to skip that step.
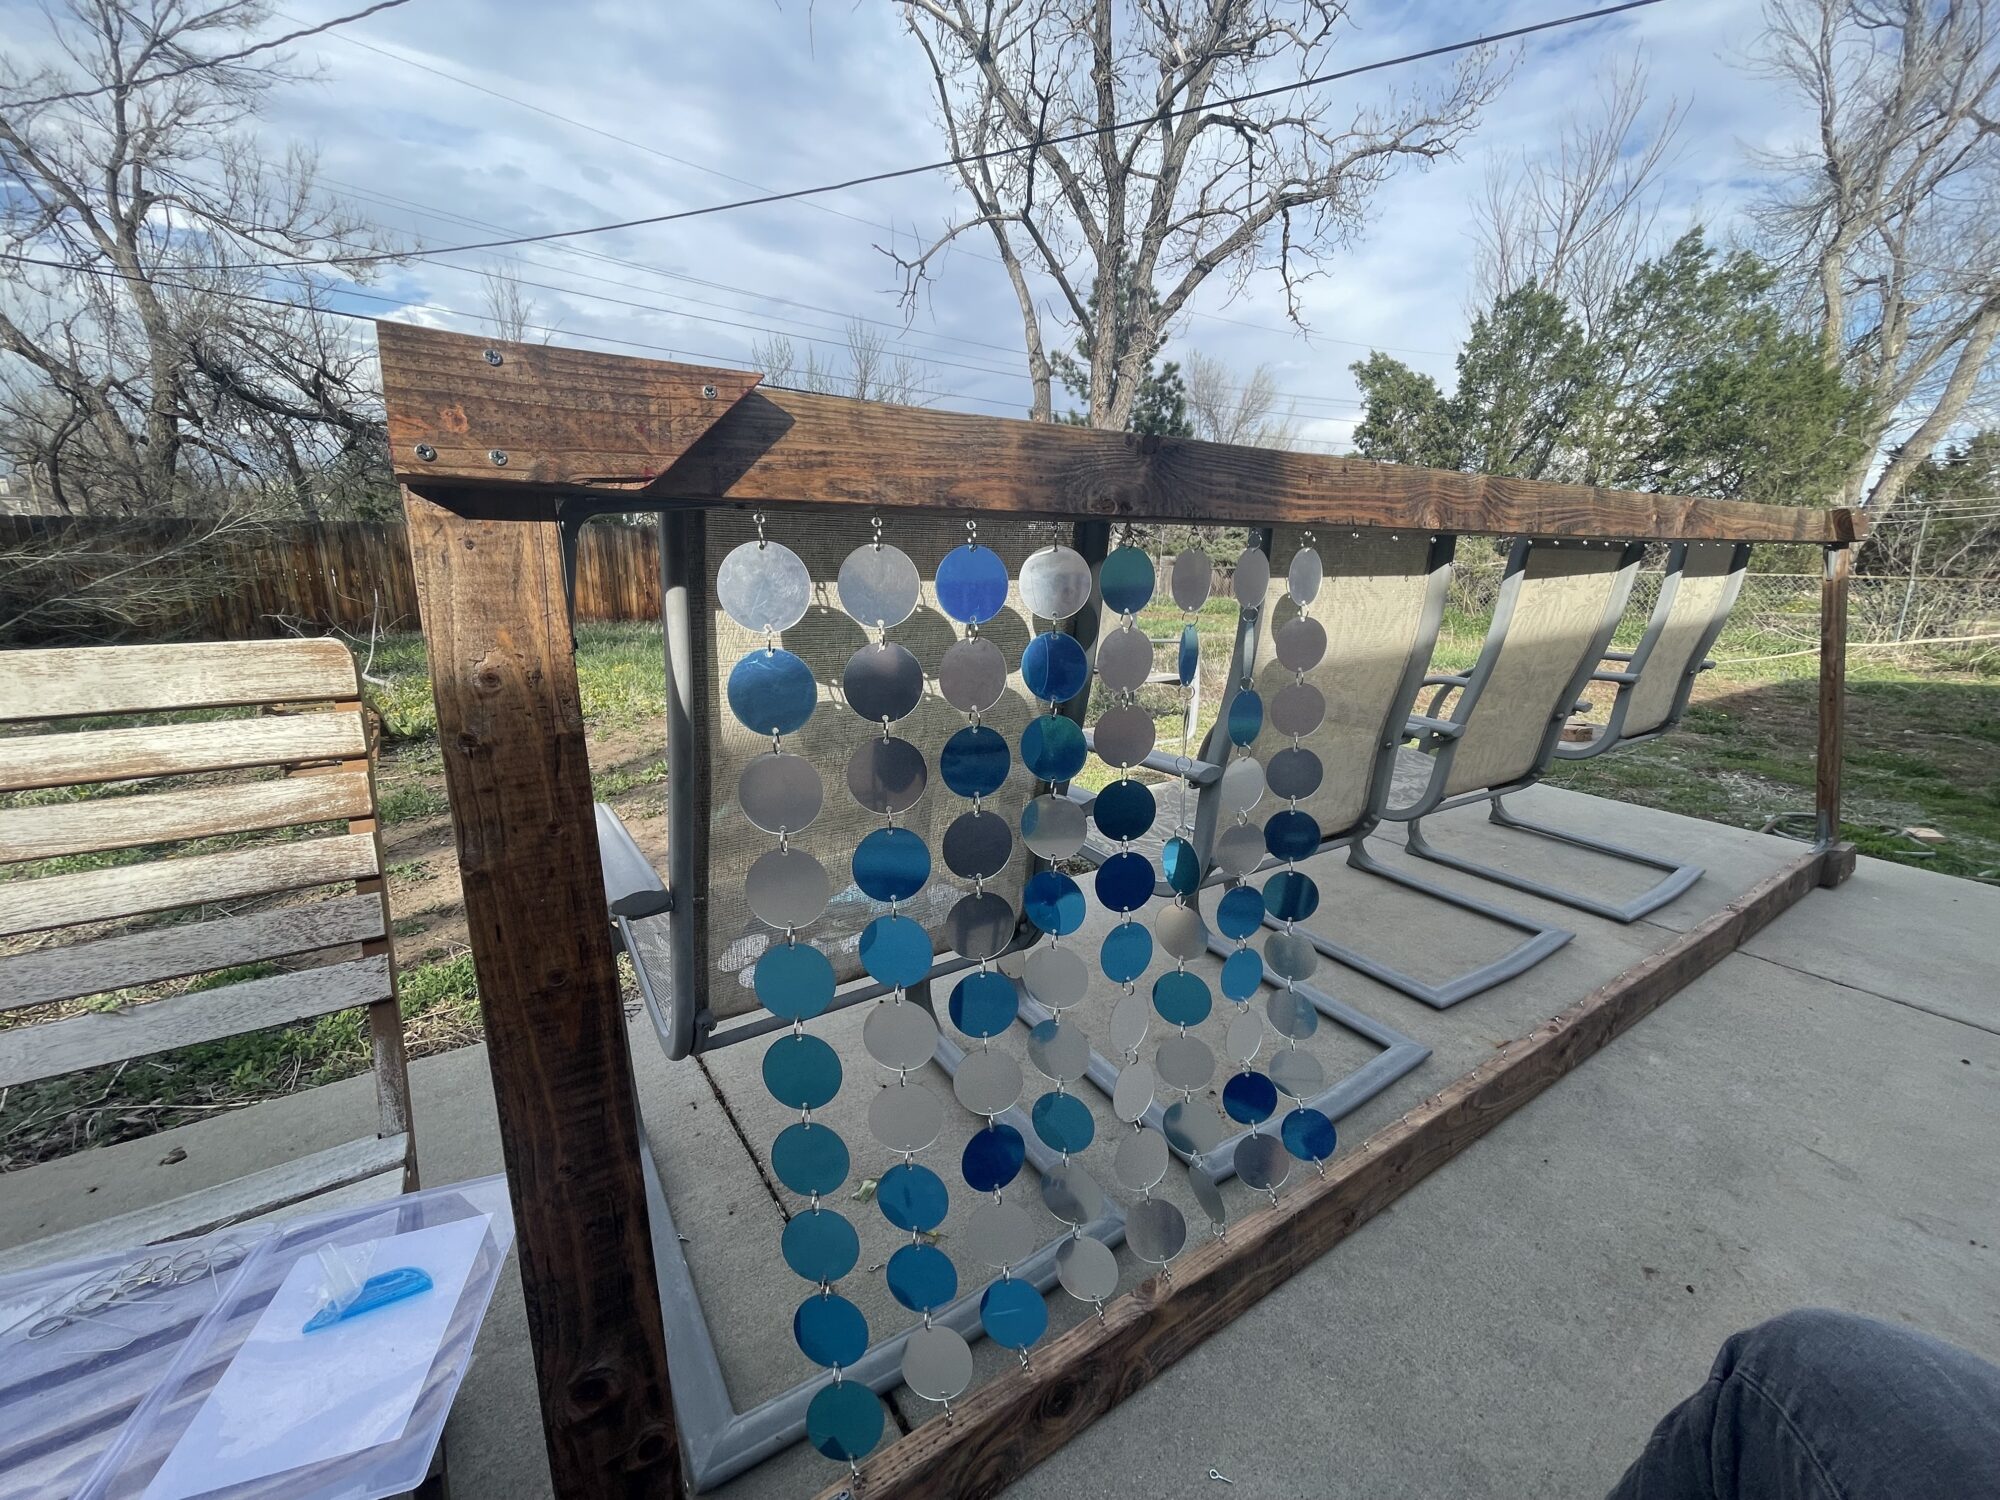
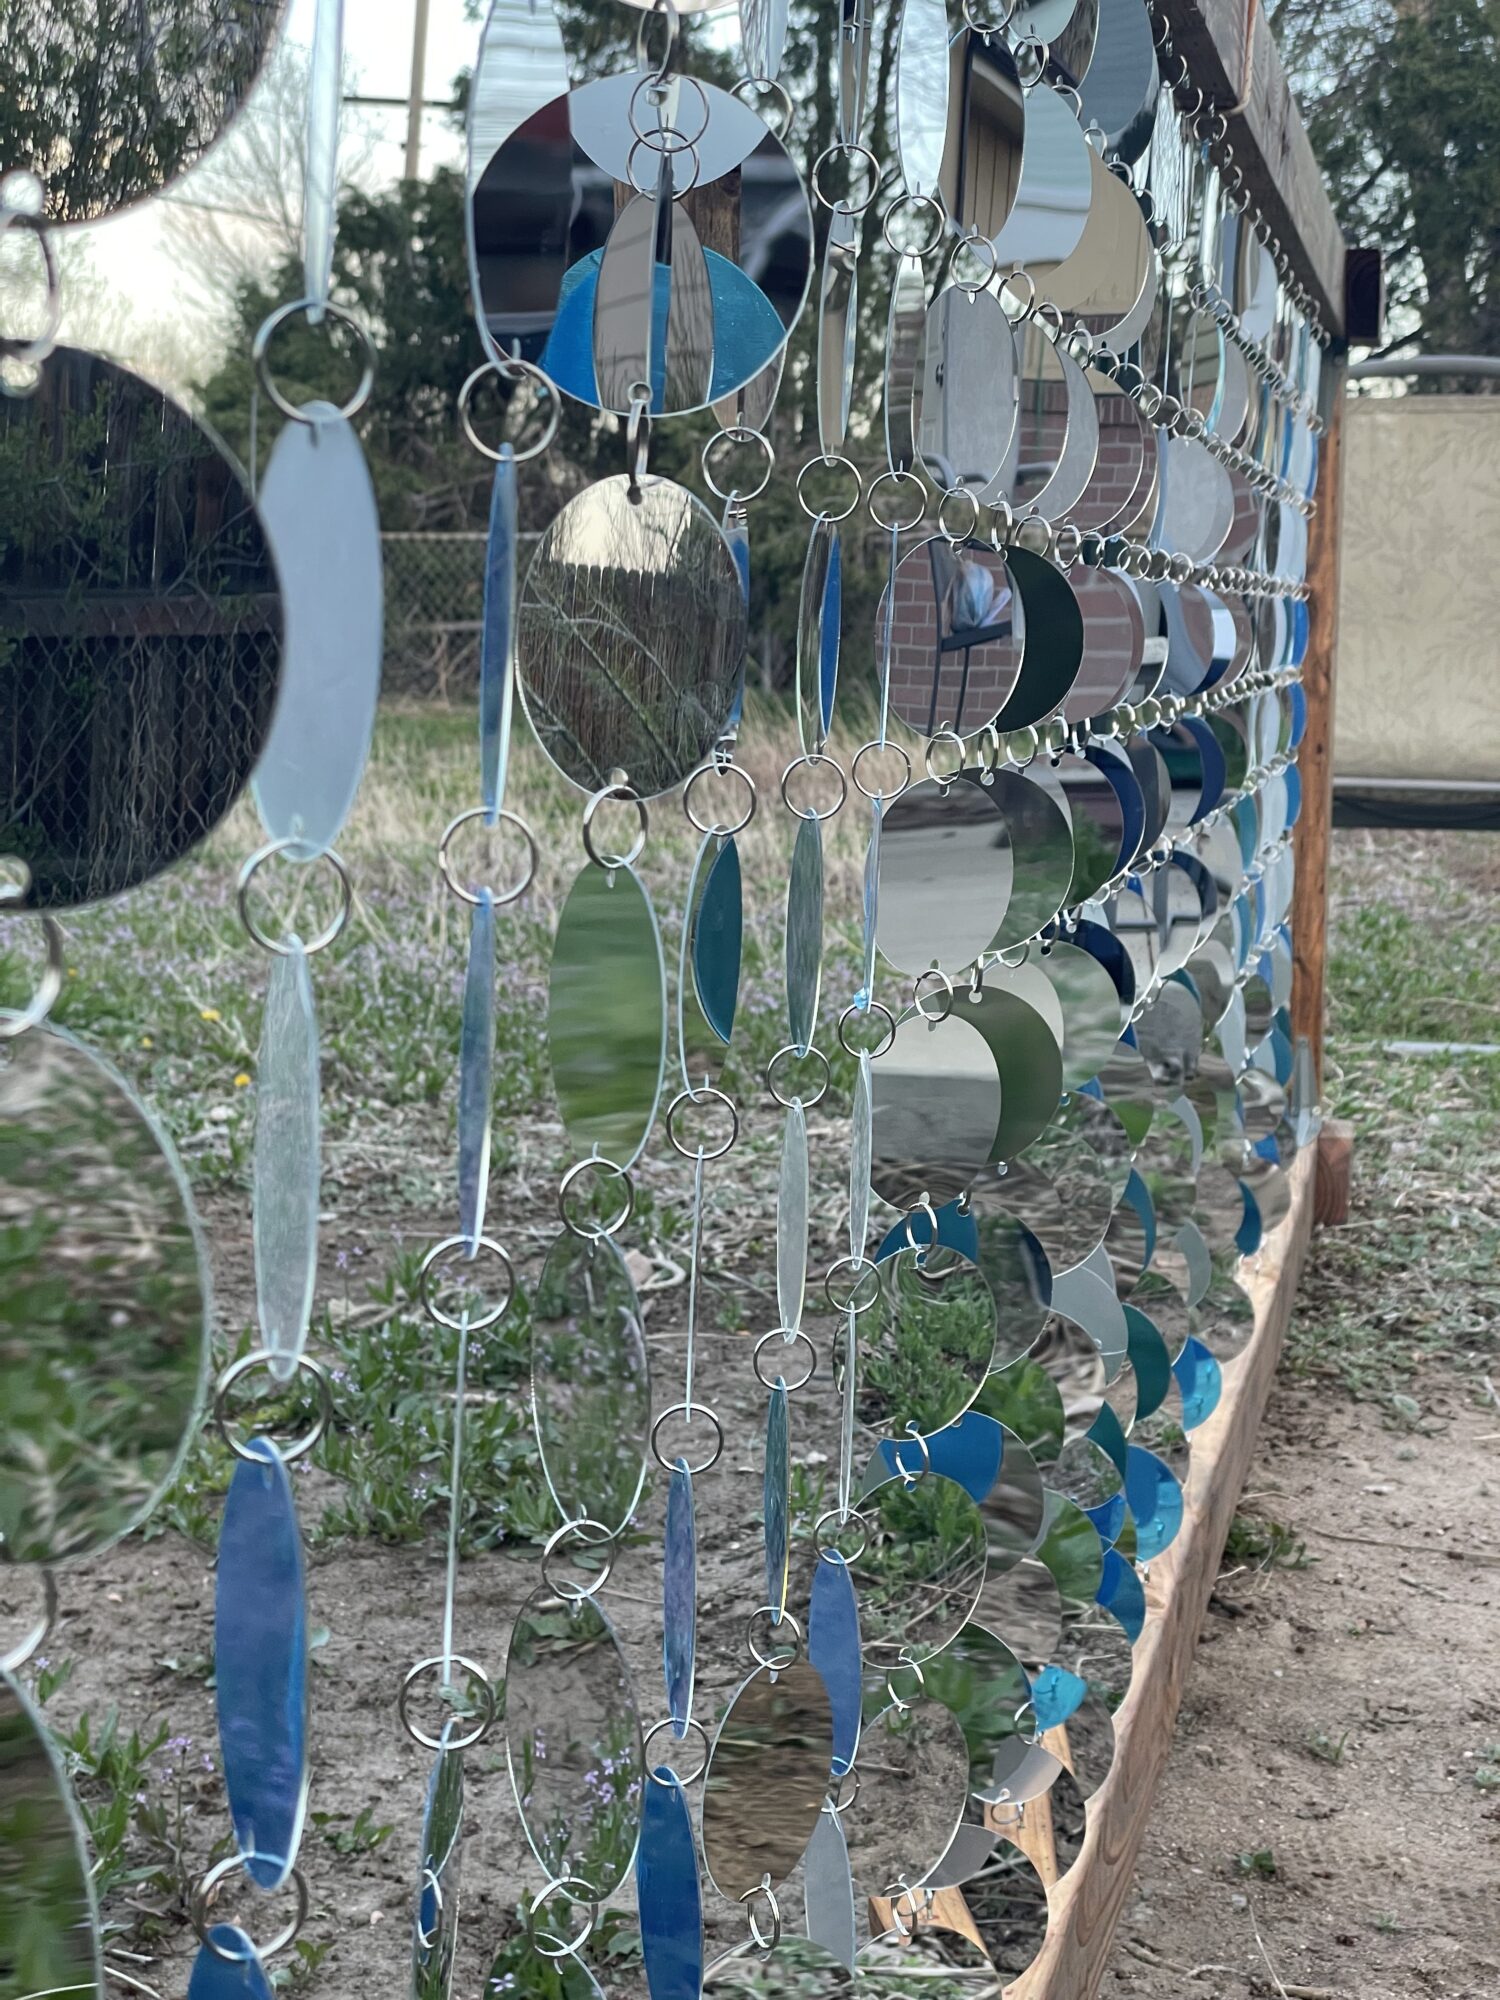
Finally once the frame was built, I attached the 30 mylar disk columns to the frame using screw eyes on both sides of the frame. Despite my best efforts with the skill saw the resulting pieces of cut wood were slightly shorter than I anticipated resulting in a bit of slack in the columns which makes them behave worse as flow visualization tools. I attempted to get around this by ordering small springs and removing one disk in each column (9 disks plus two springs). This method was not successful as the resulting columns were too stiff and acted as even worse flow visualizers.

Finally, I removed the protective film from the mylar disks to reveal the mirror like finish underneath. This task took considerably more time and was much more tedious than I had originally anticipated.
Once the film was removed and I got to view the final kinetic wind sculpture outside during a sunny day I was happy with the outcome of my work. The disks may not act as perfect flow visualizers but they are mesmerizing to look at during a windy day.
1 Comment. Leave new
Alex – it looks like the fabrication for this project took a substantial amount of time but the final product came out great. It reminds me of the display outside the ITLL and I think that scale of your version is a perfect size.