
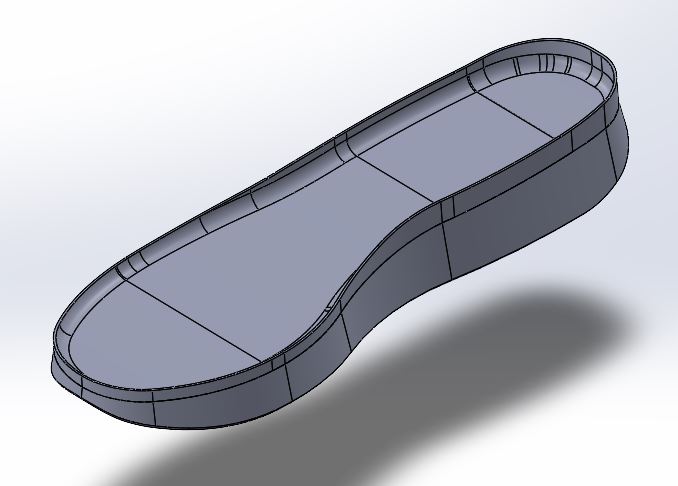
Hello everyone! Today I will be walking you all through how I went about manufacturing my recyclable running shoe midsole.
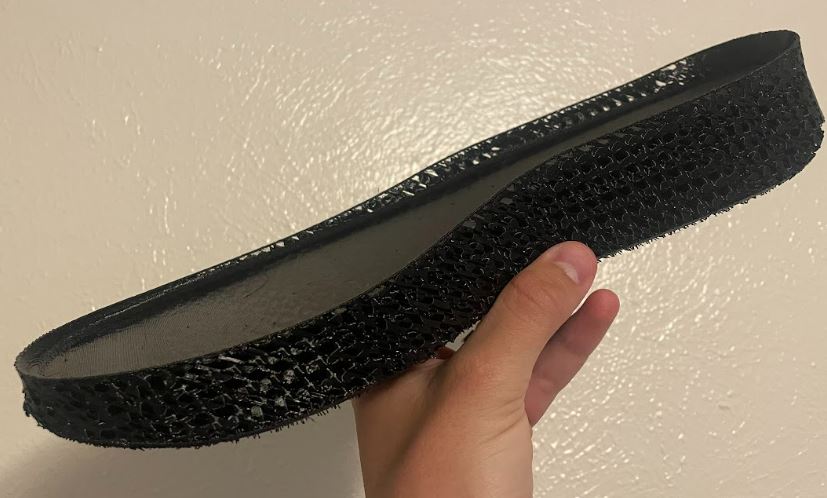
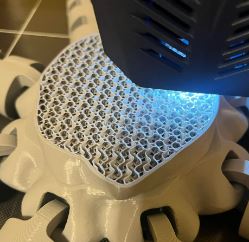
To review, I am making a 3D printed shoe midsole with a few goals in mind. The first is to achieve an organic and futuristic aesthetic in the look of the shoe. This can be achieved by exposing the interior infill that I am using in the shoe, which is a gyroid infill. This infill pattern is wavy in all directions, and this continuous curvature leans to an organic look, and the fact that many shoes have solid midsoles without any material designs make it look futuristic compared to the industry.
The other great part about gyroid infill is that it is nearly isotropic, which is extremely rare for 3D printing infill patterns. This is a necessary feature for a running shoe midsole, because the “foam” must be compressible in all directions.
The next piece is that the plastic must be recyclable to stay in line with the organic aesthetic. This works well with using TPU plastic for the design. The TPU is a thermoplastic, and is melted in order to be 3D printed. This means that it can also be melted back down into plastic after use, then purified and used again!
One of the main problems that I had to solve in building the shoe was selecting the correct infill density for the midsole. Infill density is how much of the part is filled with plastic, out of 100 percent, which would be solid TPU plastic. To solve this problem, I printed out five 3 inch by 2 inch by 1 inch blocks of TPU plastic, one at each of the following infills: 20 percent, 40 percent, 60 percent, 80 percent, and 100 percent. Immediately upon testing these, I found that even 20 percent was too heavy and stiff for the application that I was looking for, and so I had to go back and print three more blocks. One at 5 percent, one at 10 percent, and one at 15 percent. I then took the 5, 10, 15, and 20 percent blocks to my D1 cross country teammates, and asked them all to step on the blocks, and tell me which percentages felt the most like a running shoe foam underfoot. The overwhelming response to this survey was that 10 percent was a little too soft, and 15 percent was a little too firm. Because of this, I decided to print the shoe at 13 percent infill density.
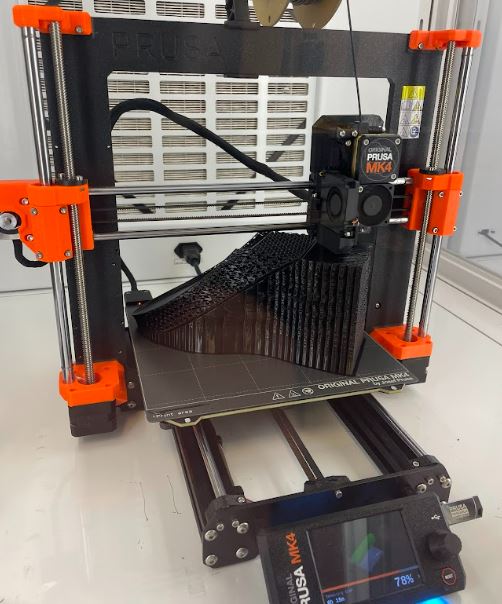
I submitted an initial print to Pat at the Idea Forge with two midsoles, one for the right and one for the left. This print was rejected because the bed size was too small, and so I had to submit just one shoe midsole for printing, and even had to print it at a 45 degree vertical angle so that it fit on the 3D printer! This caused a substantial cost increase due to all of the support material required for the angle. 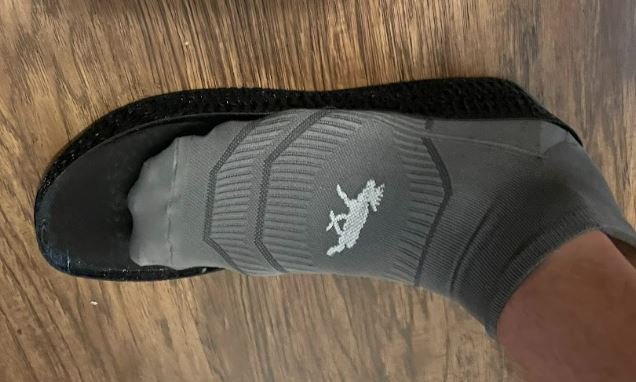
I was pretty happy with the final product! Sizing was definitely an issue, and the angle seemed to mess up some of the gyroid infill pattern on the outside of the shoe. These are both easy improvements that I can take beyond the class!
1 Comment. Leave new
I thought you did a great job telling a story that included your struggles and how you overcame them! I wonder if you are seriously considering selling these and if so how would that business model look?