

The fabrication process of my cooler fan went better than expected. I was able to get a good first 3D print, my measurements were nearly perfect, and I was able to complete all my tasks on time. Overall, the project went very well from the design process to fabricating. A few issues did come up, but the fan worked as expected and only a few cosmetic problems came up.

New to the Left, Old to the Right
Timeline
Timing for this project almost lined up with the timeline I estimated initially. 3D printing was a bit delayed by ten days due to a longer than expected design time and needing to rework several problems found when planning to 3D print. I added eleven extra days to the timeline just in case of problems, and as I guessed, I used up those days. I forgot to add fabricating to the timeline but the time used fit well into the extra days I planned for. I ended up with several days in between completely assembling it to the project deadline. With those days, I used it to touch up minor cosmetic issues, and just to overall refine it.
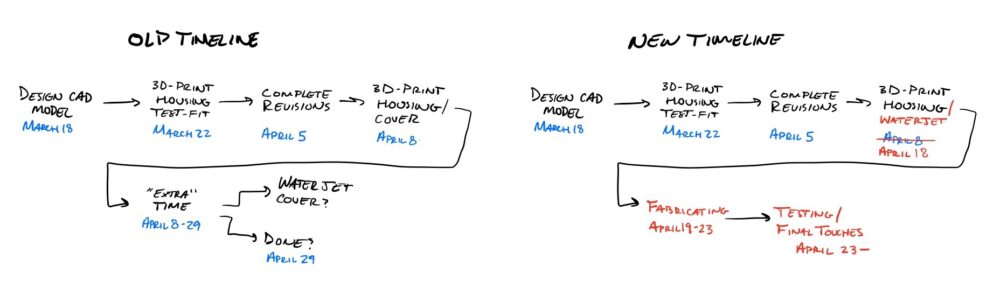
Estimated and Actual Timeline
I was also a bit delayed figuring out dimensions for some test fits, specifically for the threads and lid, heat exchanger, and other minor parts. I wanted to print these test parts to verify I had the correct measurements.
Test Prints
Fabrication- 3D Printing/Waterjet
To start fabricating, I began with 3D printing the housing using the Idea Forge printers. I initially planned to use a SLS printer with nylon filament but I didn’t realize until quite far into the design stage that it would cost nearly $200 in nylon alone. I was already over $100 into fasteners, metals, and components, so I decided to cut corners here and just use PLA with a FDM printer. The housing was printed with very few defects, and the ones that were there are hidden from the exterior. In an ideal scenario, I would’ve really preferred to use the SLS printer to get better quality prints, but I’m still very happy with what I got.
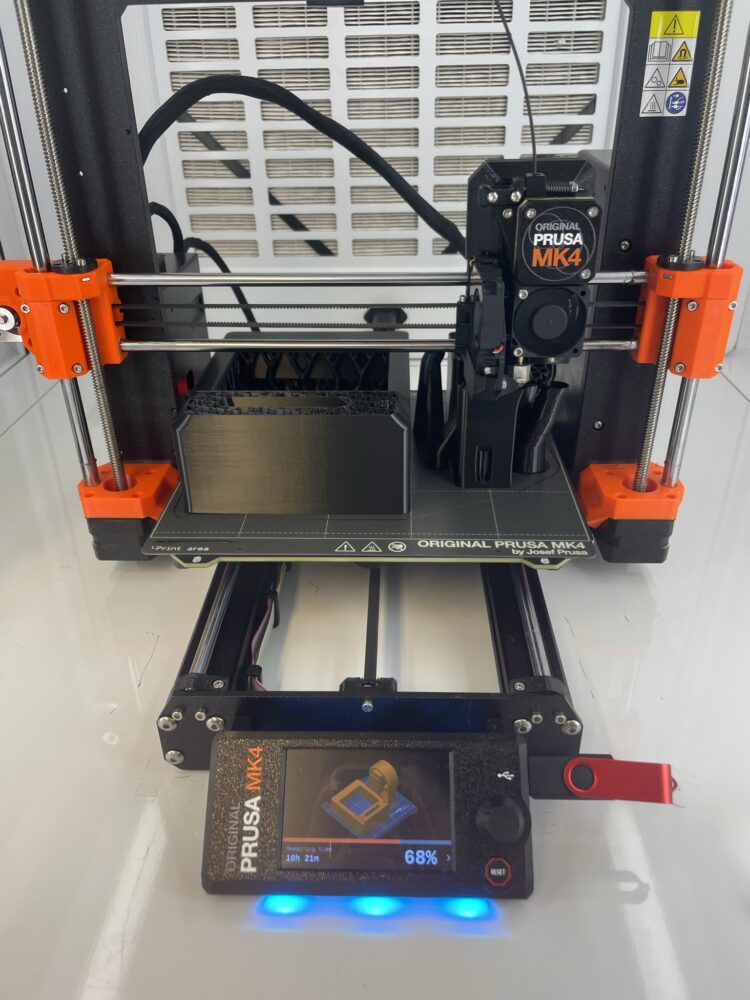
3D Printing Housing
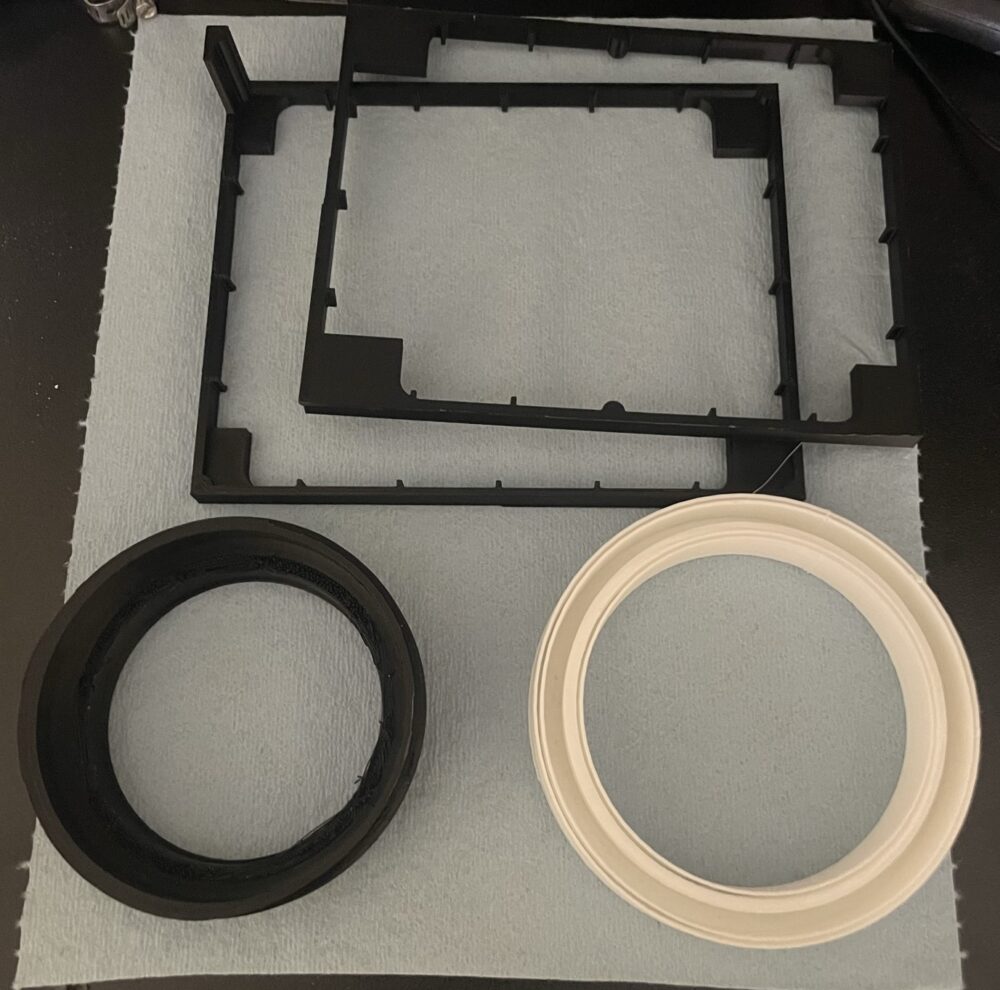
The aluminum covers were water-jetted with Idea Forge’s water cutter. I used ⅛” thickness aluminum sheet for both covers. I simply put in a request and the staff there helped me.
Fabrication- Assembly
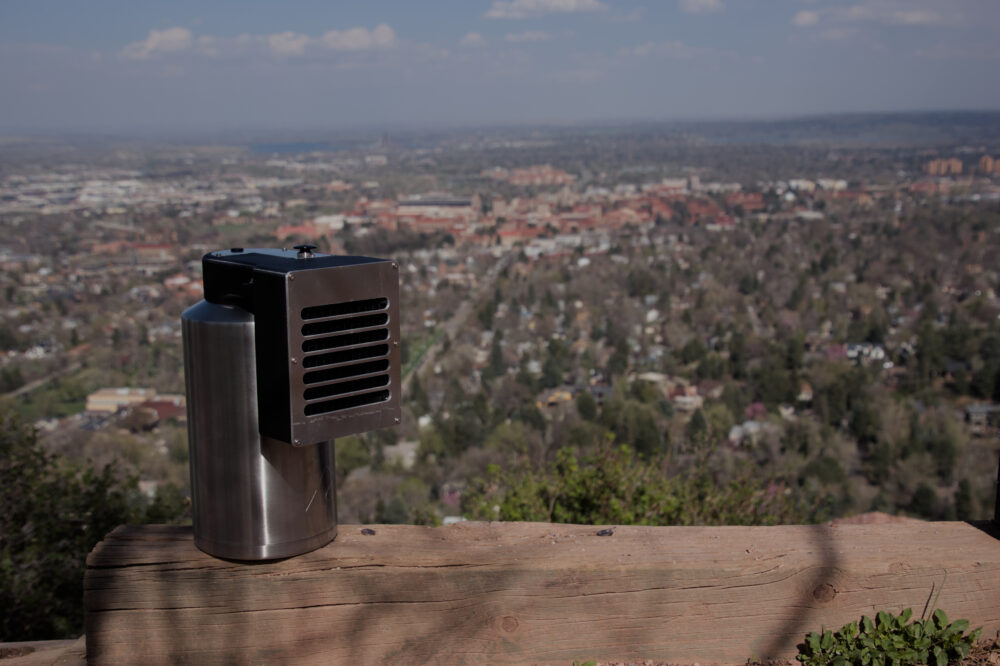
I ordered most of my parts before fabricating because I needed to take measurements of each part. I was able to connect the heat exchanger and fan together before I finished printing the housing. The most noticeable part of my project is probably the insulated cooler, simply because it’s so large, and I did not make that. The one gallon insulated jug was purchased from Walmart and is an Ozark Trail brand.
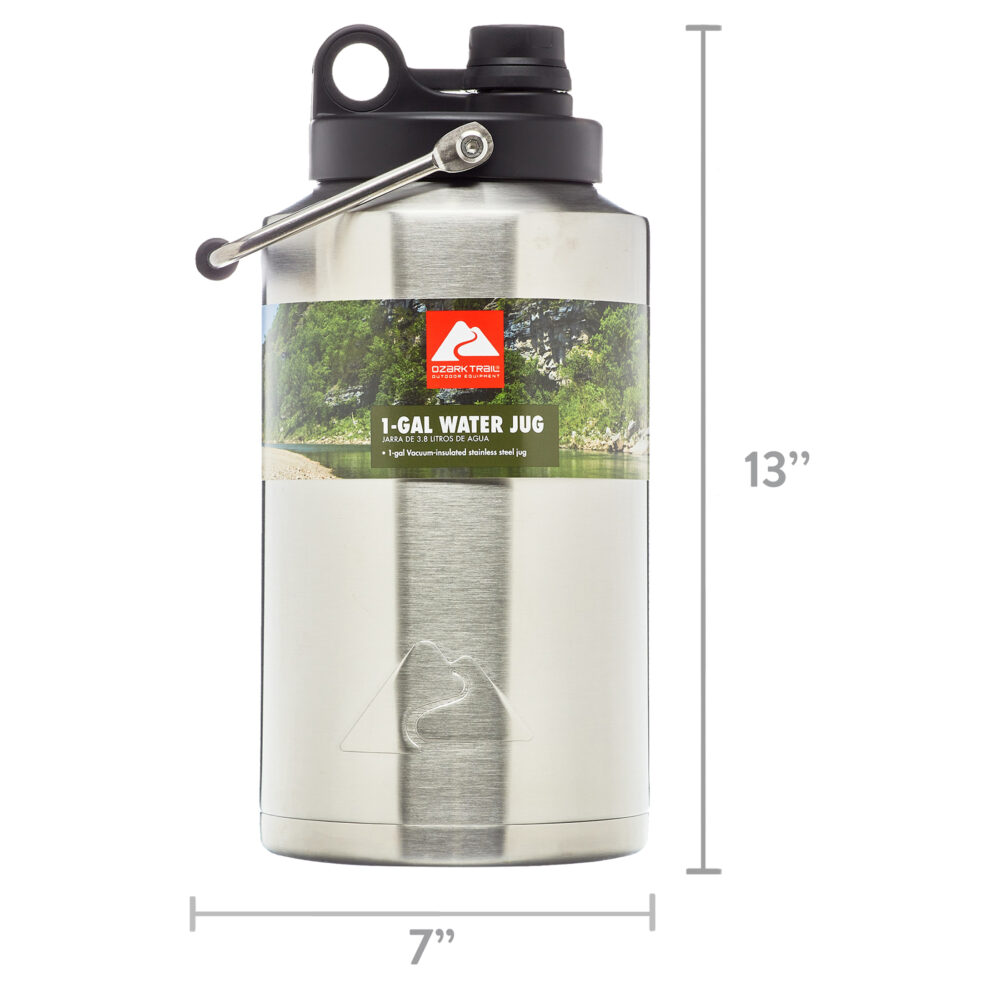
Insulated Cooler I used [1]
Once I had all my components and parts, I began to assemble it all together. I started with the housing that I print in 2 parts. I designed the housing in two because I wasn’t sure which printing technology I was going to use at first, and so I didn’t know the print bed size. I figured I would plan ahead of this possible issue and just split the part into two. I designed two holes through the parts to accommodate a bolt and nut. I found some cool low profile socket screws on McMaster-Carr that I used for this.
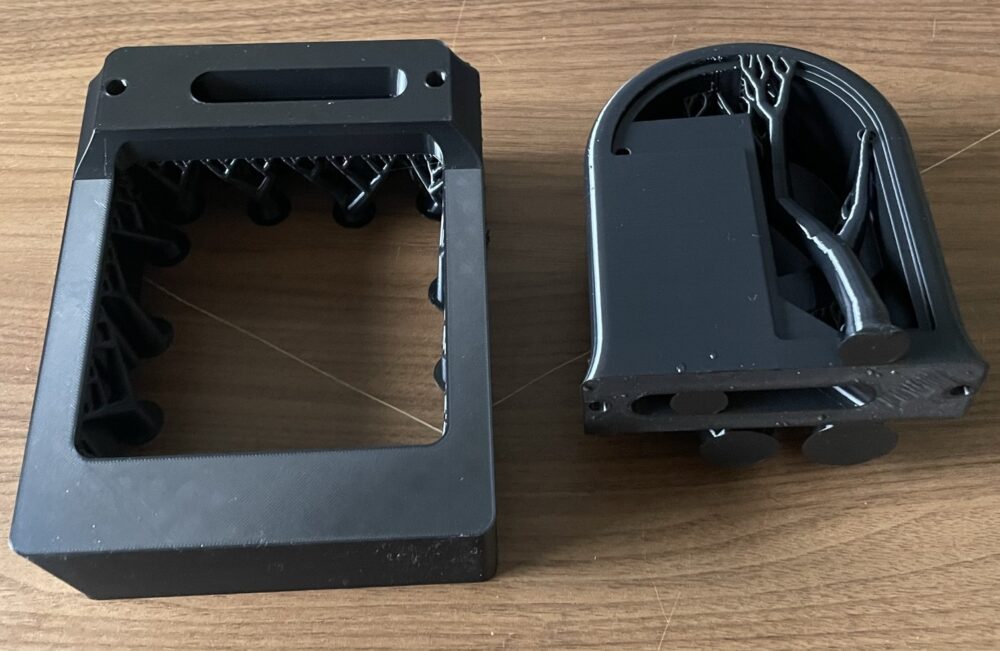
FDM Printed Housing
One of the more annoying parts of this process was inserting the hose for the water. I included channels in the housing to allow the hose to travel from the heat exchange to the pump and jug, but I used too tight of a tolerance. There is also a 90 degree bend that was difficult to navigate, but not impossible. With a little elbow grease I was able to get it in. At the same time I fished through several wires for the pump and fan. I included a hole through the channel to the “electronics enclosure” so the wires can connect to the plug and switch. I bought little rubber seals to prevent any possible water from entering into the electronics enclosure but I didn’t end up using them because the hole I made was too thick. I ended up buying silicone and filling the hole in.
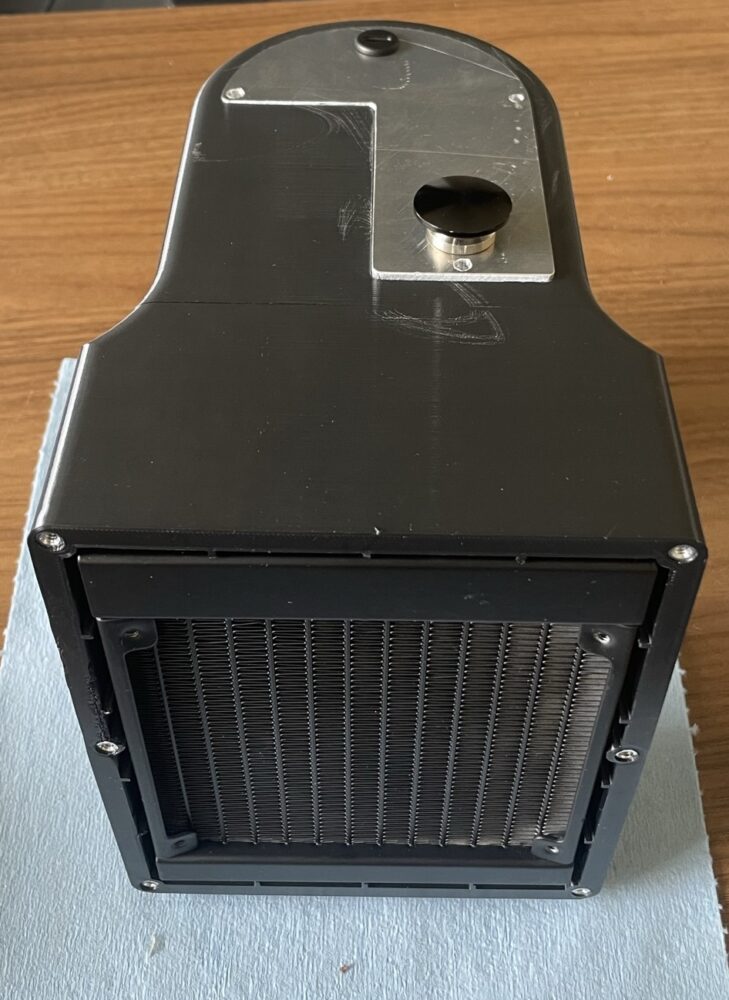
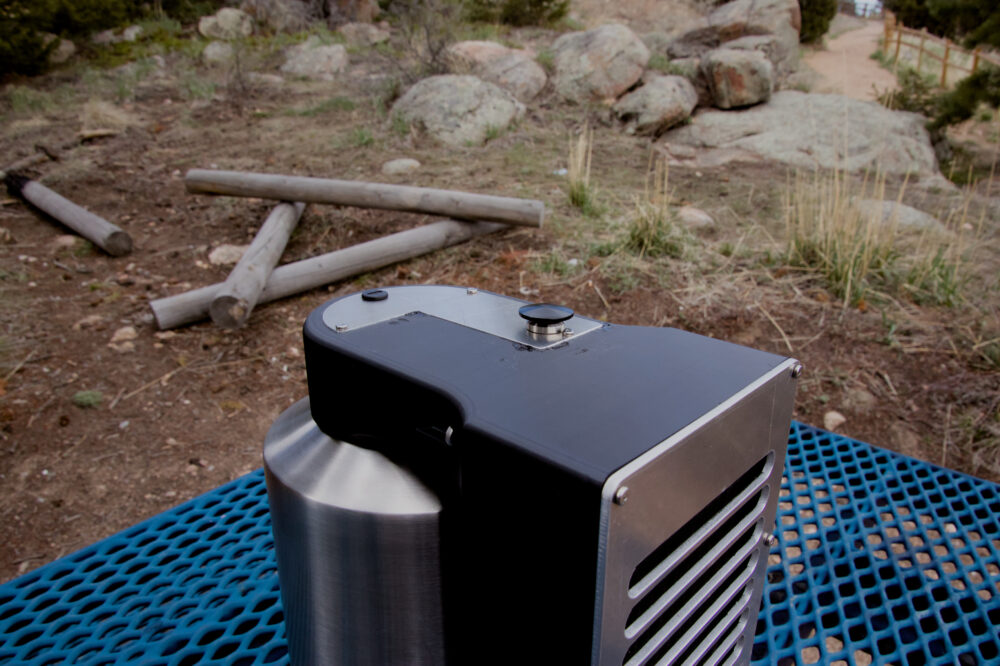
I designed a cavity that I have been referring to as the electronics enclosure. This hole houses wires and accommodates the space needed for the switch and USB port. To cover it, I used an aluminum sheet with holes cut into to fit the switch and port.
Partially Complete Housing
Similar to the enclosure cover, I used the same material on the heat exchanger cover. I decided to not fasten the exchanger to the housing, and opted to clamp it between the housing and cover. The ports are aligned with the fan to allow airflow and I spent a good amount of time filing and sanding the corners smooth.

Heat Exchanger Cover, Front Cover
The electronics are pretty simple in this circuit. It’s essentially just 5V power entering a USB-C port, connected to a pump and fan in parallel. An on/off momentary switch is added in series to the power side of the USB port. I was able to find 5V pumps and fans so that simplified the circuit even further. I bought some Noctua fans because I figured I wanted as much airflow with their quieter fans, it’s funny because my PC doesn’t even have them.
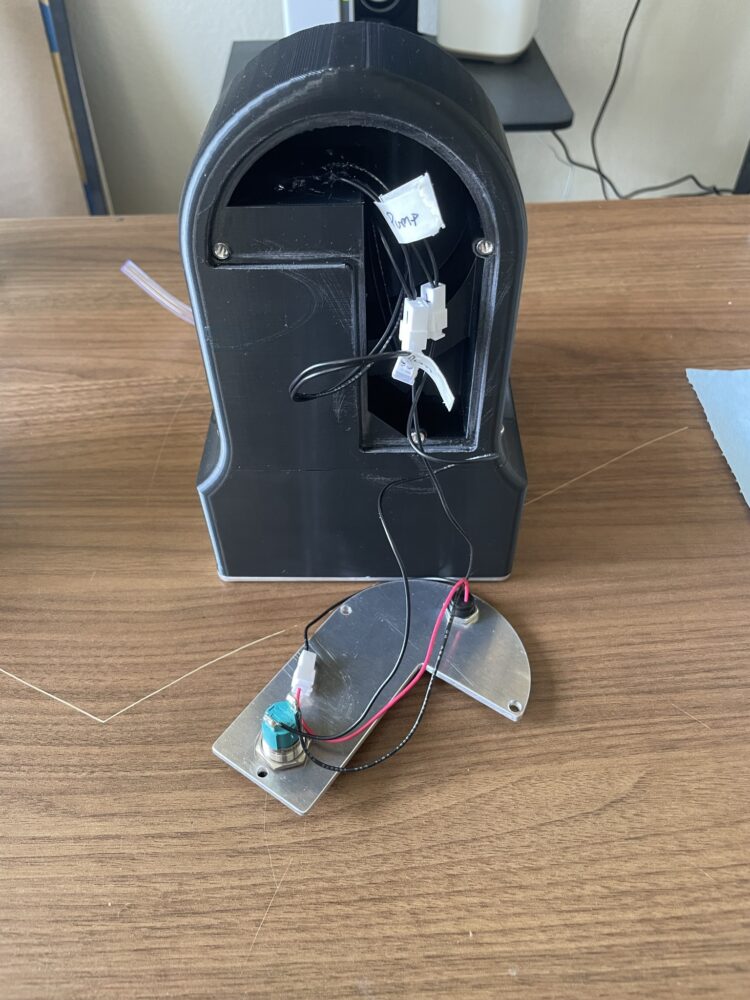
Electrical Enclosure and Components
Once everything was assembled into their own sub-assemblies, I just needed to fasten the covers to the housing. I used heated inserts to add threads into the plastic housing. This allowed me to use screws I found on McMaster. The screws are actually pretty cool, they are low-profile stainless steel socket head screws. Fun stuff.
Final Product
With all the components made and parts assembled, I ended up with a final product!
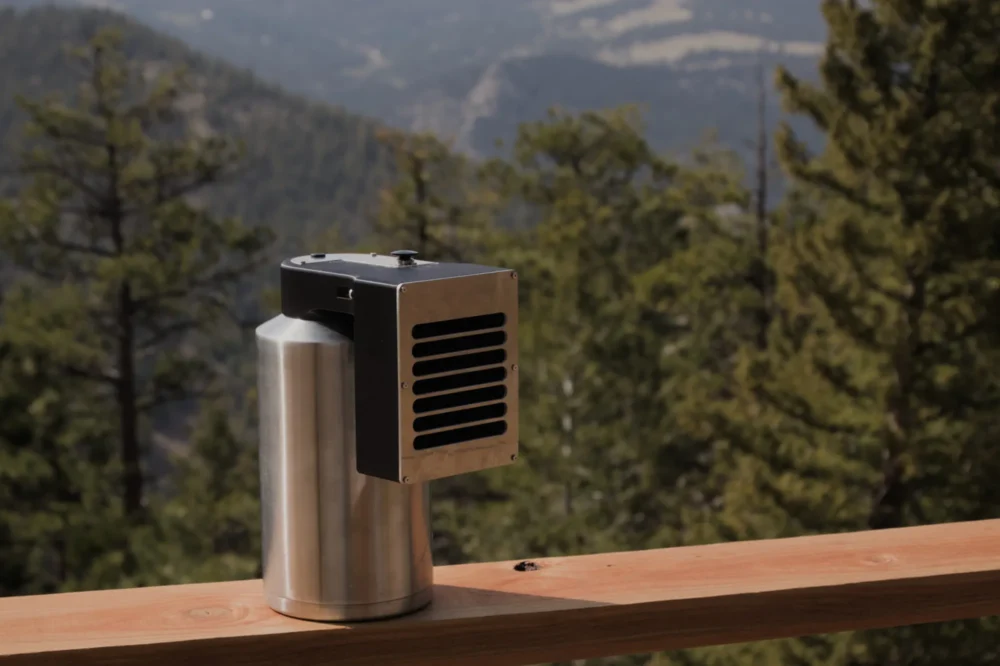
I’m quite happy with how it all turned out, I was pretty nervous on the aesthetics while assembling. A few issues appeared, for example I designed the enclosure cover a bit too large. I went back and forth slowly grinding away the cover and the housing. I ended up grinding away too much plastic on the housing and there were very noticeable holes. I ended up melting PLA filament with a soldering iron to fill it in. The finish isn’t perfect, but it is definitely better than the holes. Another issue is the heated inserts; I’m not sure what exactly went wrong but some of the screws don’t sit perfectly flush.
I tried to sand and polish the aluminum covers, but when I did a test run on some offcuts, my “polishing” was worse than the huge scuffs already on it. I decided to hold off on that and improve this certain skill until I make another attempt. If your really, really far, it looks pretty good!
The biggest improvement I would like to tackle later is the threaded cap. To seal the housing to the jug, I have to screw it on, which causes the hose inside to tangle and sometimes get cinched. I think if I were to completely revise this project, I would use a clamping mechanism to attach the housing to the jug. I want to eliminate the need to rotate the housing and just “plug” it in.
If I do decide to implement these changes, I think I would actually use a SLS printer. Although it is pretty expensive, I think if I got to the point of wanting another version, it would be to sell it or something. Basically, the current one I made is good enough for personal use.
Final Thoughts
The aesthetic I was aiming for was minimalism but combined with the look of ruggedness from other outdoor products. I also wanted to match the polished aluminum jug, so using metal for the covers added that rugged look. I have noticed it does look a bit industrial rather than minimal, but I think the principles of minimalism are there: simple lines and curves, minimal material use, and some would consider, void of character(but I think the metal fixes this problem compared to true minimalism).
Citations
[1] https://www.walmart.com/ip/Ozark-Trail-Stainless-Steel-1-Gallon-Water-Jug/285297047?wl13=5341&selectedSellerId=0
1 Comment. Leave new
Hey Kevin, its been awesome following the progress of your project, I think the final result turned out super cool and you should be really happy with what you created. Would be cool to get some temperature data to show how effective it works.