
Step 0: Planning
The first thing I did was to find a kite plan to follow. I eventually settle on the Sceptre Kite designed by David Holt. Using that plan I calculated how much fabric, bridle line, and ribbon I needed to purchase. Next I determined an order for what all the steps needed to sew the kite:
- Buy Materials
- Cut Stencils
- Cut Fabric
- Hem Front Edges
- Hem and sew a ribbon into front of profiles.
- Cut bridle loop ribbon and align on panels
- Align panels with profiles the sew bottom layer.
- Sew on dots and profiles that are mid-panel
- Cut holes in each profile
- Sew top panels on
- Hem Back Edge
- Cut and tie bridle line
- Add the flight line
Step 1: Buying Materials
I bought all the fabric I used from Into the Wind and will likely by the flight line there as well. The bridle line I purchase from an online store call Fly Market Kites which was recommended by someone from Into the Wind. All the ribbon and thread I used was supplied by the Idea Forge.
Step 2: Cut Stencils
The stencils were laser cut from cardboard using the laser cutters at the ITLL. I made the patterns for cutting in Corel Draw using the .png images provided by my kite plan and then adding hem allowances to the dimensions. The cardboard I used was a slip sheet used on pallets from Costco. The cardboard was thin and with one sheet I was able to make all my stencils so they were consistent.
Step 3: Cut Fabric
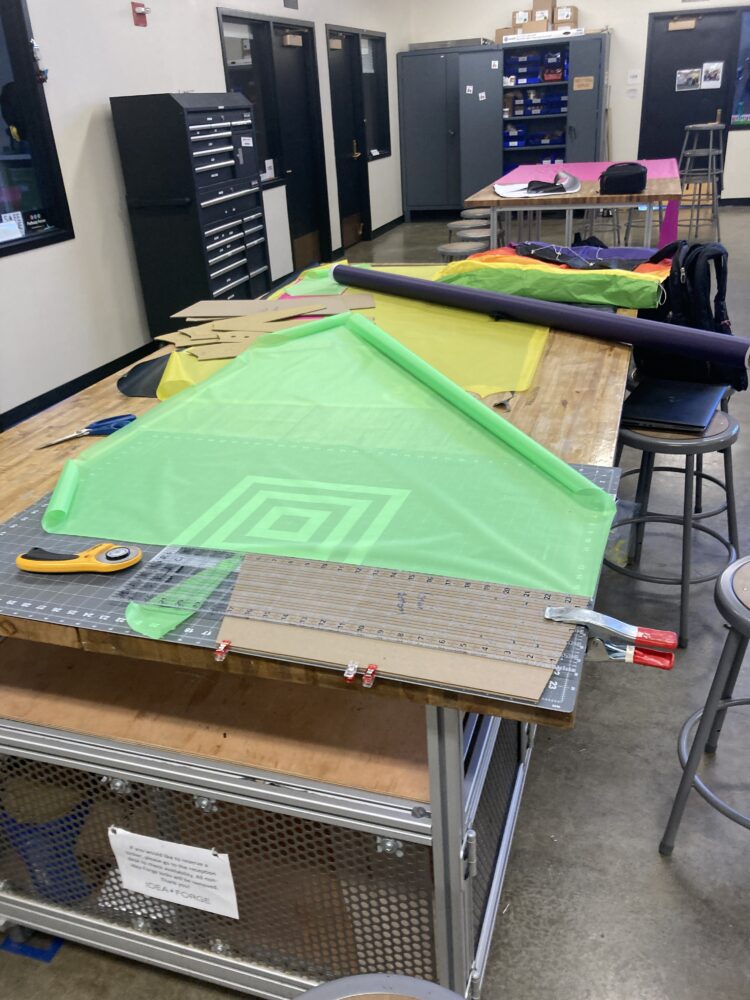
I used the cardboard stencils with an acrylic sheet clamped in place on top so that I wouldn’t cut into my stencils and had a rigid surface to run the roller cutter blade against. Cutting was time consuming but I got faster as I became more confident and practice at setting up the fabric and stencils.
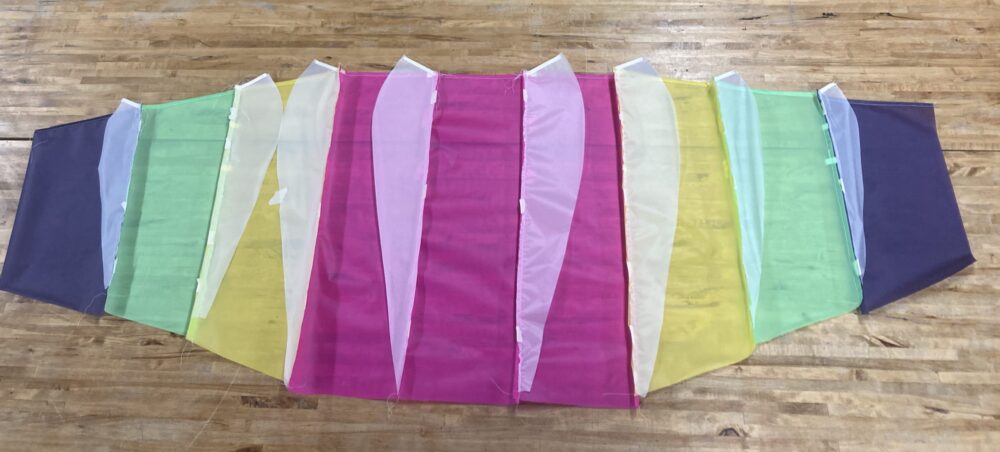
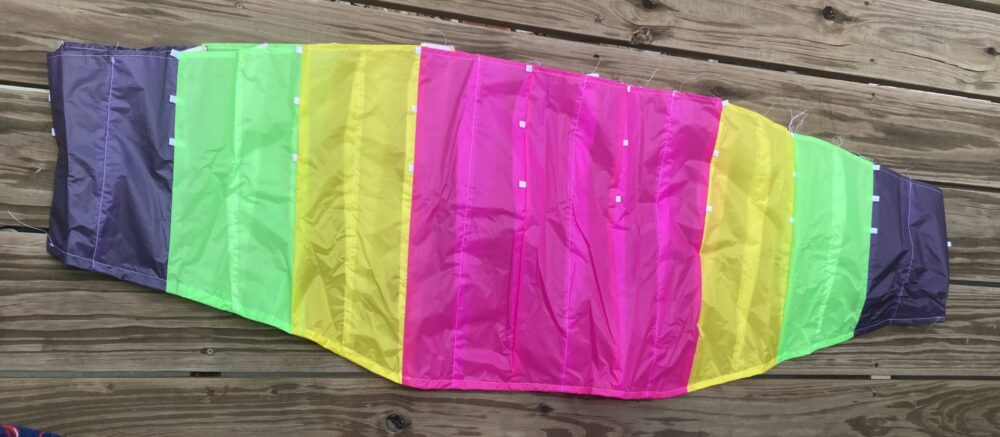
Once the colored panels and some of the dots were cut I was excited to visualize the physical product by laying out the pattern on a table.
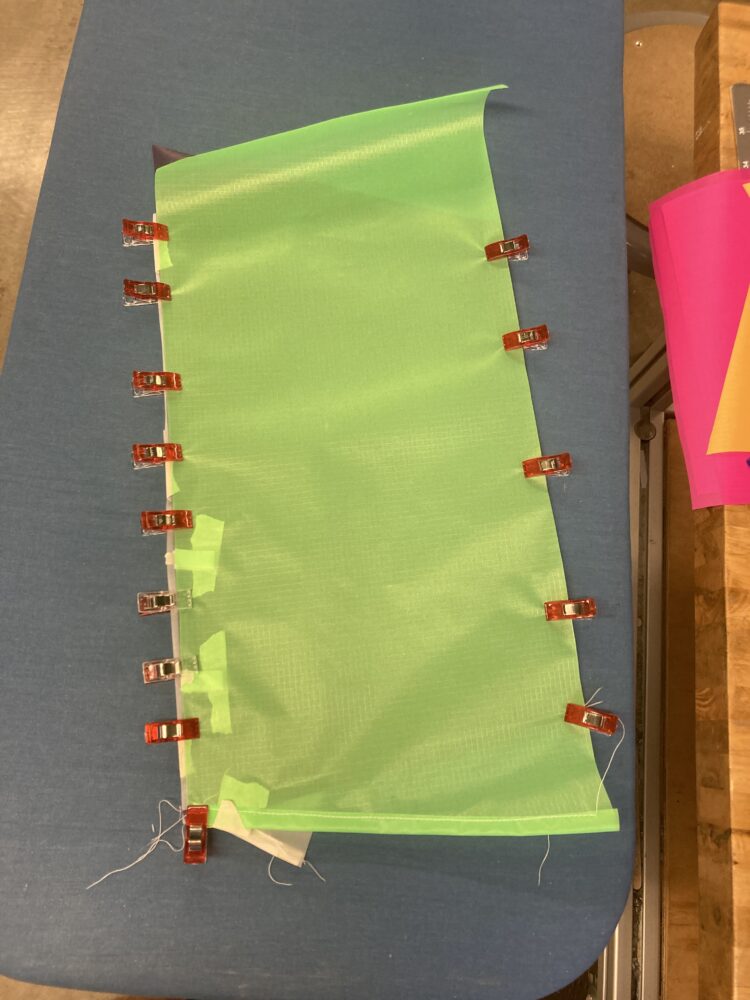
4. Hem Front Edges
Before sewing the pieced of fabric together I hemmed the front edge of all the colored panels. This was also a good way to get more practice sewing with this fabric before getting to more complicated seams.
5. Hem and sew ribbon into front edge of profiles
The Sceptre kite pattern didn’t include this step, however while Josh Colyer and I were investigating how my friend’s parafoil kite was made we noticed that the front edge of every profile had ribbon sewn into the hem. We decided it was there for a reason so I did the same for all my profiles.
6. Cut bridle loops and align with panels
The bridle loops were made from folded ribbon that was sew in place between panels with the loops ending up on the outside of the kite. I taped the bridle loops in place so I didn’t have to worry about them moving while I aligned the profiles with the panels.
7. Align profiles and panels then sew bottom layer
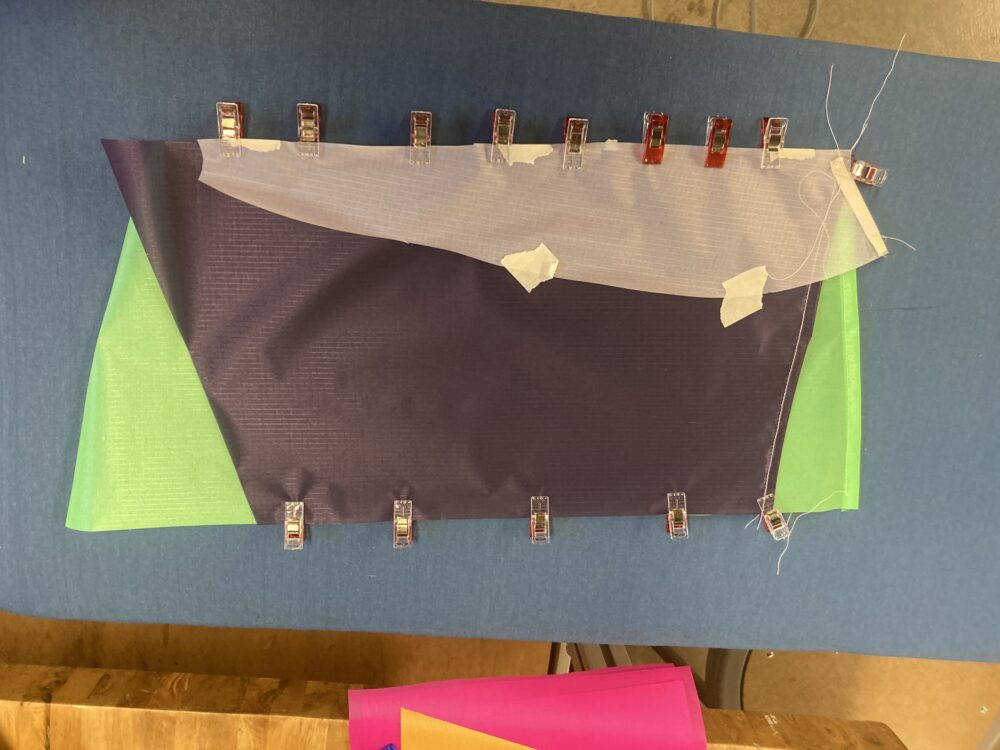
At each seam there were two colored panels and one profile with the bridle loops taped in place on one of the panels. These stacks proved to be slippery but with lots of clips generally stayed in place for sewing. I also used masking tape to hold pieces of fabric together that were not being held in place with clips well.
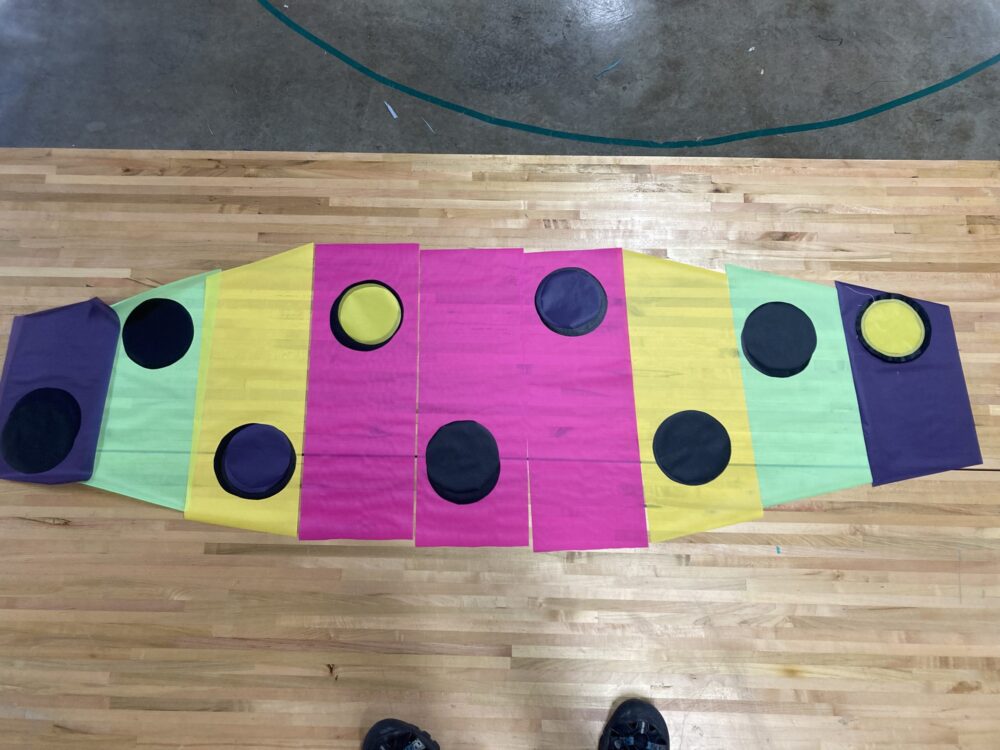
8. Sew on dots and profiles that are mid-panel
At this point in the project I had already spent about 6 hours cutting materials and 5 hours sewing. I liked how my kite was starting to turn out so I was hesitant to make any choices that would lead to a sewing mistake ruining the final product. I made the decision that sewing on the dots as planned would be a bad idea. I would have to learn a new sewing style (applique), the applique dots had a higher chance of me making a hard to repair hole in my kite, and I did not have unlimited time. I committed to this decision by starting to sew profiles across the midsection where I was planning to sew the dots. In my planning I would be sewing over the dots, but my plans were changing.
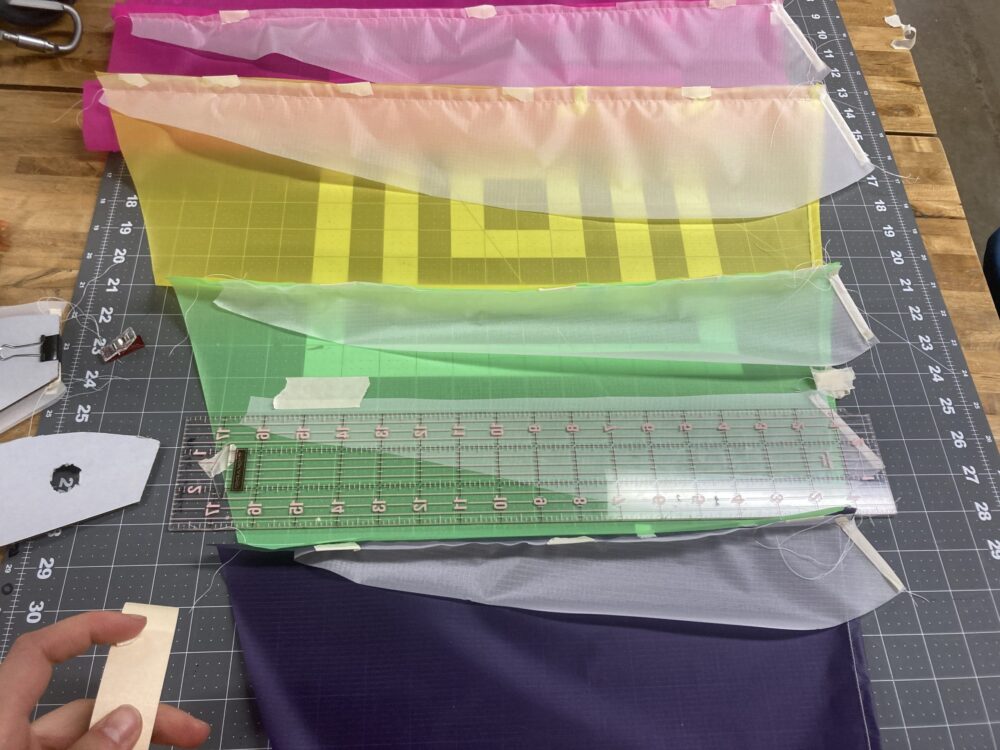
To sew on the profiles that were attached at the centerline of each panel I used a lap seam. Since clips were not going to work and I didn’t want to put pinholes in my kite I taped the profiles in place. The profiles I located by folding the panel in half with the seams align and the placing the line I wanted to sew along at the crease. In the image above the acrylic sheet marks where I wanted to sew.
9. Cut holes in each profile
All the internal profiles (the purple edge ones are solid) have three holes to help inflate the neighboring pockets. To cut the holes I used a pencil to trace the circles and then used fabric scissors.
10. Sew top panels on
While the bottom of the profiles have straight edges the top is a curve. This meant lining up the two straight edged colored panels and the curved profiles for sewing quite difficult. I essentially had to pleat the excess material of the profiles as they were pinned in place. This was a very time consuming step. While the entire bottom of the kite was sewn in about 6 hours, sewing the top ending up taking close to 10 hours, mostly due to time spent aligning fabric for sewing and pauses in sewing to realign all the pieces.

The last seam was hard to sew. To make sure the stitches and seam allowances are on the internal side of the kite the already sewn section was rolled up and then the two panels I had left to sew were sewn around the roll. This was difficult because due to the profile shape the further I sewed the smaller the opening the roll could fit in became. I was also nervous that I would accidentally sew into the roll which would be detrimental to the success of my kite. The kite sewn in this state was inside out so after I finished sewing I turn it back to the right side out.

11. Hem back edge edge of kite
The last step for the sewing machine was to the hem the back edge of the kite. The hem closes the pockets allowing the kite to hold air. I decided to hem it twice (not sure if there is an exact name) because I wanted to make sure it held and that is what the kite I was using as a model did. Having two parallel meant it was easy to tell that I was not sewing straight in some sections but overall I was proud of my work. When I went to Into the Wind to receive advice about buying a flight line the kite enthusiast helping me complimented my stitching which was exciting. He did say there is a tool I could get that attached to the foot and helps with fabric alignment for having straighter stitching in the future.
As I approached the end of sewing I started cleaning up the hanging threads but it was a bit of a time consuming process since I forgot to use a back stitch to secure the start of each seam until I was working on the top of the kite. To make sure my seams do not come undone I have been tying knots before cutting the loose threads off.
12. Cut and tie the bridle lines
The bridle line I am using is a Dacron sheathed Spectra core line that is rate for 56 lbs. I decided to follow the bridle pattern shown in the Spectre kite pattern because I had all the dimensions for it. To measure the lengths I needed I started by measuring the amount of string taken up by the knot so I would know how much extra length to add. To do that I measured the length of a tied know and then marked either side of the knot with a wax pen. After untying that knot I was able to determine how much extra line was wrapped in the knot. The extra length I needed to add to the line was the length of the knot untied minus the length of the knot tied.
Since I needed ten lines that were 20 cm long with loops on both ends I used a measuring tape with masking tape marks of how long I wanted my lengths to measure so I could make them identical without thinking too hard. All the bridle lines are secured to the kite with a Lark’s head knot. Each of the three bridle lines between a given panel are then looped together with another Lark’s head and another length of bridle line.
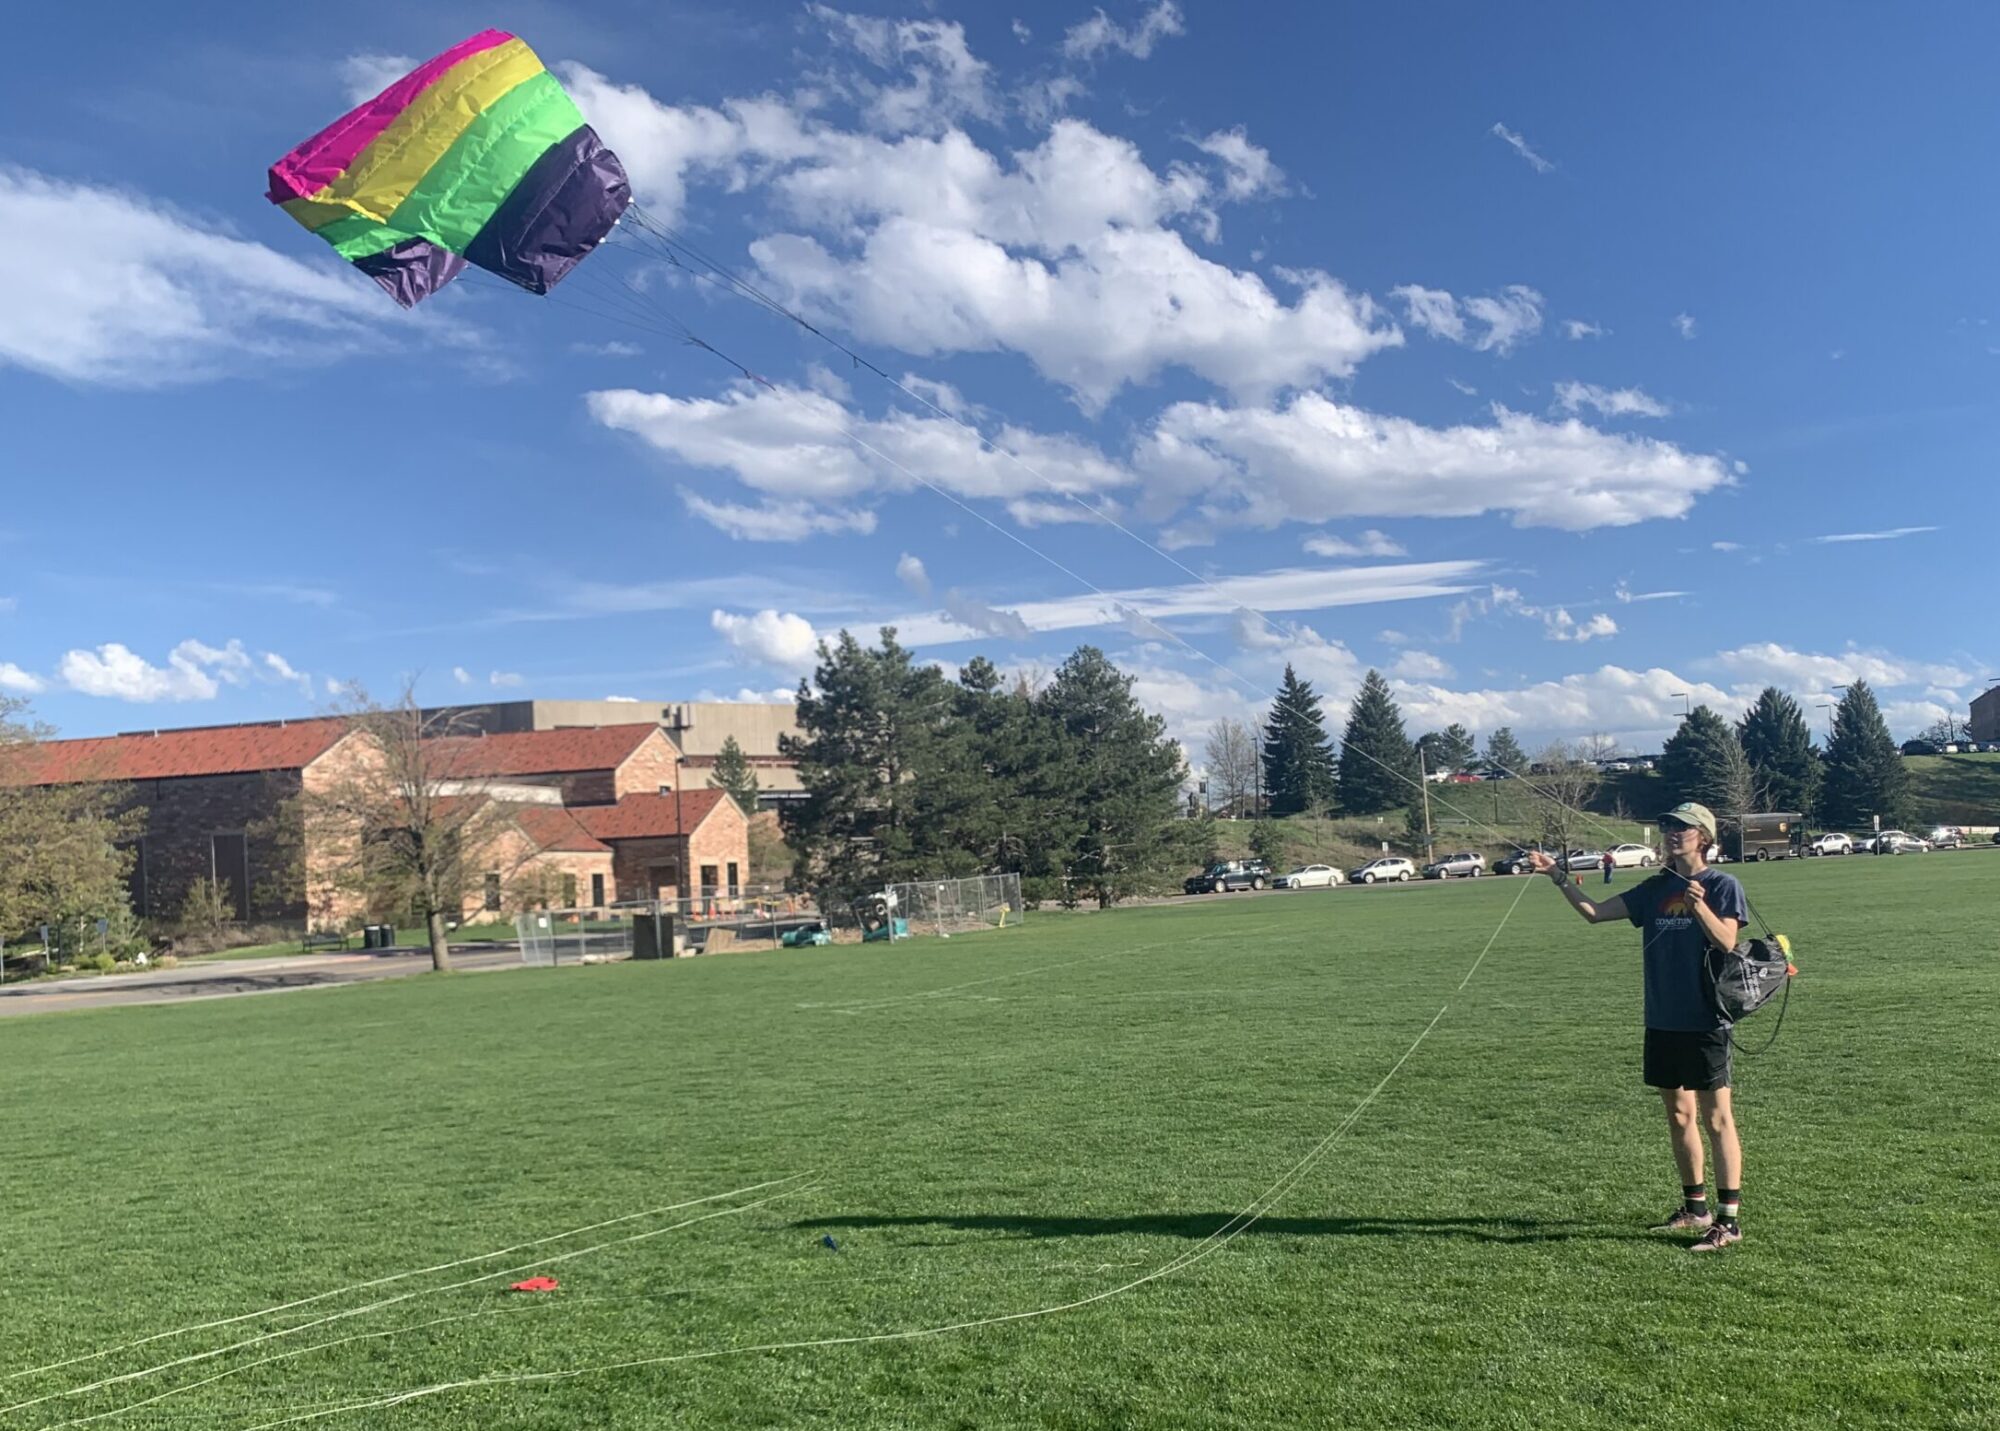
13. Add the flight line
The final step was to go fly my kite! After going to Into the Wind to buy a flight line and deciding I wasn’t sure how nice of a fligh line I wanted I decided to start flying my kite with the flight line from a different kite. Th flight lines are attached with Lark’s head knots so they are easy to interchange.

1 Comment. Leave new
Hi Abigail! I think your kite looks great! I understand not wanting to add the dots–it sounds like you had put in a lot of work up til that point, and the kite looks wonderful without them as well. Maybe there will be a little wind on expo day so you can demonstrate it! Nice job!