
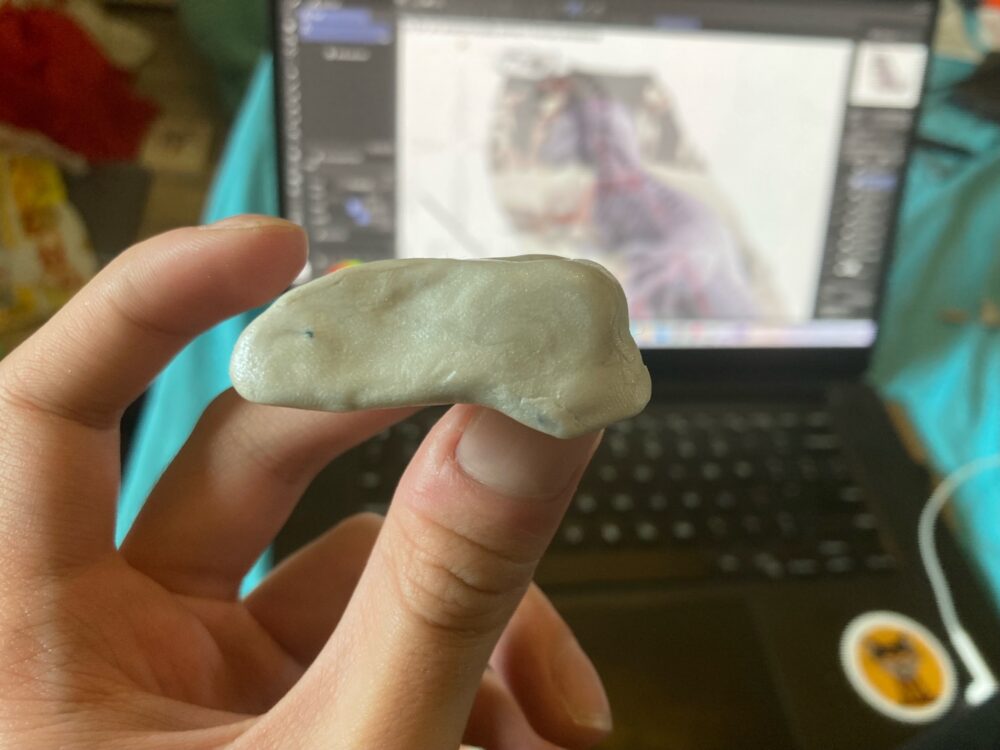
Before starting on the final puppet, I wanted to conduct some tests to make sure the materials I was using would be suitable for the project. First, I ran a test to see which brand of clay would be best for the head sculpt. It would need to be durable enough to have an articulated wire run through it. I made a small test sculpt with a basic wire hinge using the two clay brands I had in mind to see which one could hack it.
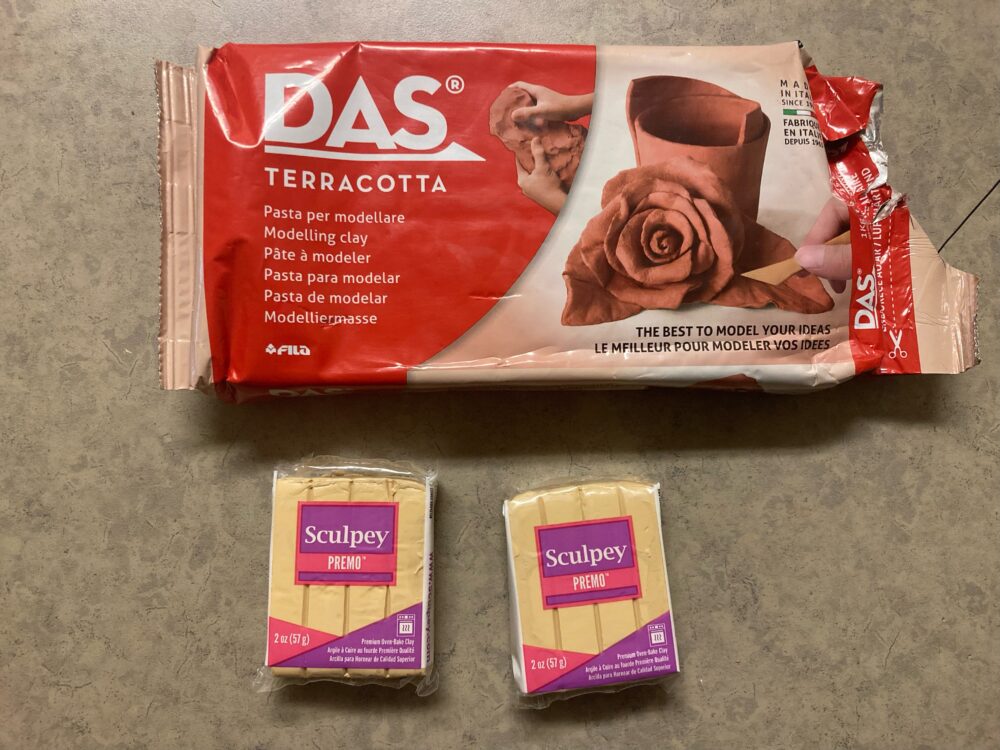
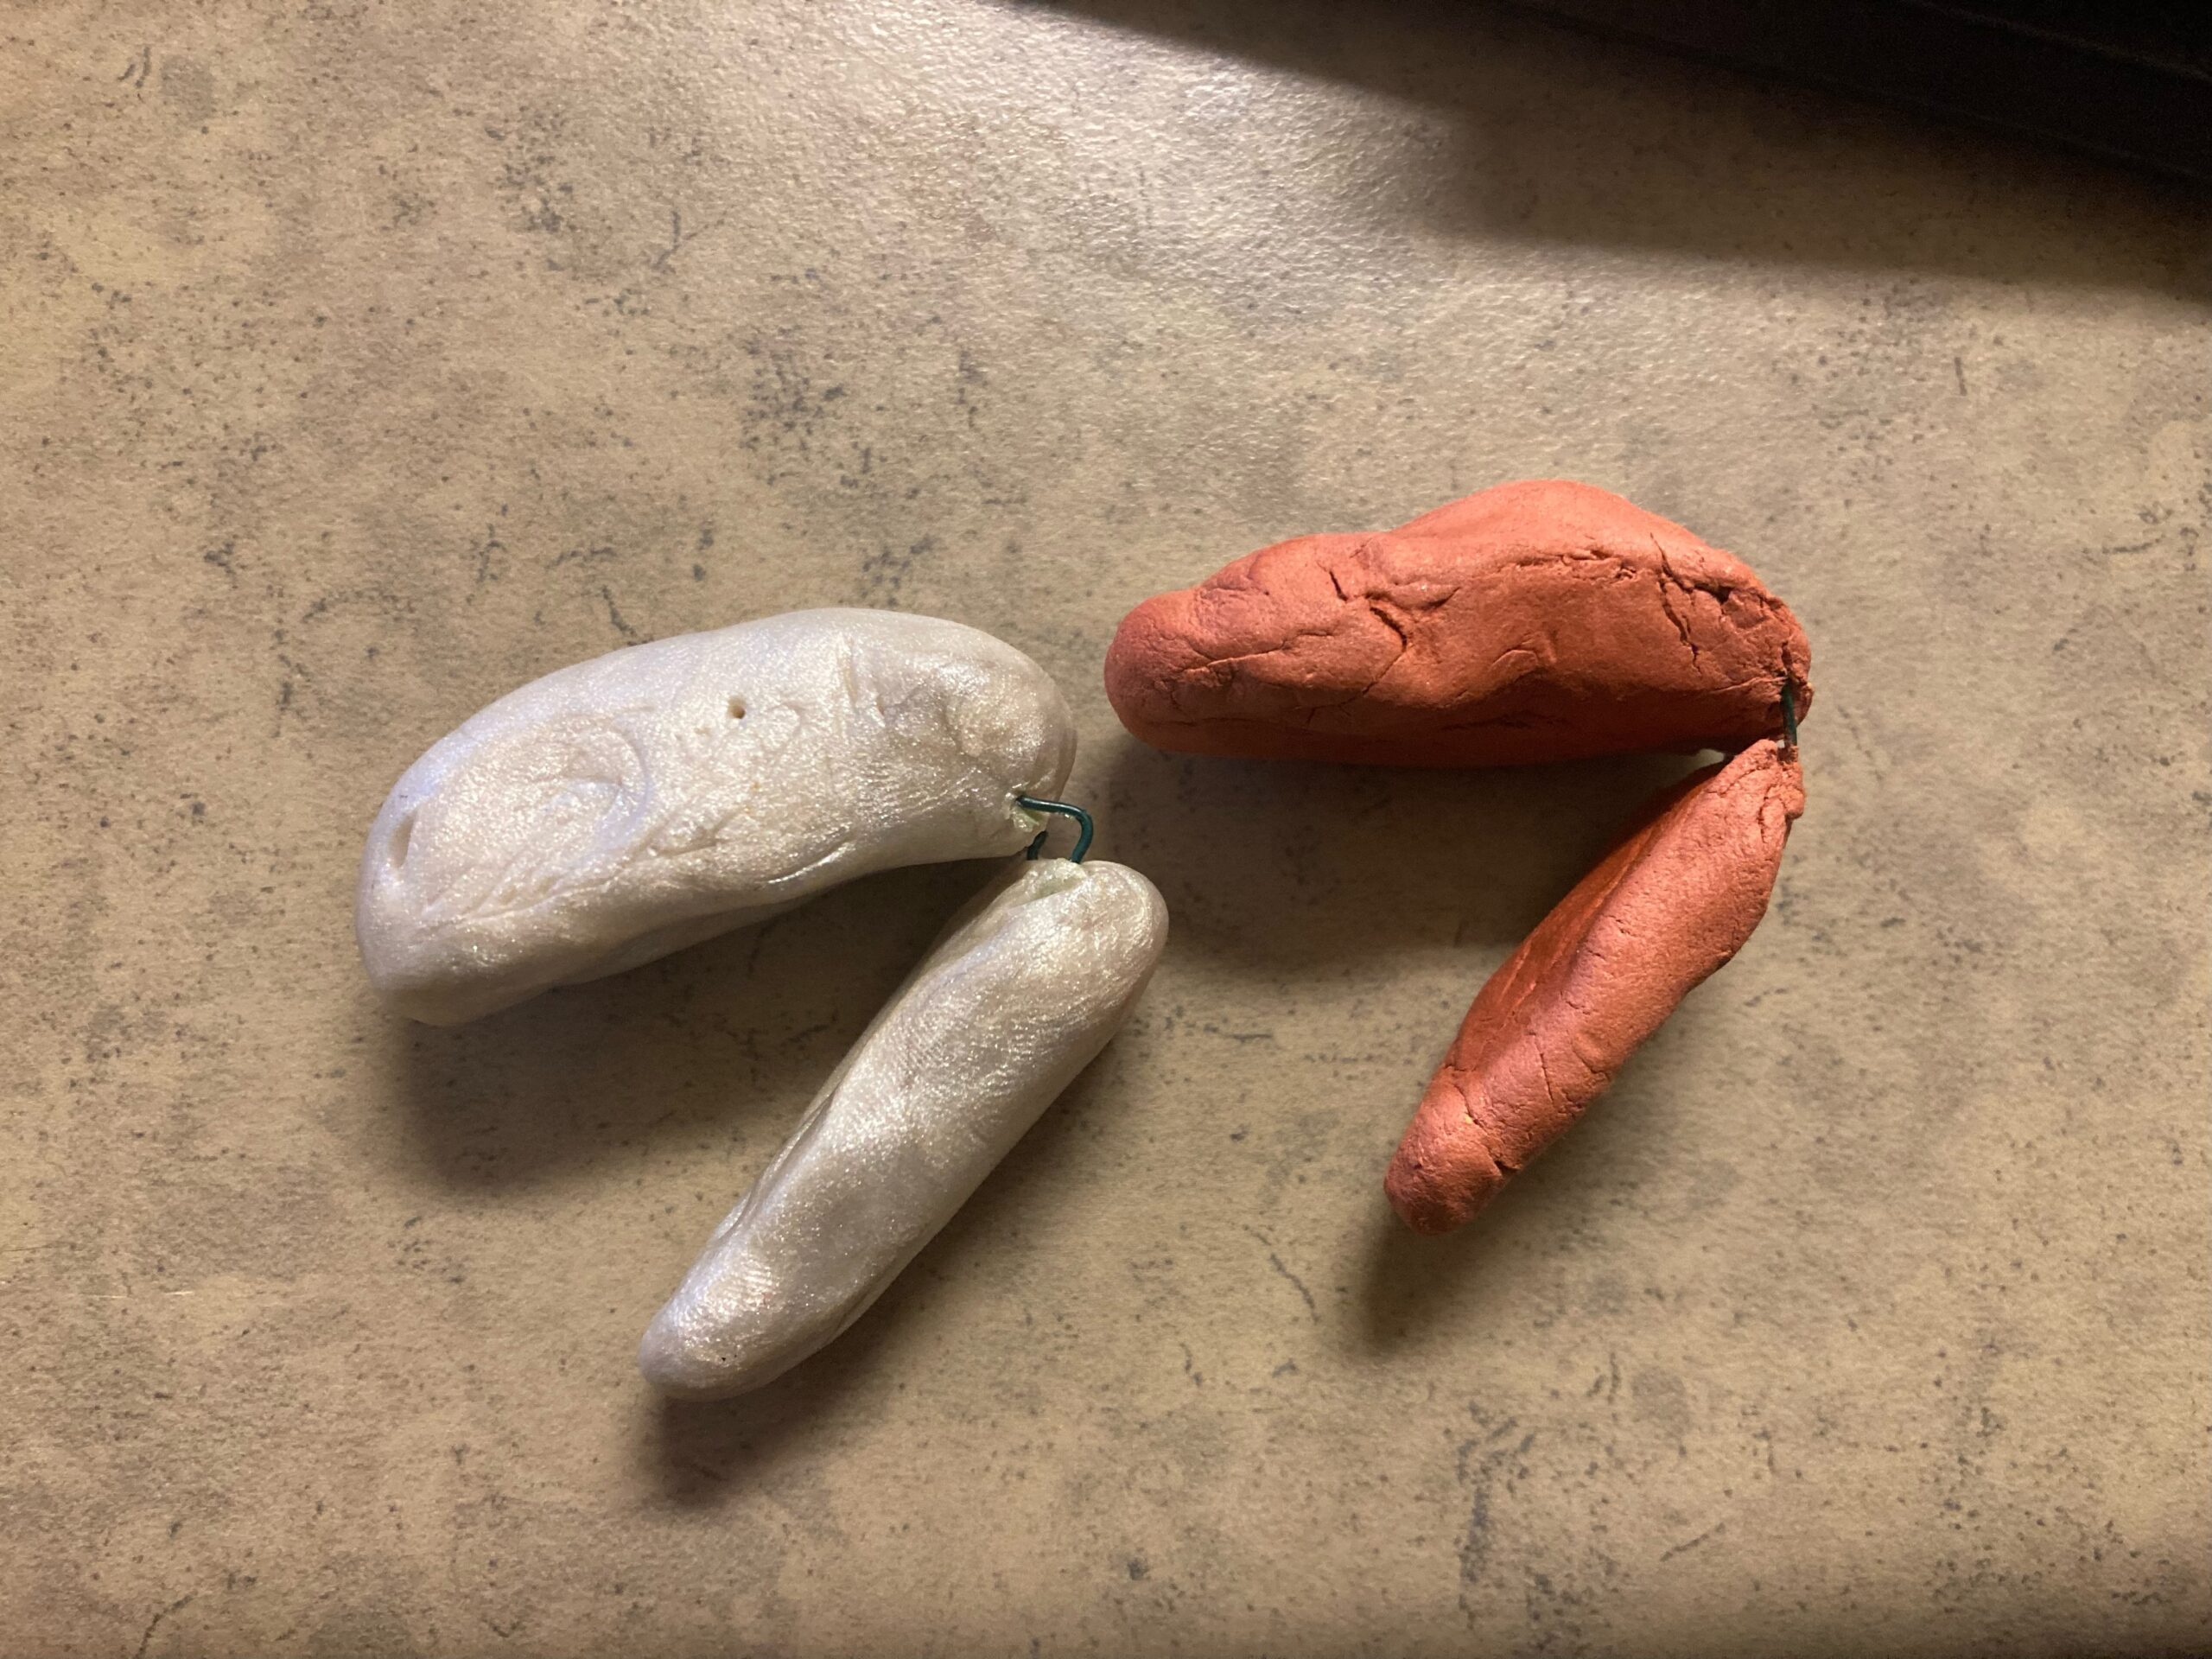
Ultimately, the Sculpey Premo clay ended up being my top choice.
The second material test I conducted was to make sure that the foam and adhesive I was using would be capable of remaining flexible around an articulated armature. That test is recorded here: https://youtube.com/shorts/leX6R1R8FJA
Confident that my supplies were up to the task, it was time to start on the final puppet. Fabrication started with this timeline I planned out for the different stages of construction: 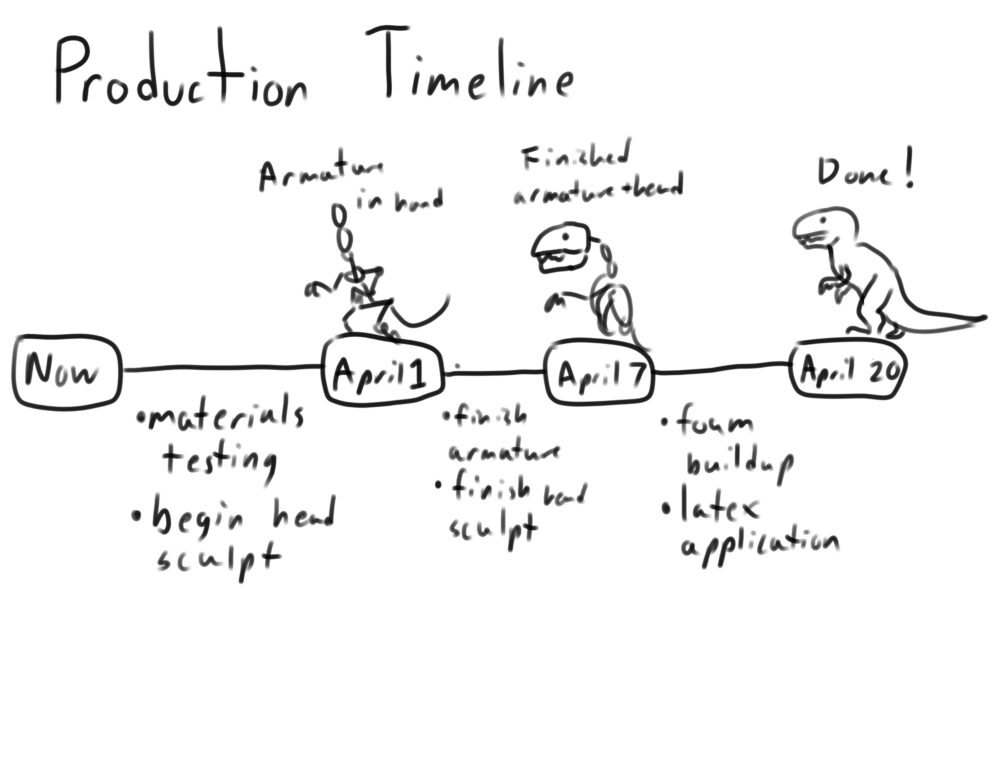
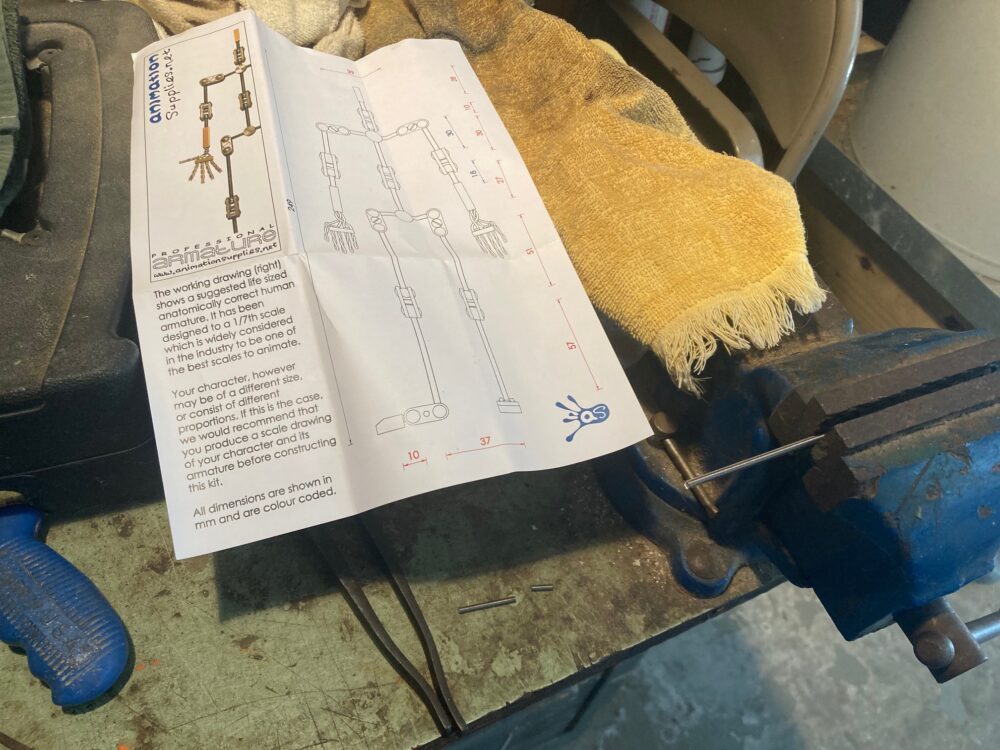
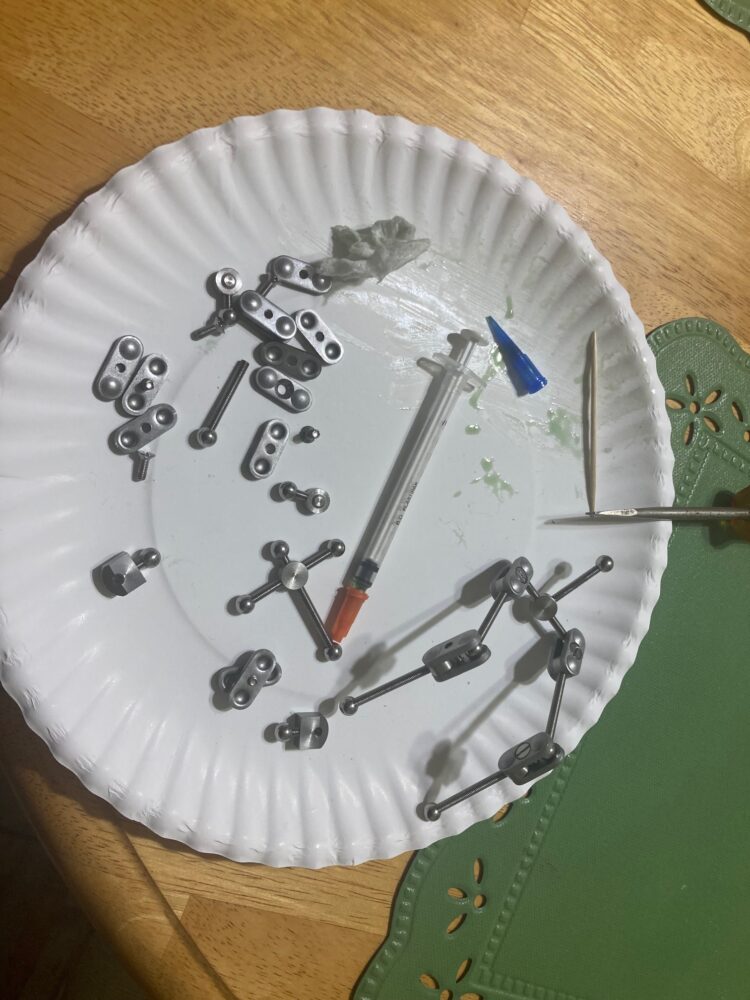
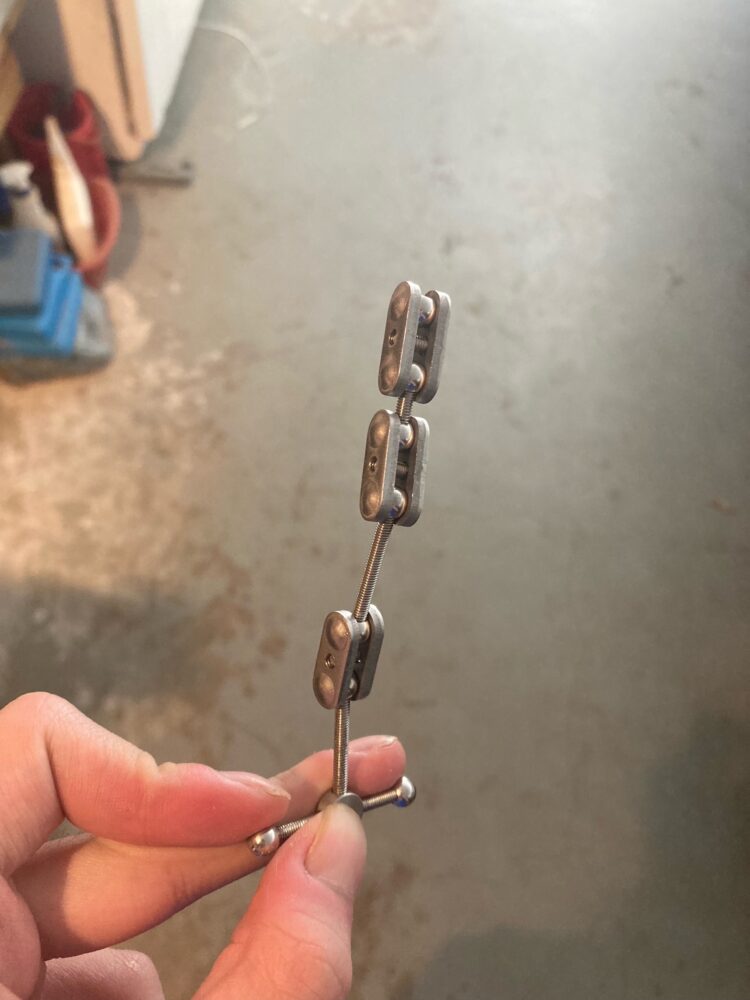
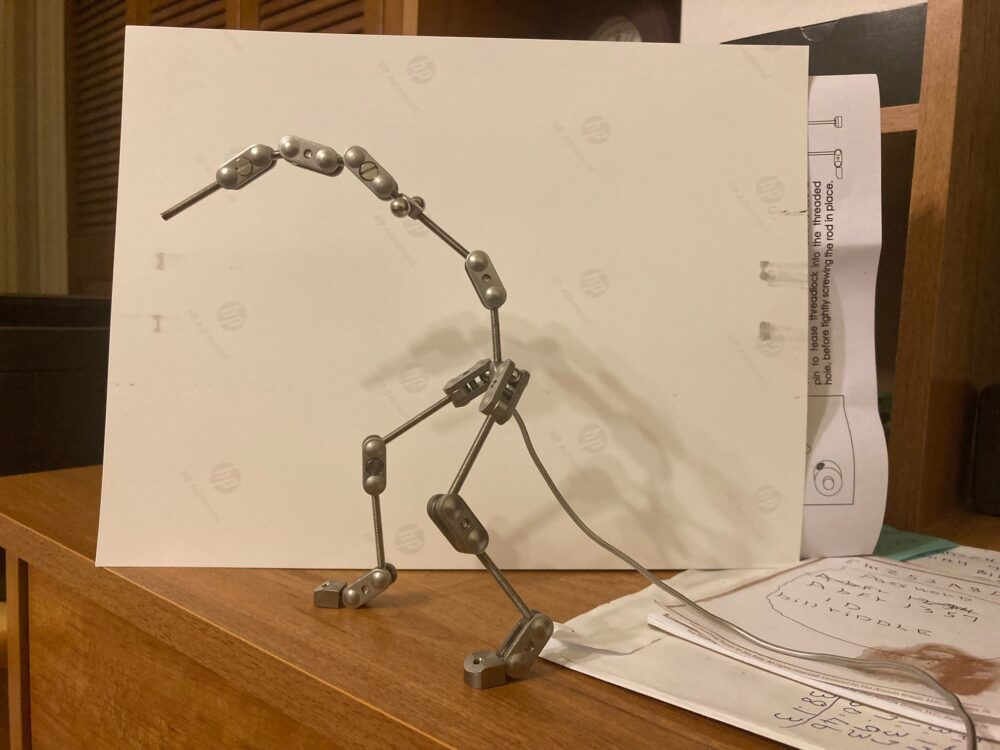
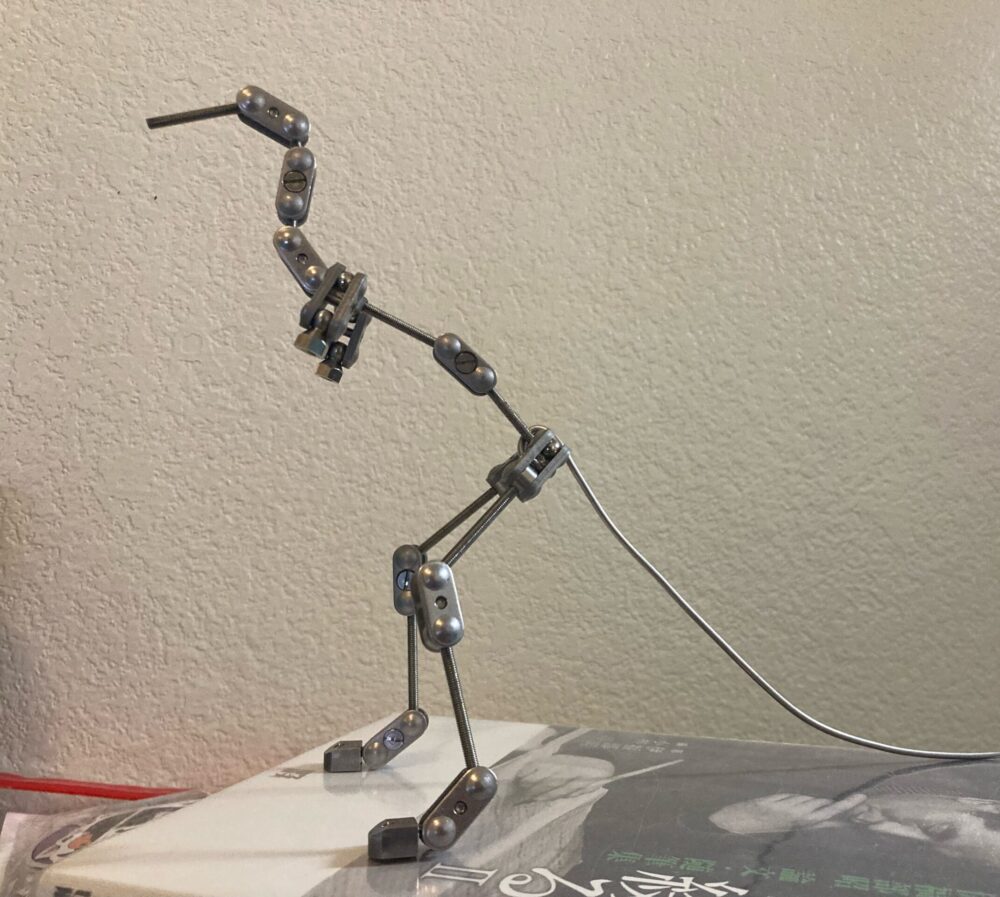
Stage 1 would be the puppet’s armature. This is a sort of articulated skeleton that gives the puppet structure and stability and allows it to hold dynamic poses. For this project, I wanted to use a professional quality steel armature, which I ordered from animationsupplies.net. The armature kits they provide allow you to assemble the individual components yourself, which meant I could alter the humanoid body plan to fit my project before putting it all together.
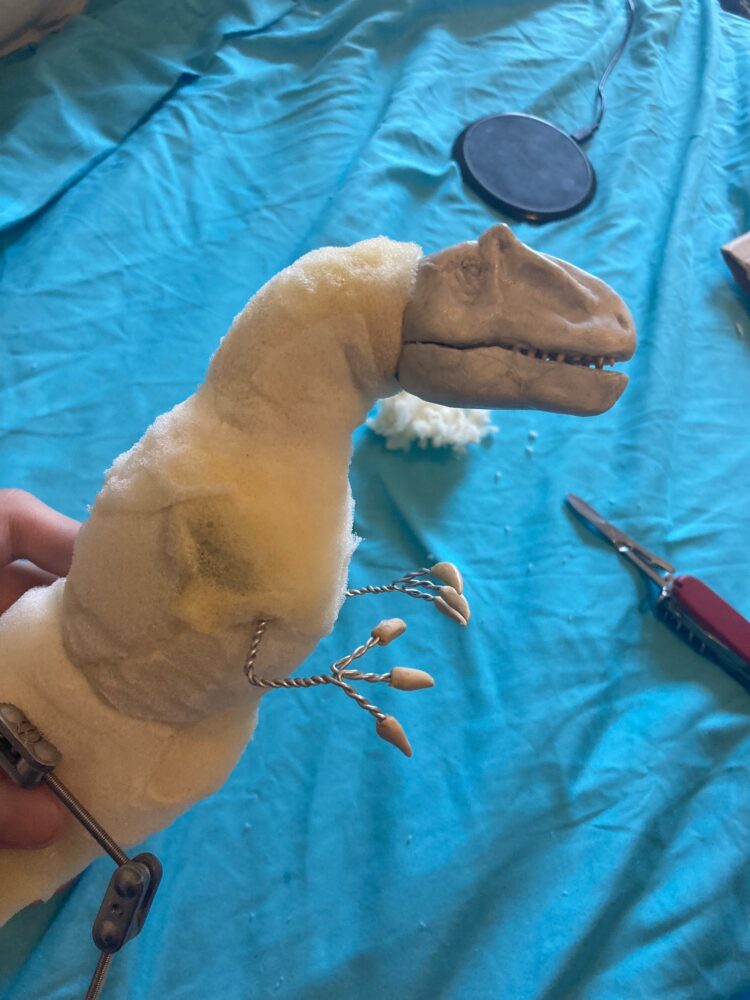
Once I had all the metal parts assembled, it was time to start sculpting the head out of clay.
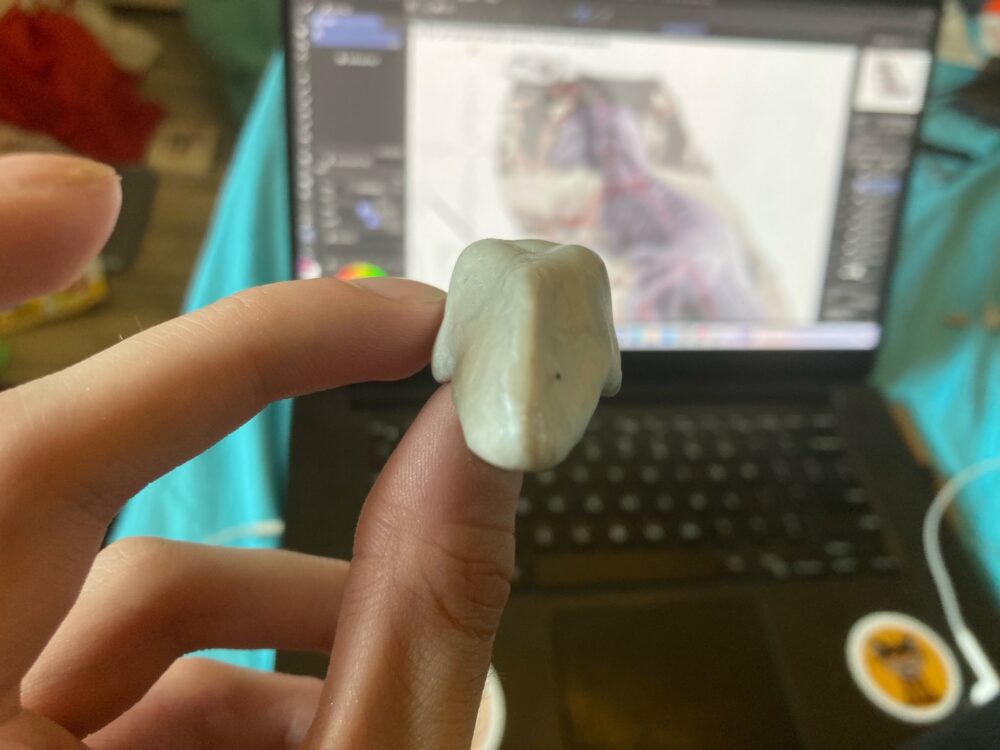
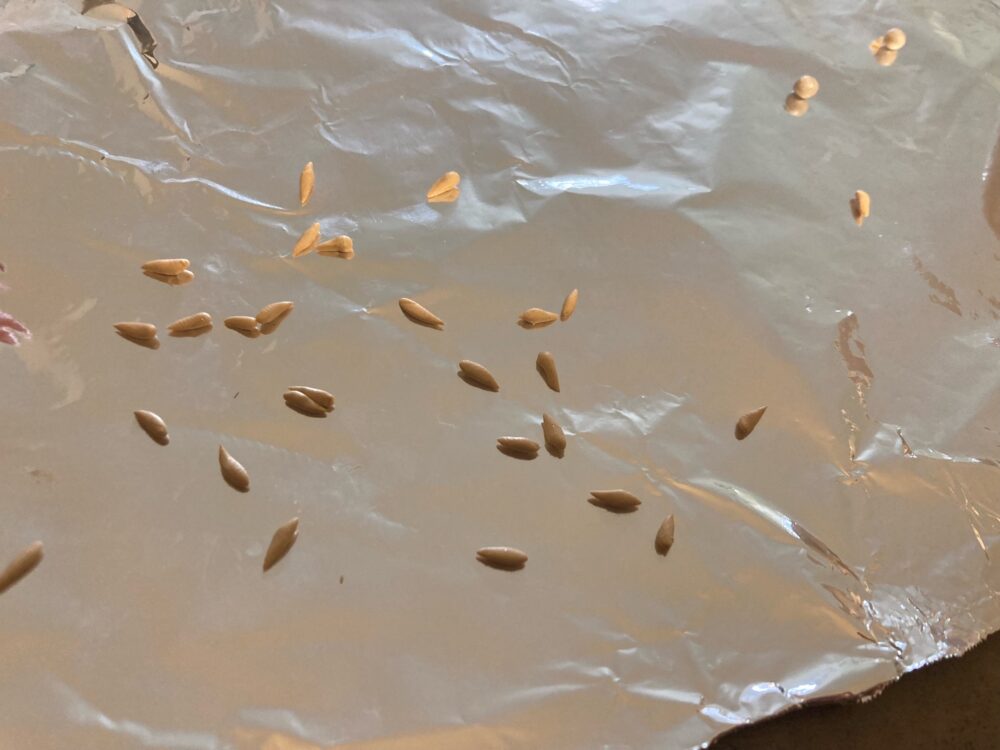
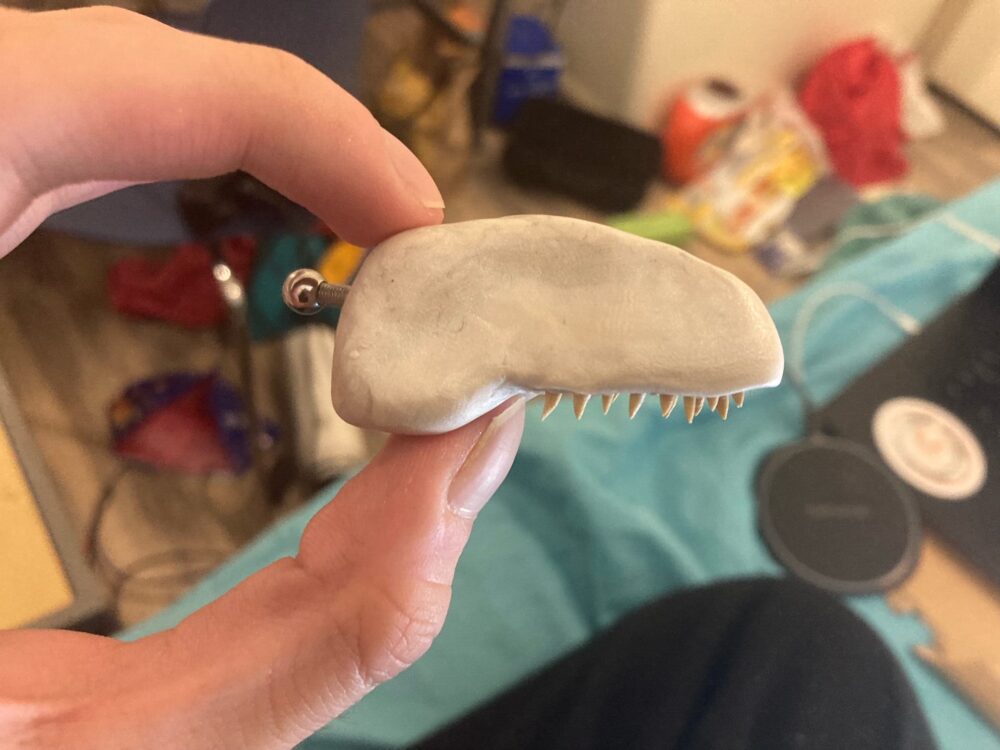

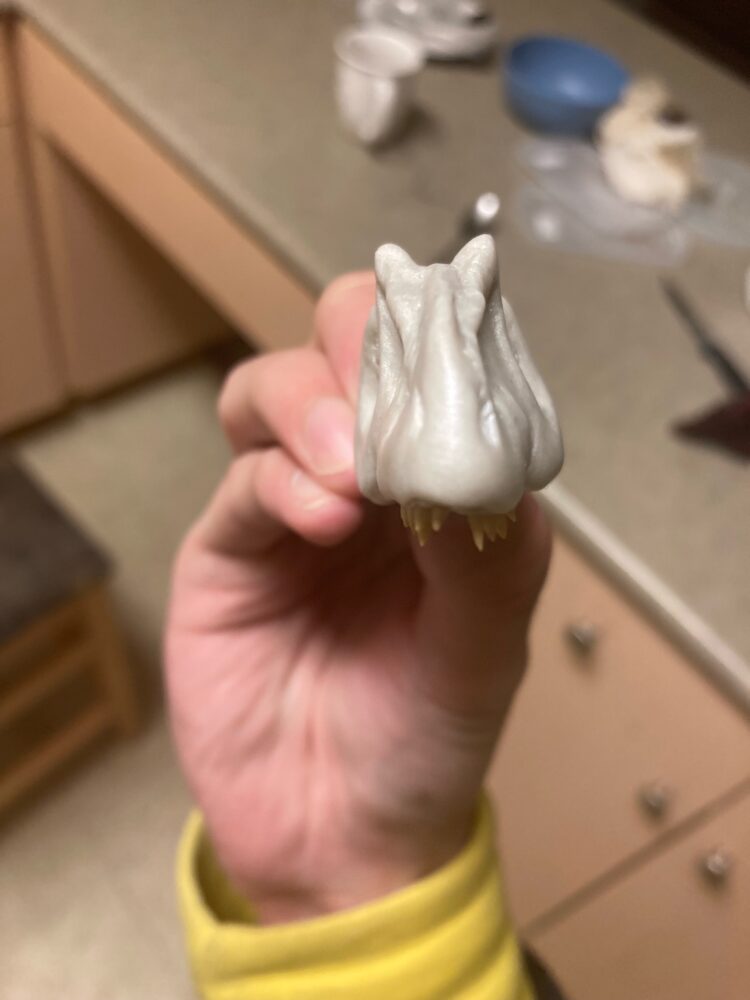
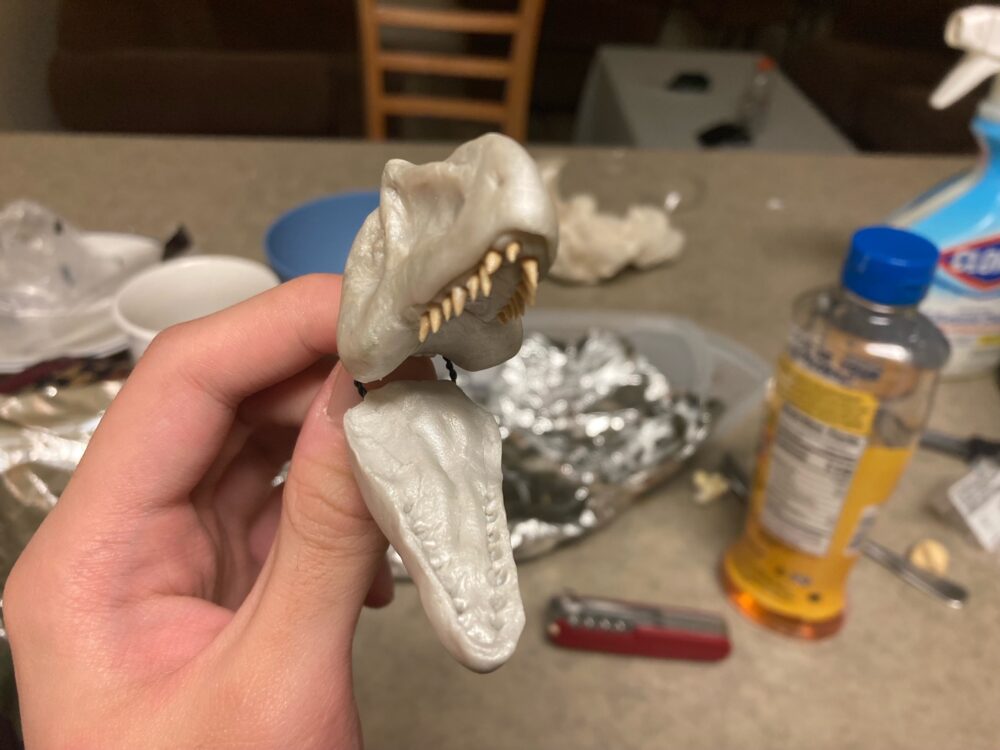
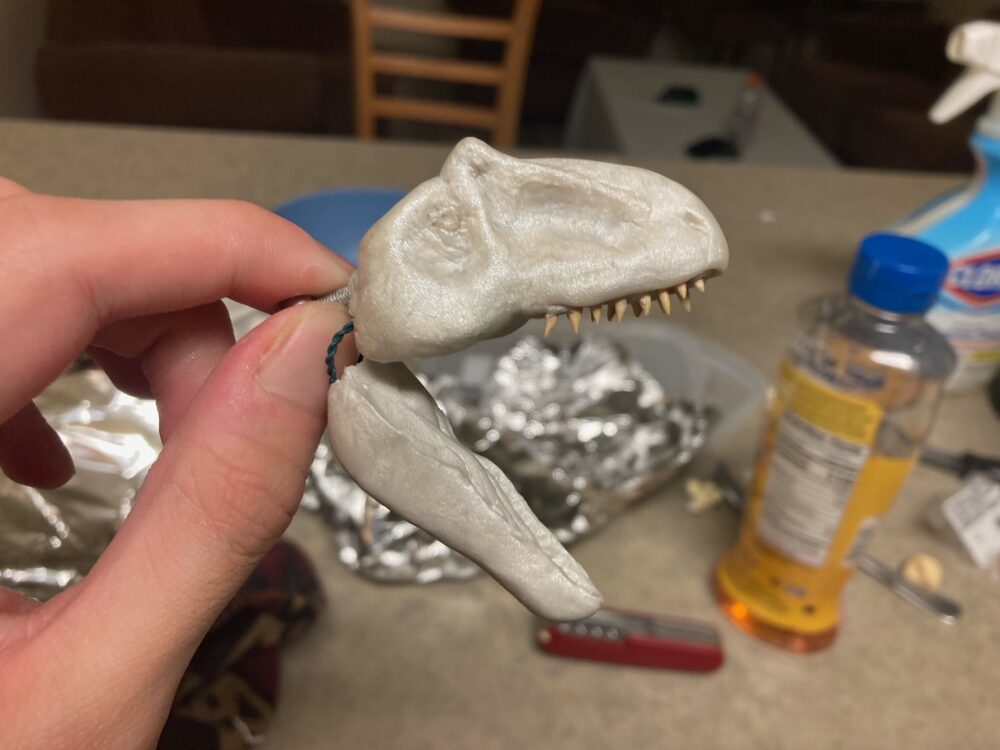
Attaching the lower jaw was a bit of a process. I had to model it so that it had lips that would cover the upper teeth while closed, while still leaving room for the lower teeth. The wire I used at first to attach the lower jaw wasn’t sturdy enough to keep the jaw closed, so I ended up having to drill holes in the jaws to insert a stronger wire that worked better.
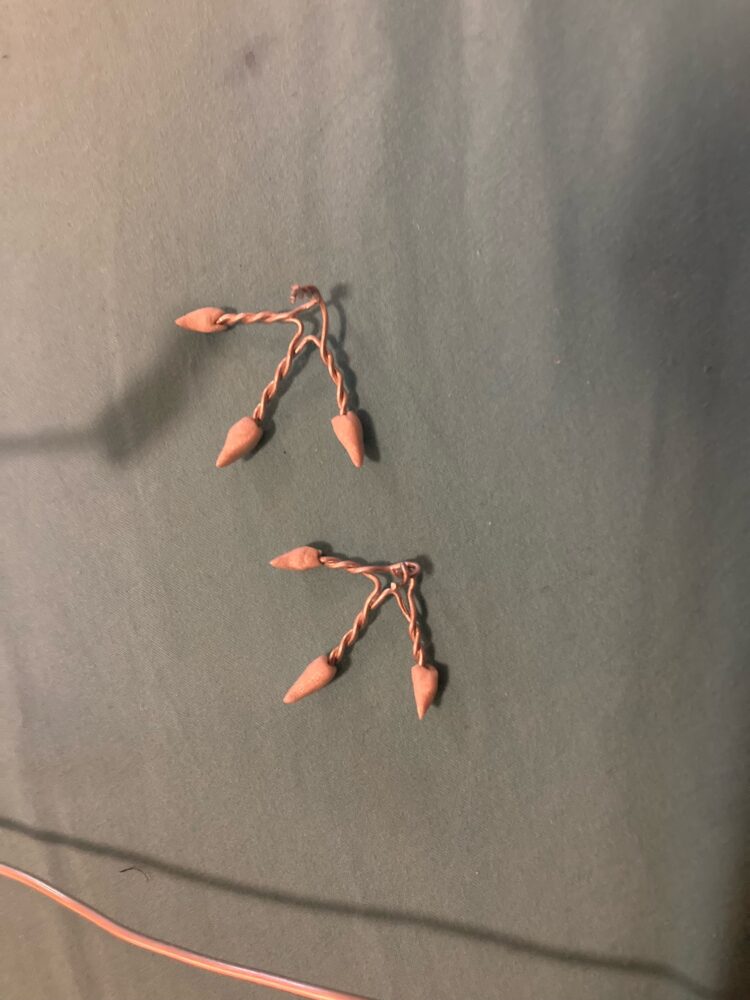
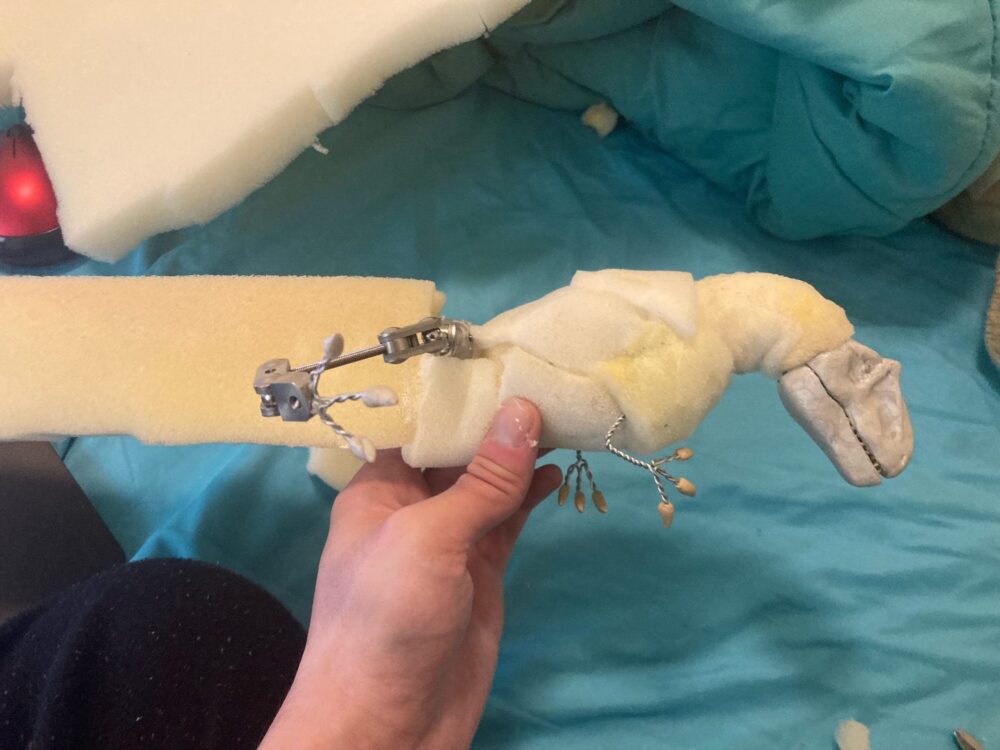
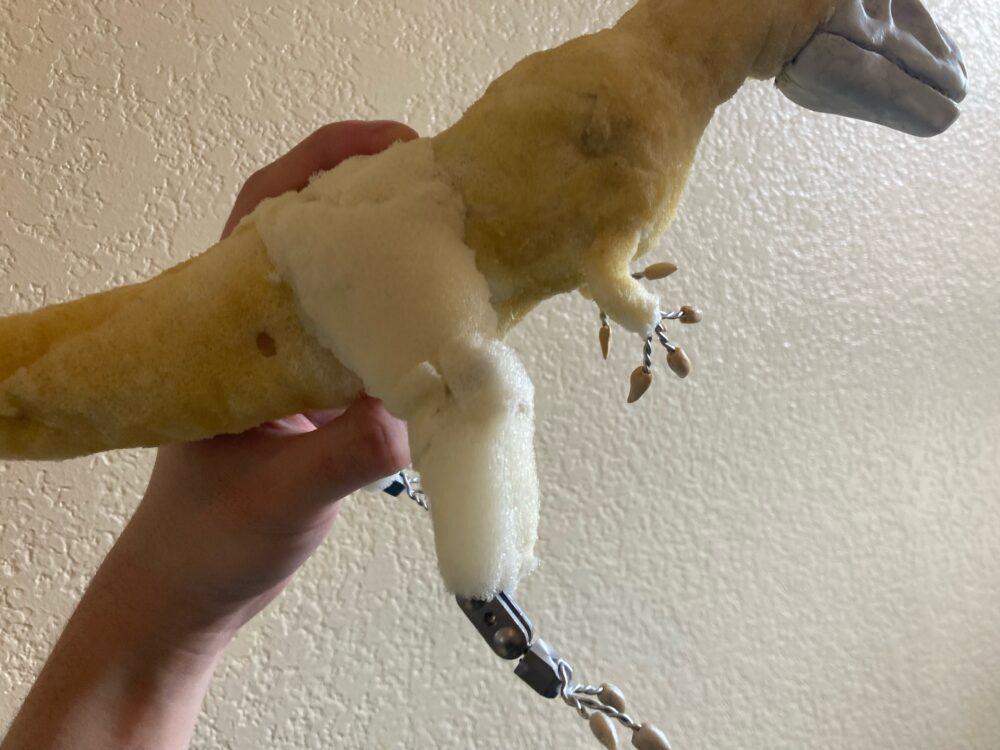
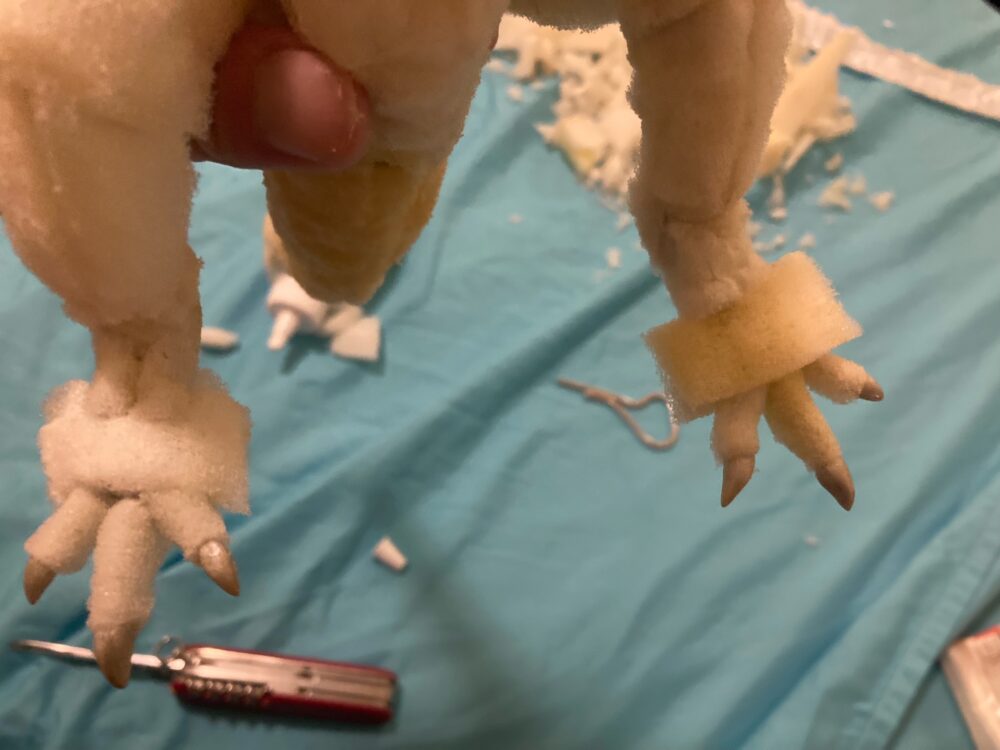
Next, I constructed the armature’s arms and feet out of wire, with clay for the claws.
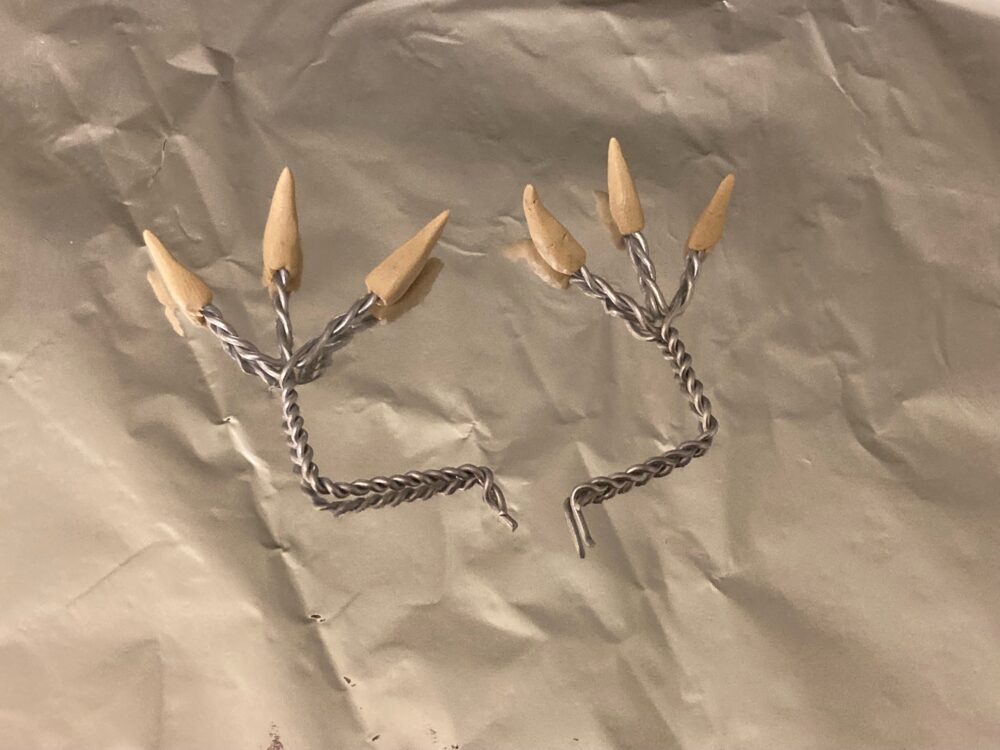
With these elements all attached, the armature was finally complete.
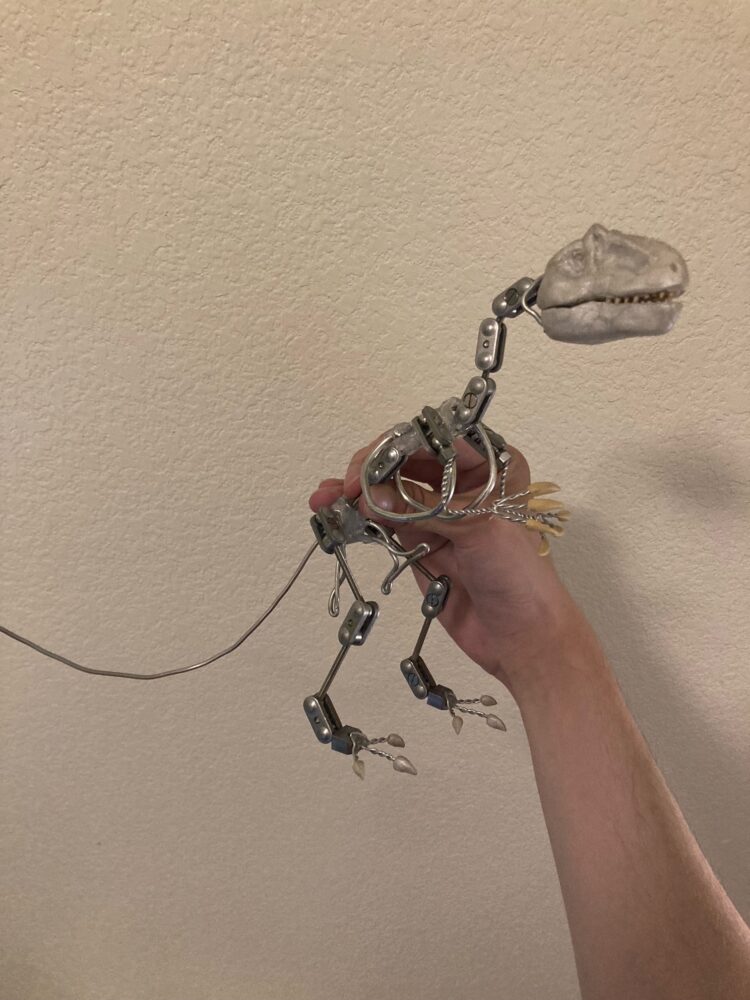
Next, it was time to construct the puppet’s body. In traditional stop motion puppet construction, there are two main method of building the body up around the armature. In one method, the whole body is sculpted ahead of time and cast into a mold. The armature is placed into this mold, which is then filled with silicone, forming a flexible body. I have no experience with mold casting, so I opted for the second method, which involved layering on pieces of foam to gradually build up the musculature.
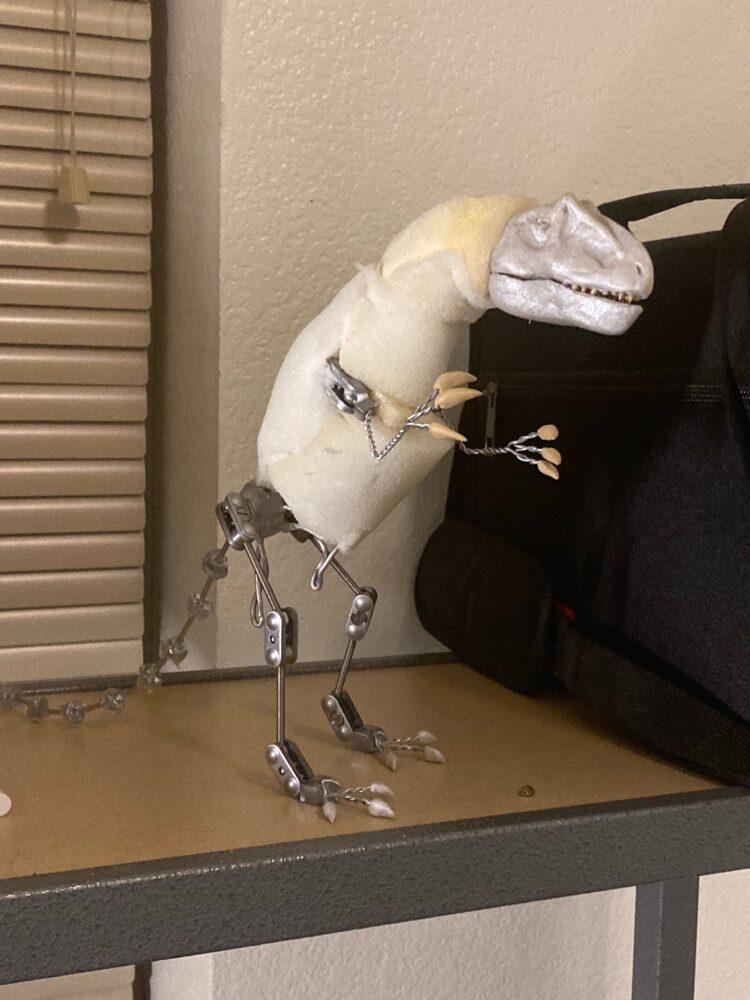


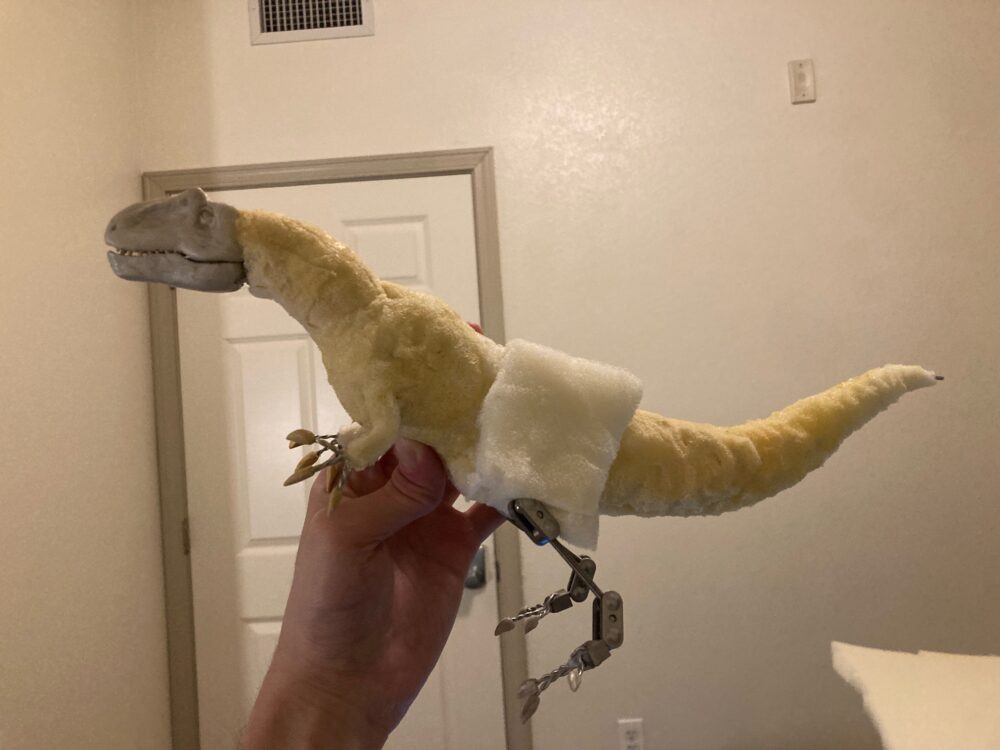
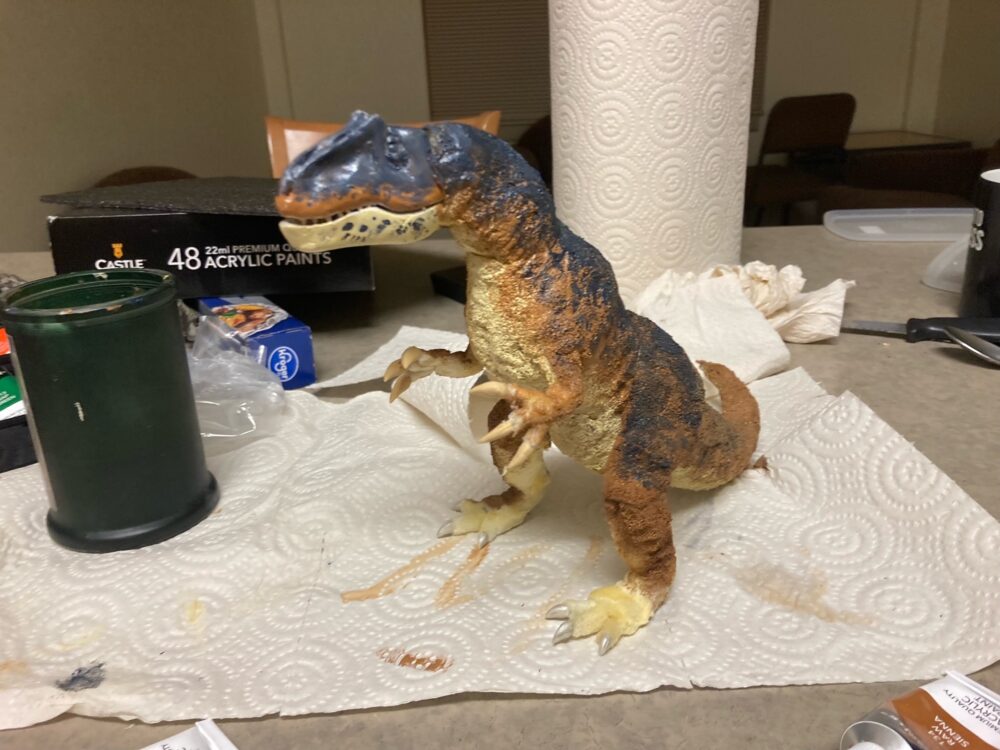
 On top of the foam body, I painted on layers of liquid latex to form a sort of skin. Once the latex was dry, it was time for painting.

With that, my puppet was complete! Here’s a brief video of her in motion:
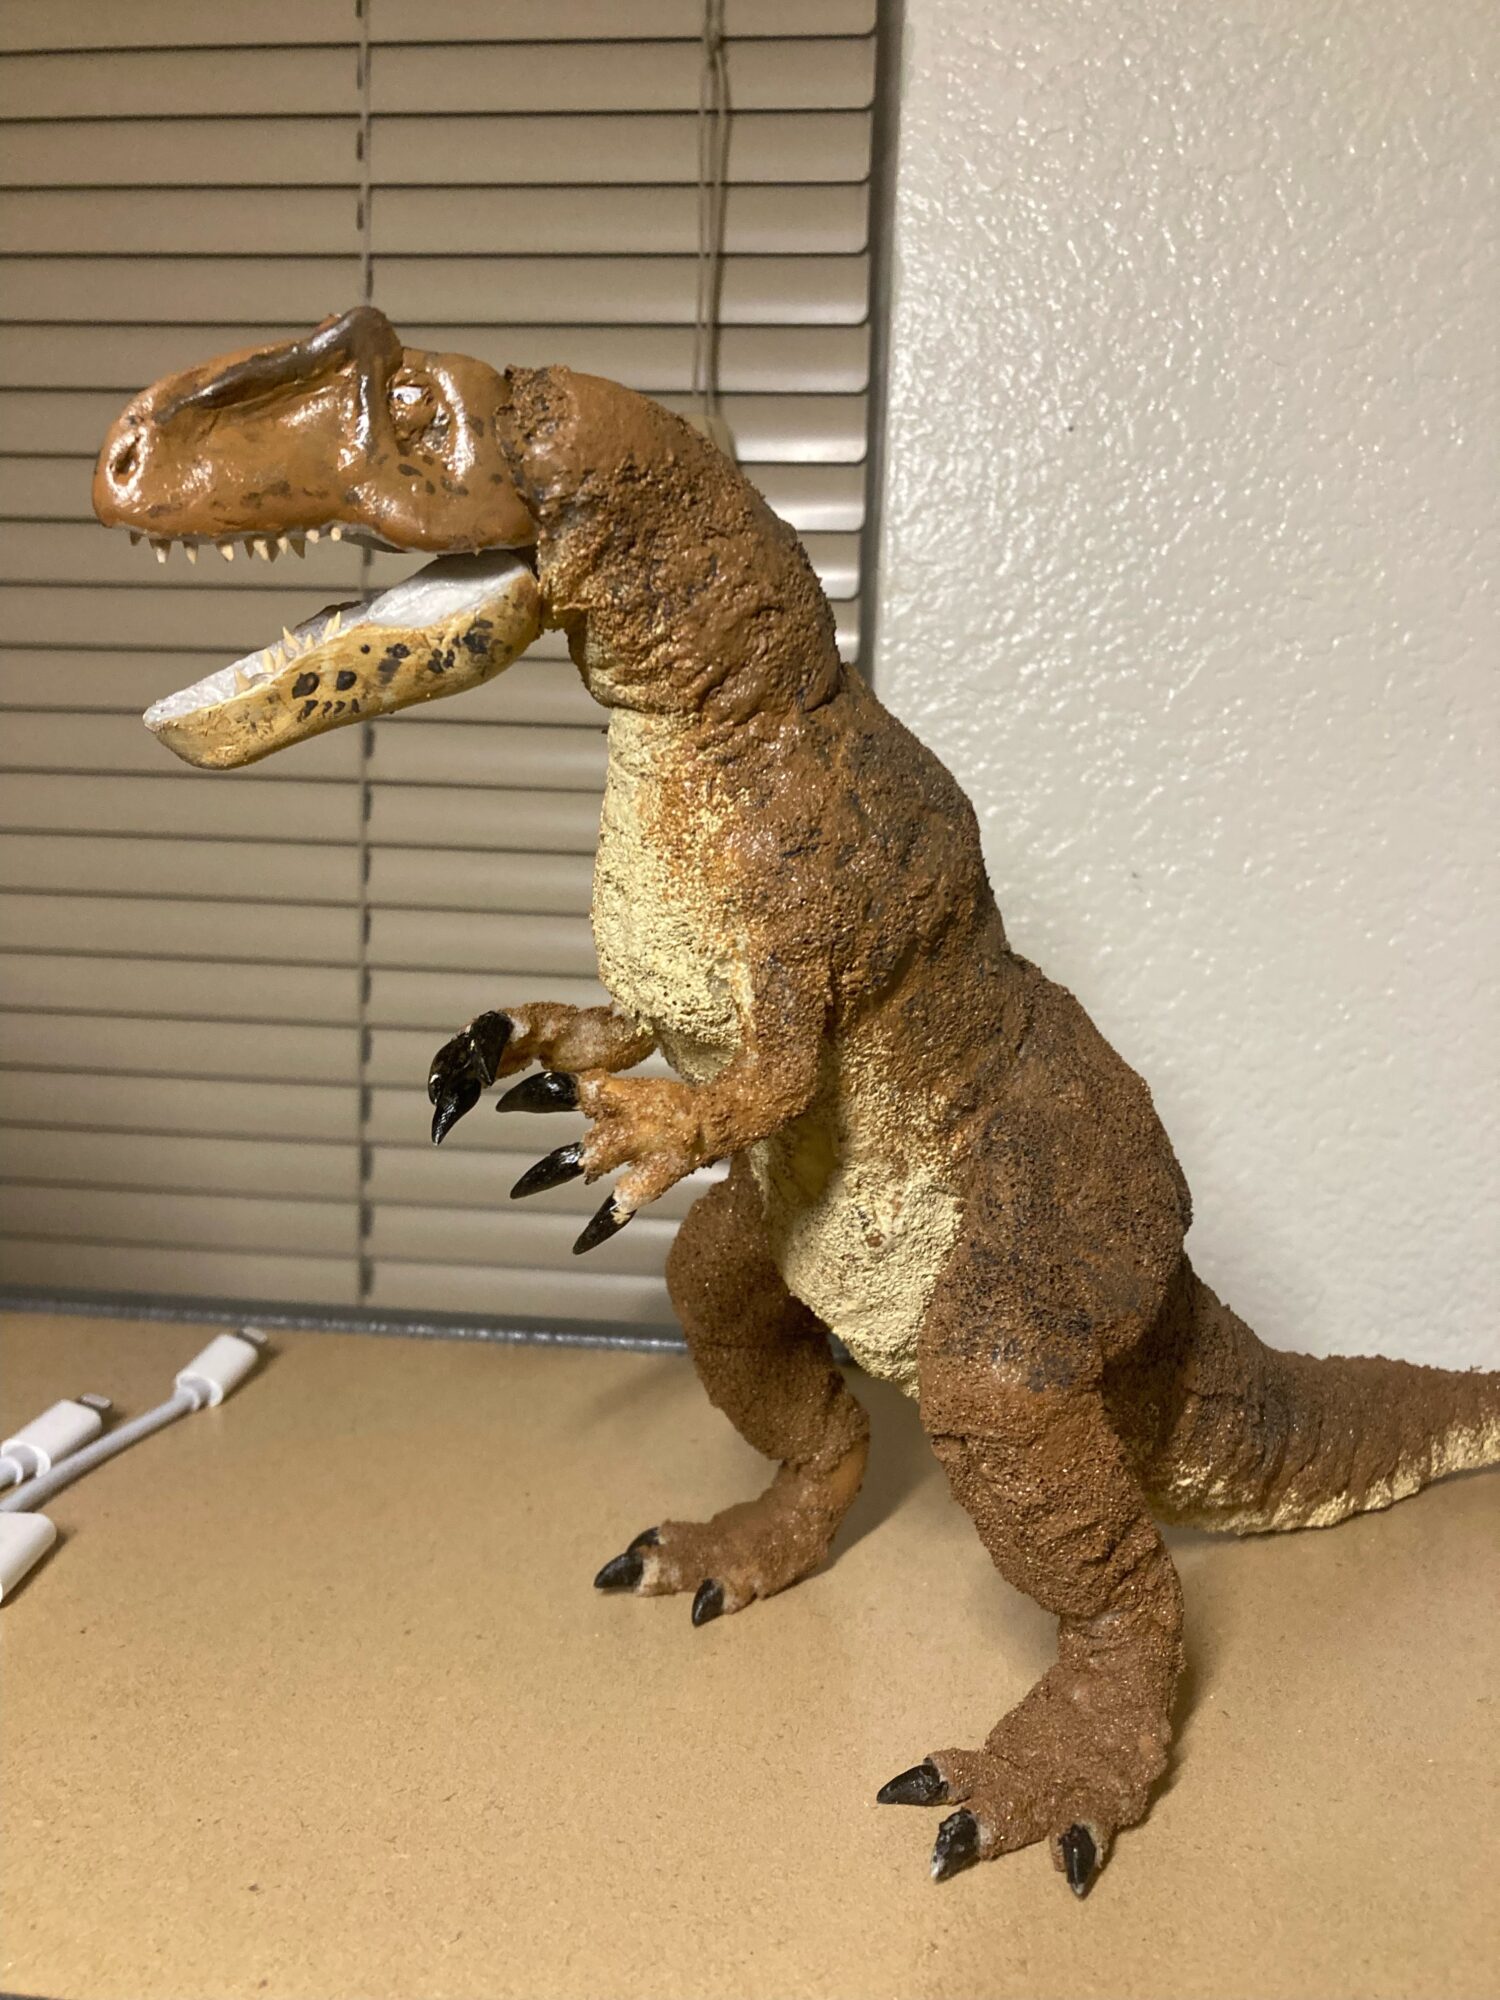
Overall, I’m extremely happy with the way she turned out. The puppet looks pretty much exactly as I originally envisioned it, combining the upright pose of classic dinosaur art with a more modern, accurate head sculpt and body proportions. The color scheme turned out pretty well, although I might have added more to it if I’d had more time. There are a few things I would have done differently; for one, I think I went a bit overboard on the foam glue and latex on the neck, since that’s where I started the buildup and hadn’t quite gotten a handle on the right amount to use. As a result, the neck is a little stiffer than I’d like, though it’s not the end of the world. I’ve also noticed that the acrylic paint I used doesn’t quite get along with the Sculpey clay, and has remained a little tacky where the rest of the paint has dried. Again, not the end of the world. She’s got a decent range of motion and she looks amazing, and I’m looking forward to animating with her. More than anything, I’ve finally shown that I can build a stop motion puppet start to finish, and I think that with everything I learned from this project, the next one will turn out even better.
Thanks for reading!
References:
- Allosaurus fragilis skeletal reconstruction, Scott Hartman, 2012. https://www.skeletaldrawing.com/theropods/allosaurus-fragilis
2 Comments. Leave new
Hi Sean, As one of your pod group mates it has been very exciting seeing you work on this project and complete it. I am very impressed with the technical and artistic skill necessary to complete this project. Congrats!
Hey Sean, I think you did an awesome job on the stop motion dinosaur! I really like the rough texture on the body and the video was fun to watch. Do you think you will make more stop motion puppets in the future? I would definitely watch any stop motion video you put out there.