
INTRODUCTION
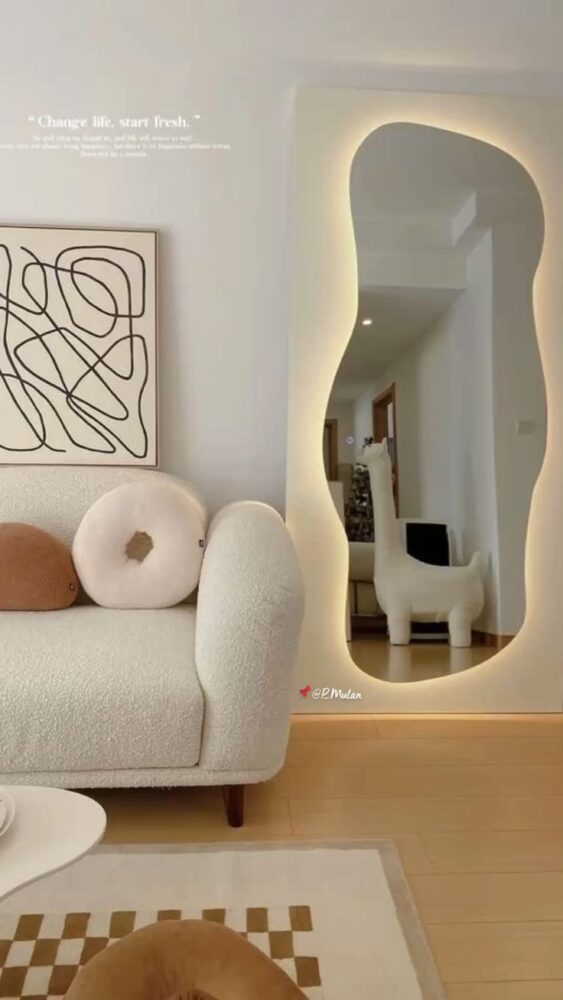
My vision for this project was to combine modern and natural aspects with organic abstract aesthetics to create a wavy mirror. The modern elements would be displayed through neutral color pallets and materials and the organic aesthetic would be carried through with textured and layered designs within the frame. Overall, I was not able to make the mirror in the original scale of the mirror I purchased but I was still able to keep it in the largest size possible for my fabrication process. As for the design, I feel as though I kept to my original vision with it being organic modern and creating a functional piece of furniture that also acts as an interior design piece.
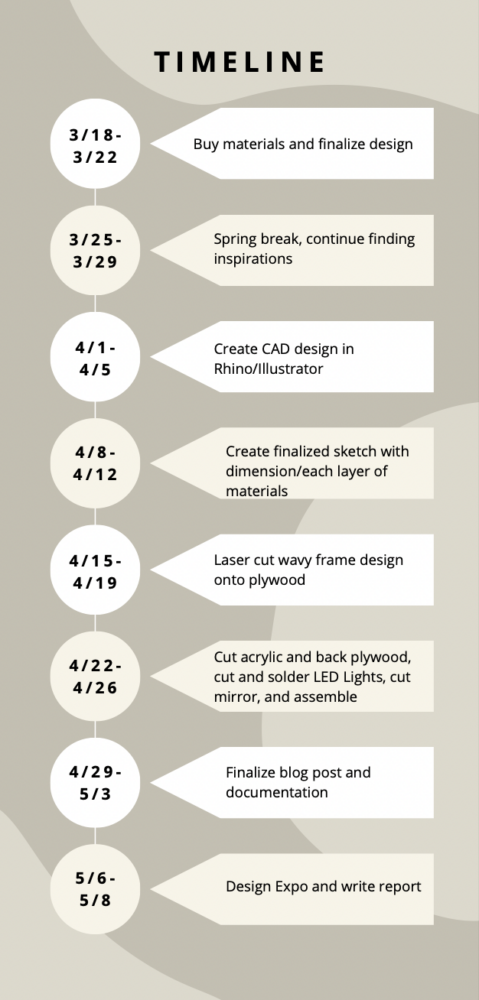
TIMELINE
FABRICATION PROCESS
During my initial design process and ideation phase, I created many sketches to get the idea of how I wanted the wavy frame to look. I considered some functional aspects like how I would add my dynamic feature of lights, but mainly focused on the aesthetic of the project.
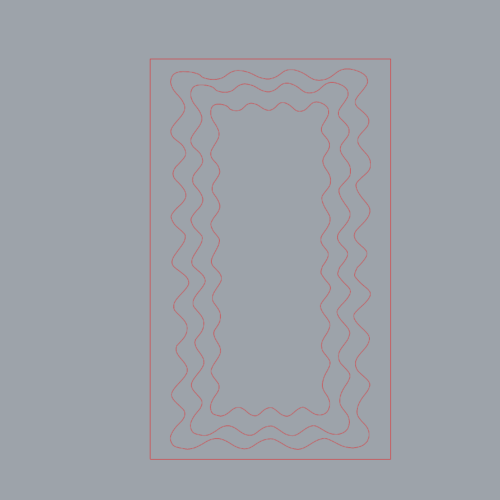
Next, I started to develop my laser cut design in CAD. I started by hand drawing the wavy design on my iPad through Illustrator and then continued to export that file to my computer to ultimately use it in the software Rhino. I wasn’t exactly sure how I would want the wavy lines to look because I debated on creating the design in Rhino itself but I didn’t want to have too geometric styled shapes so I went for a more natural design that flowed more naturally. My initial design was made for the floor length mirror I purchased which had the dimensions of 13.5 inches by 49.5 inches. As I will explain later in my post, I ended up decreasing the height of the mirror in order to laser cut the design on one piece of plywood. I did not calculate the exact width and height of the final product but I was able to manipulate the lines throughout my process.
After considering inspirations and other designs, I began to do some further research to see how I will exactly incorporate the LED Lights. The lights I purchased were LED strip lights in a warm light color. I found this design that I thought would fit my aesthetic and overall design.
https://www.pinterest.com/pin/434667801550095064/
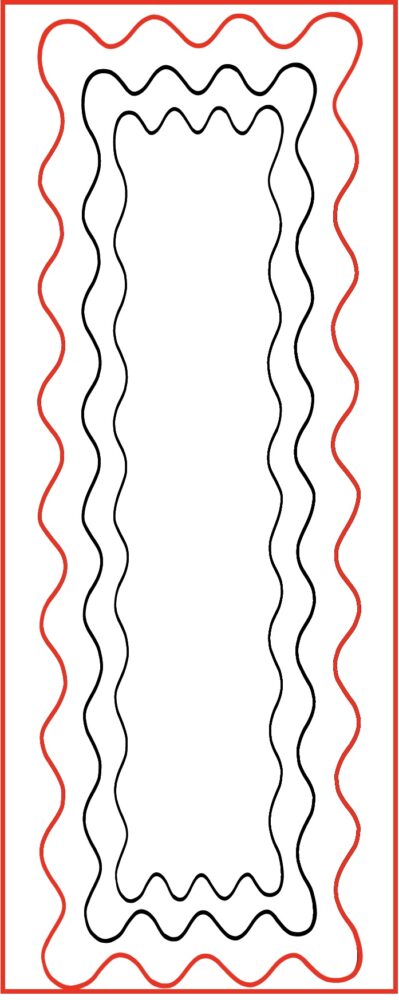
After this, I redid my CAD design to fit the exact length of the laser cut bed at the BTU Lab in the Roser Atlas building. This is my CAD design before laser cutting on about 6mm plywood and about 24 inches by 40 inches.
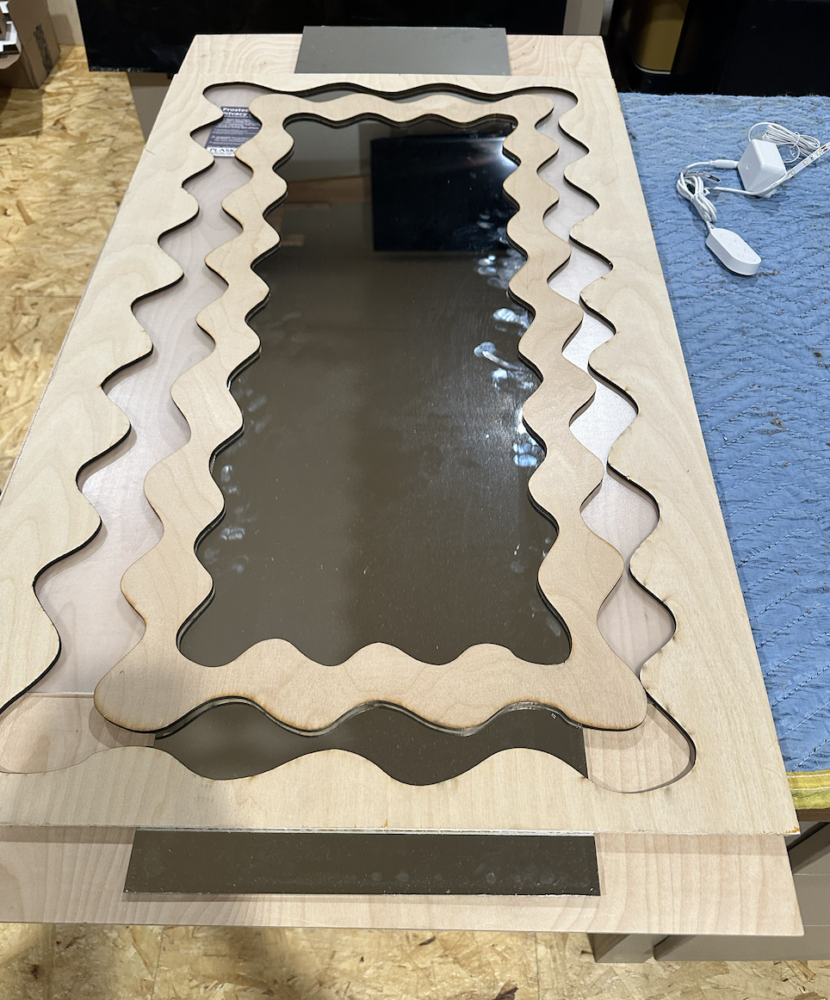
After I laser cut the wavy frame, I brought the frames and the rest of my materials home to finish the rest of my fabrication. I decided to go to my cousin’s woodworking shop that he has in his basement to use his tools since I have not yet done the woodshop orientation at the BTU Lab, which had stopped doing orientations since it was so late in the year. I had laser cut many different projects this semester but I had never laser cut something this large of a scale. Thankfully I was able to get the pieces cut all the way through on my first try and I think it turned out great. Since plywood is made of many thin layers of separated glue some of the outer layers started to peel but other than that I think the overall quality of the frame was good enough to use. I think if I were to use a jigsaw to cut the curves it would have made my life so much harder.
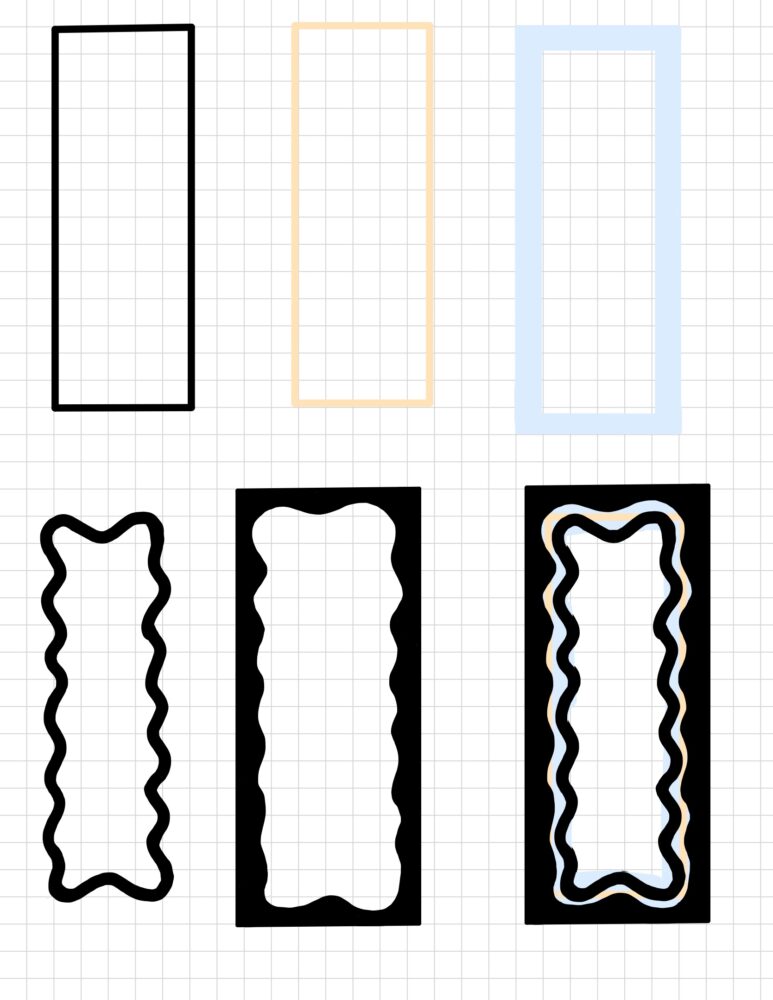
 I then started by laying out all of my materials in a type of “sandwich” to visualize my next steps. My plan was to start with a large piece of plywood for the “backboard”, then add the led lights and mirror, add the foggy acrylic on top of the led lights, and then finally the wavy frame.
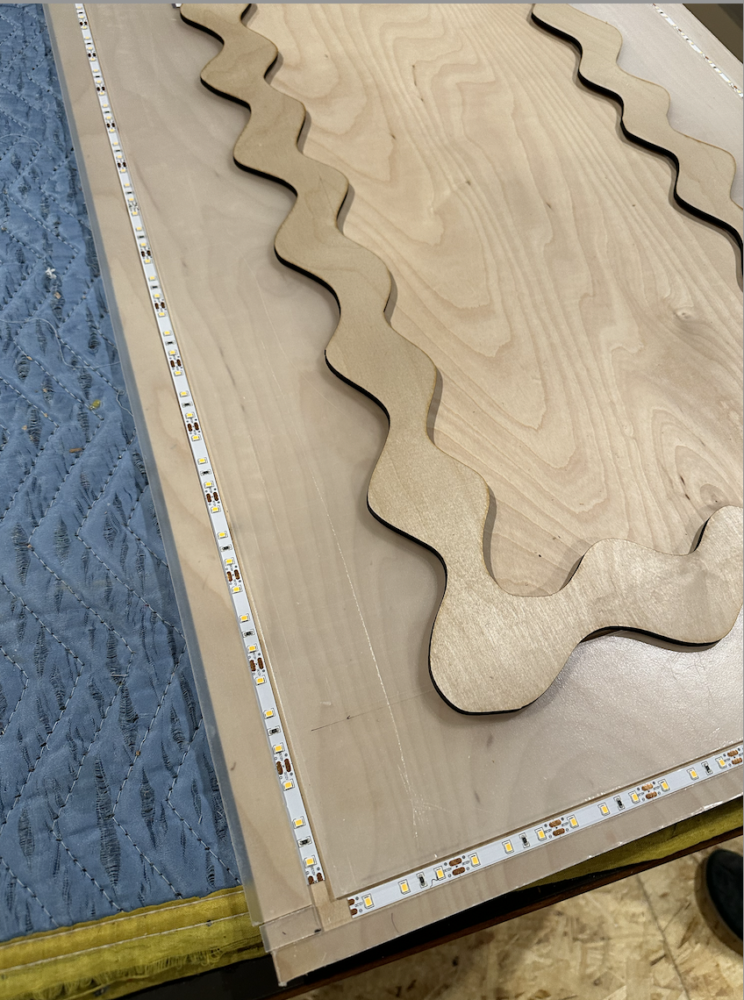
My next step was to cut out the foggy acrylic. Originally I was going to try to laser cut the acrylic but since it was more of a flexible material I was able to cut it with a table saw. The piece of acrylic was too short height wise so I had to cut many pieces. Since I was only covering the surface of the plywood not including the area of the mirror, I was able to cover the area that is between the two wavy frames and fill the edges of the mirror. During this process I decided to create a channel for the led lights to lay. Since the led lights could not round the corners I decided to cut the lights and solder them back together. I wanted to make sure the led lights laid flat so when I put the final wavy frame on top there is no gapping between all of the plywood and acrylic.
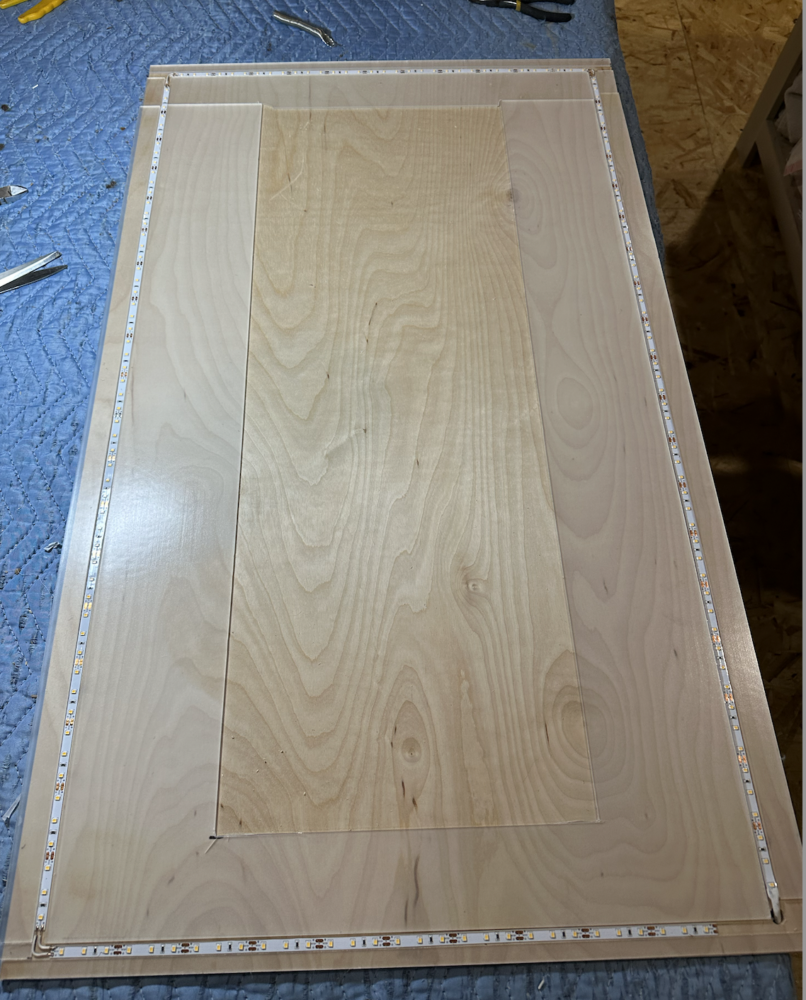
In the image below you can see how I created about a 1 inch border of acrylic around the outside. I then leave a ⅜ inch gap for the led lights, and then fill about 5 inches wide of acrylic which will act as a gap between the outside frame and the inside frame. I tested this layering method out to make sure the lights shine in the spots I wanted to and it thankfully does. It probably isn’t as bright as it would have been putting the lights directly in the gap between the frames and underneath the acrylic, but since you would be able to clearly see the strip light I decided to hide them underneath the outermost frame.
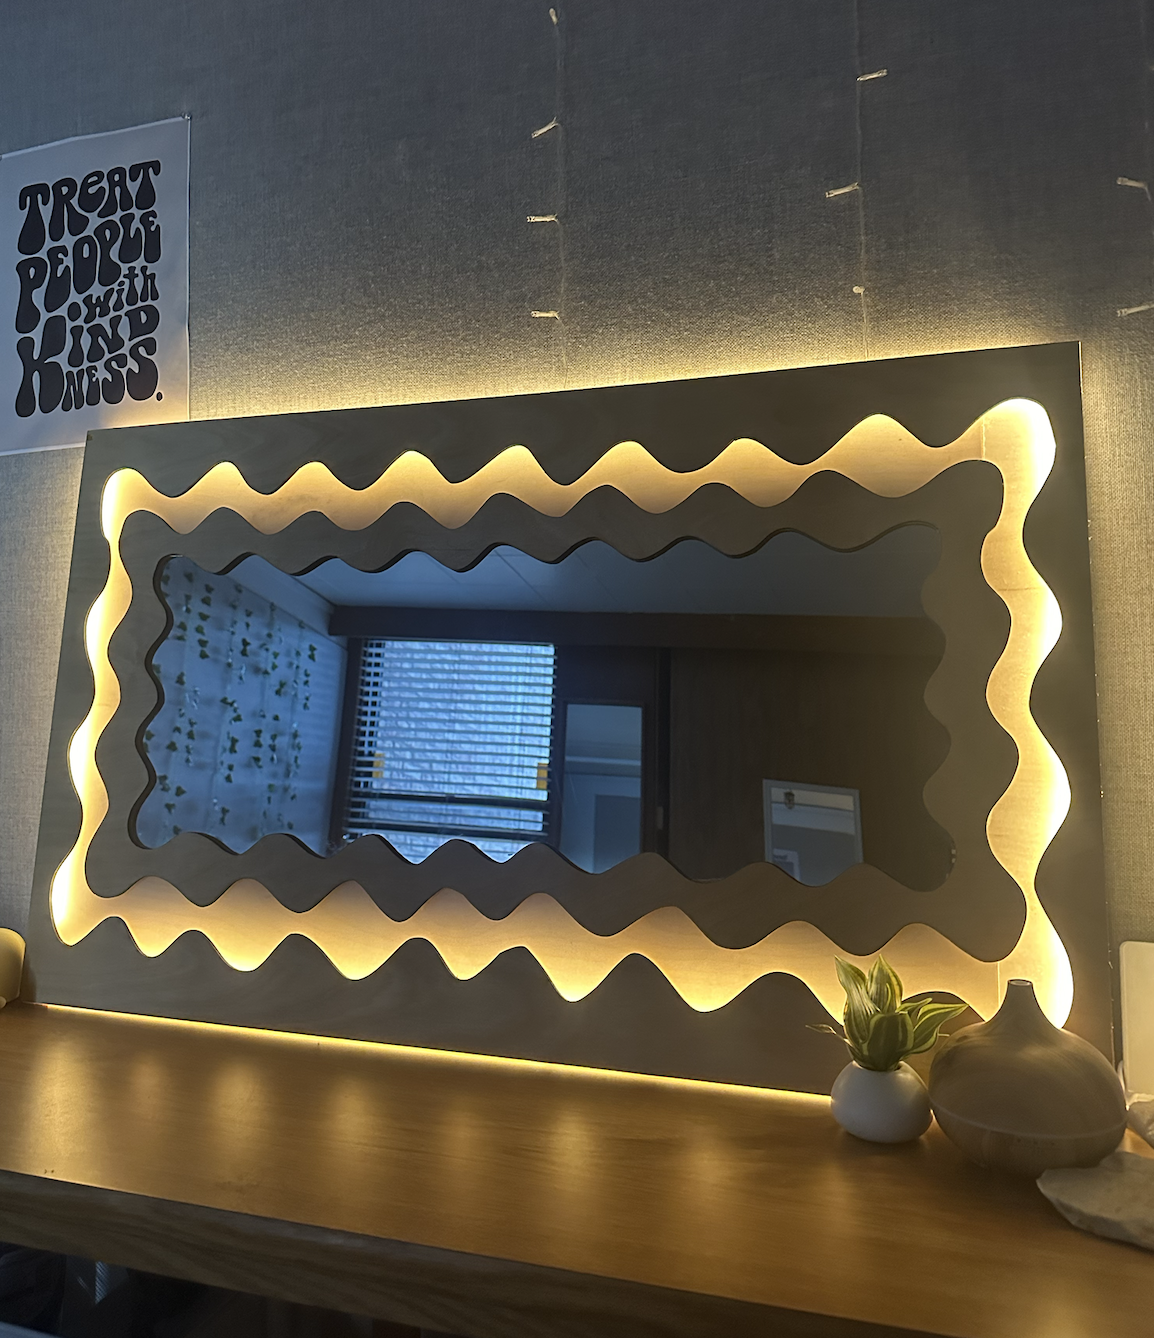
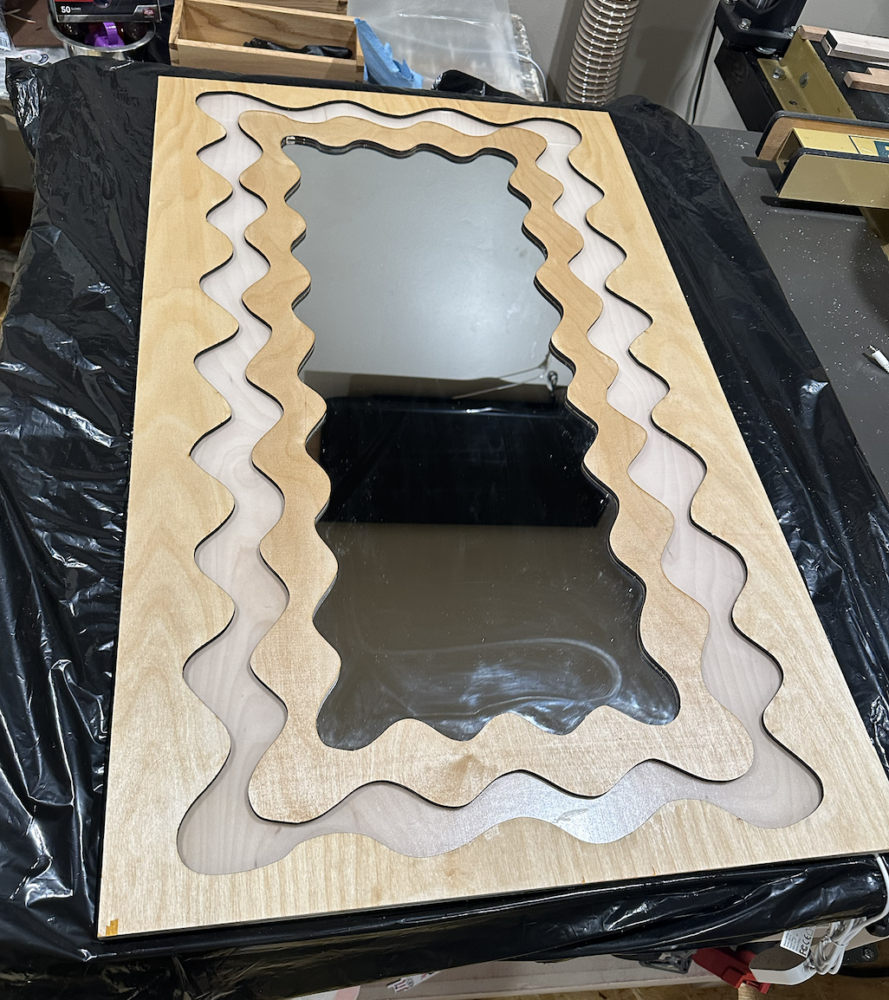
Finally, I glued the rest of the frame and mirror together using both spray adhesive and super glue. Once assembled, I took a track saw and trimmed the sides that had excess acrylic and the rest of the sides to make sure everything was smooth and even. I then added a clear Polyx-Oil stain to the wood to give it a nice professional finish and still keep the light natural color for the organic modern aesthetic. Overall, my piece turned out the way I wanted it to despite the slight altercation of the size. It fits my desired aesthetic that I was going for and functions perfectly.
CONCLUSION
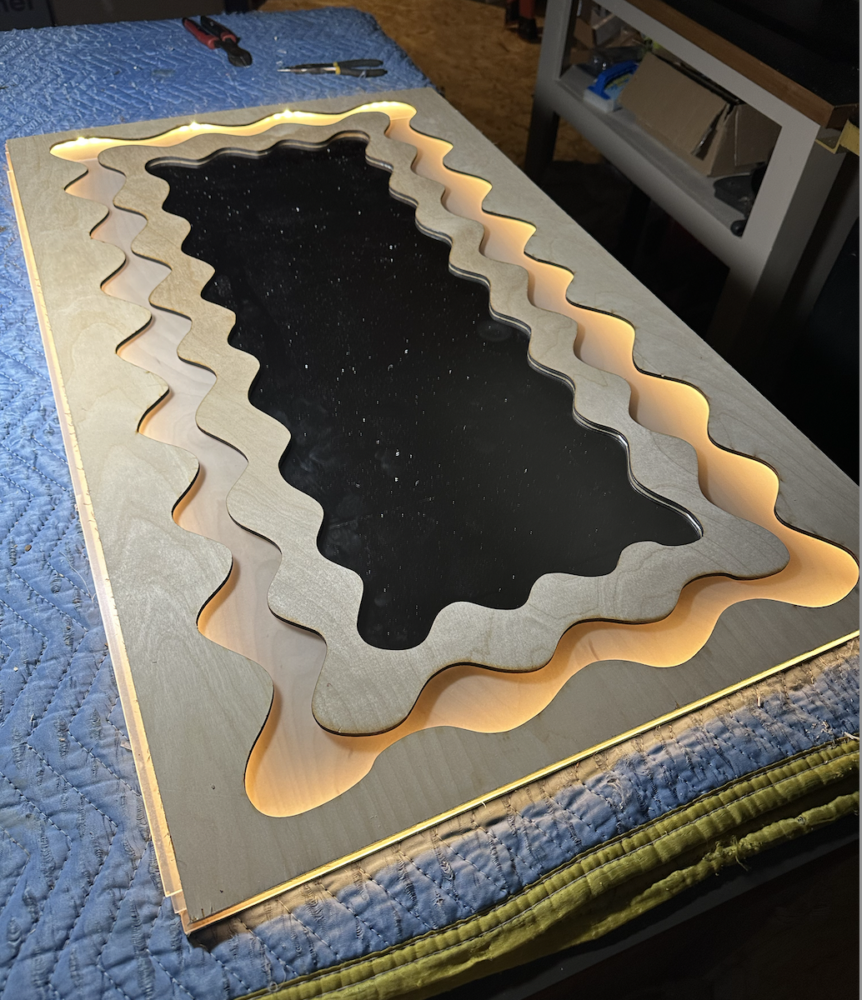
I think my final design looks like my original sketches and also combines a lot of aspects from my inspiration photos. I also achieved all of my specifications that I was aiming for. I still created a piece of furniture that is functional and also aesthetically pleasing. I think if I had to do something differently, I would use a different and stronger glue. Since I did most of the assembly at home I immediately took it back to college with me and some of the edges of the frame started to separate. This was an easy fix though because all I had to do was push the frame back to its original place. In the future I plan to use this mirror in my room and any other living spaces I may find myself in. Currently I have it horizontally on a large table in my room and I use it every night with the lights as a nightlight before bed. I like how it is very relaxing and not a harsh light especially when it is late at night and I am trying to wind down. The led lights are able to be dimmed and brighted to many different brightnesses so that is very useful.

3 Comments. Leave new
[…] Main Final Report Pt. 2 […]
I really like the depth that’s created with the shadows in the dark. It looks like a little wiggly mirror box. Were there any other challenges?
Thank you for your feedback! All I changed so far was making the adhesive for some parts of the frame stronger.