
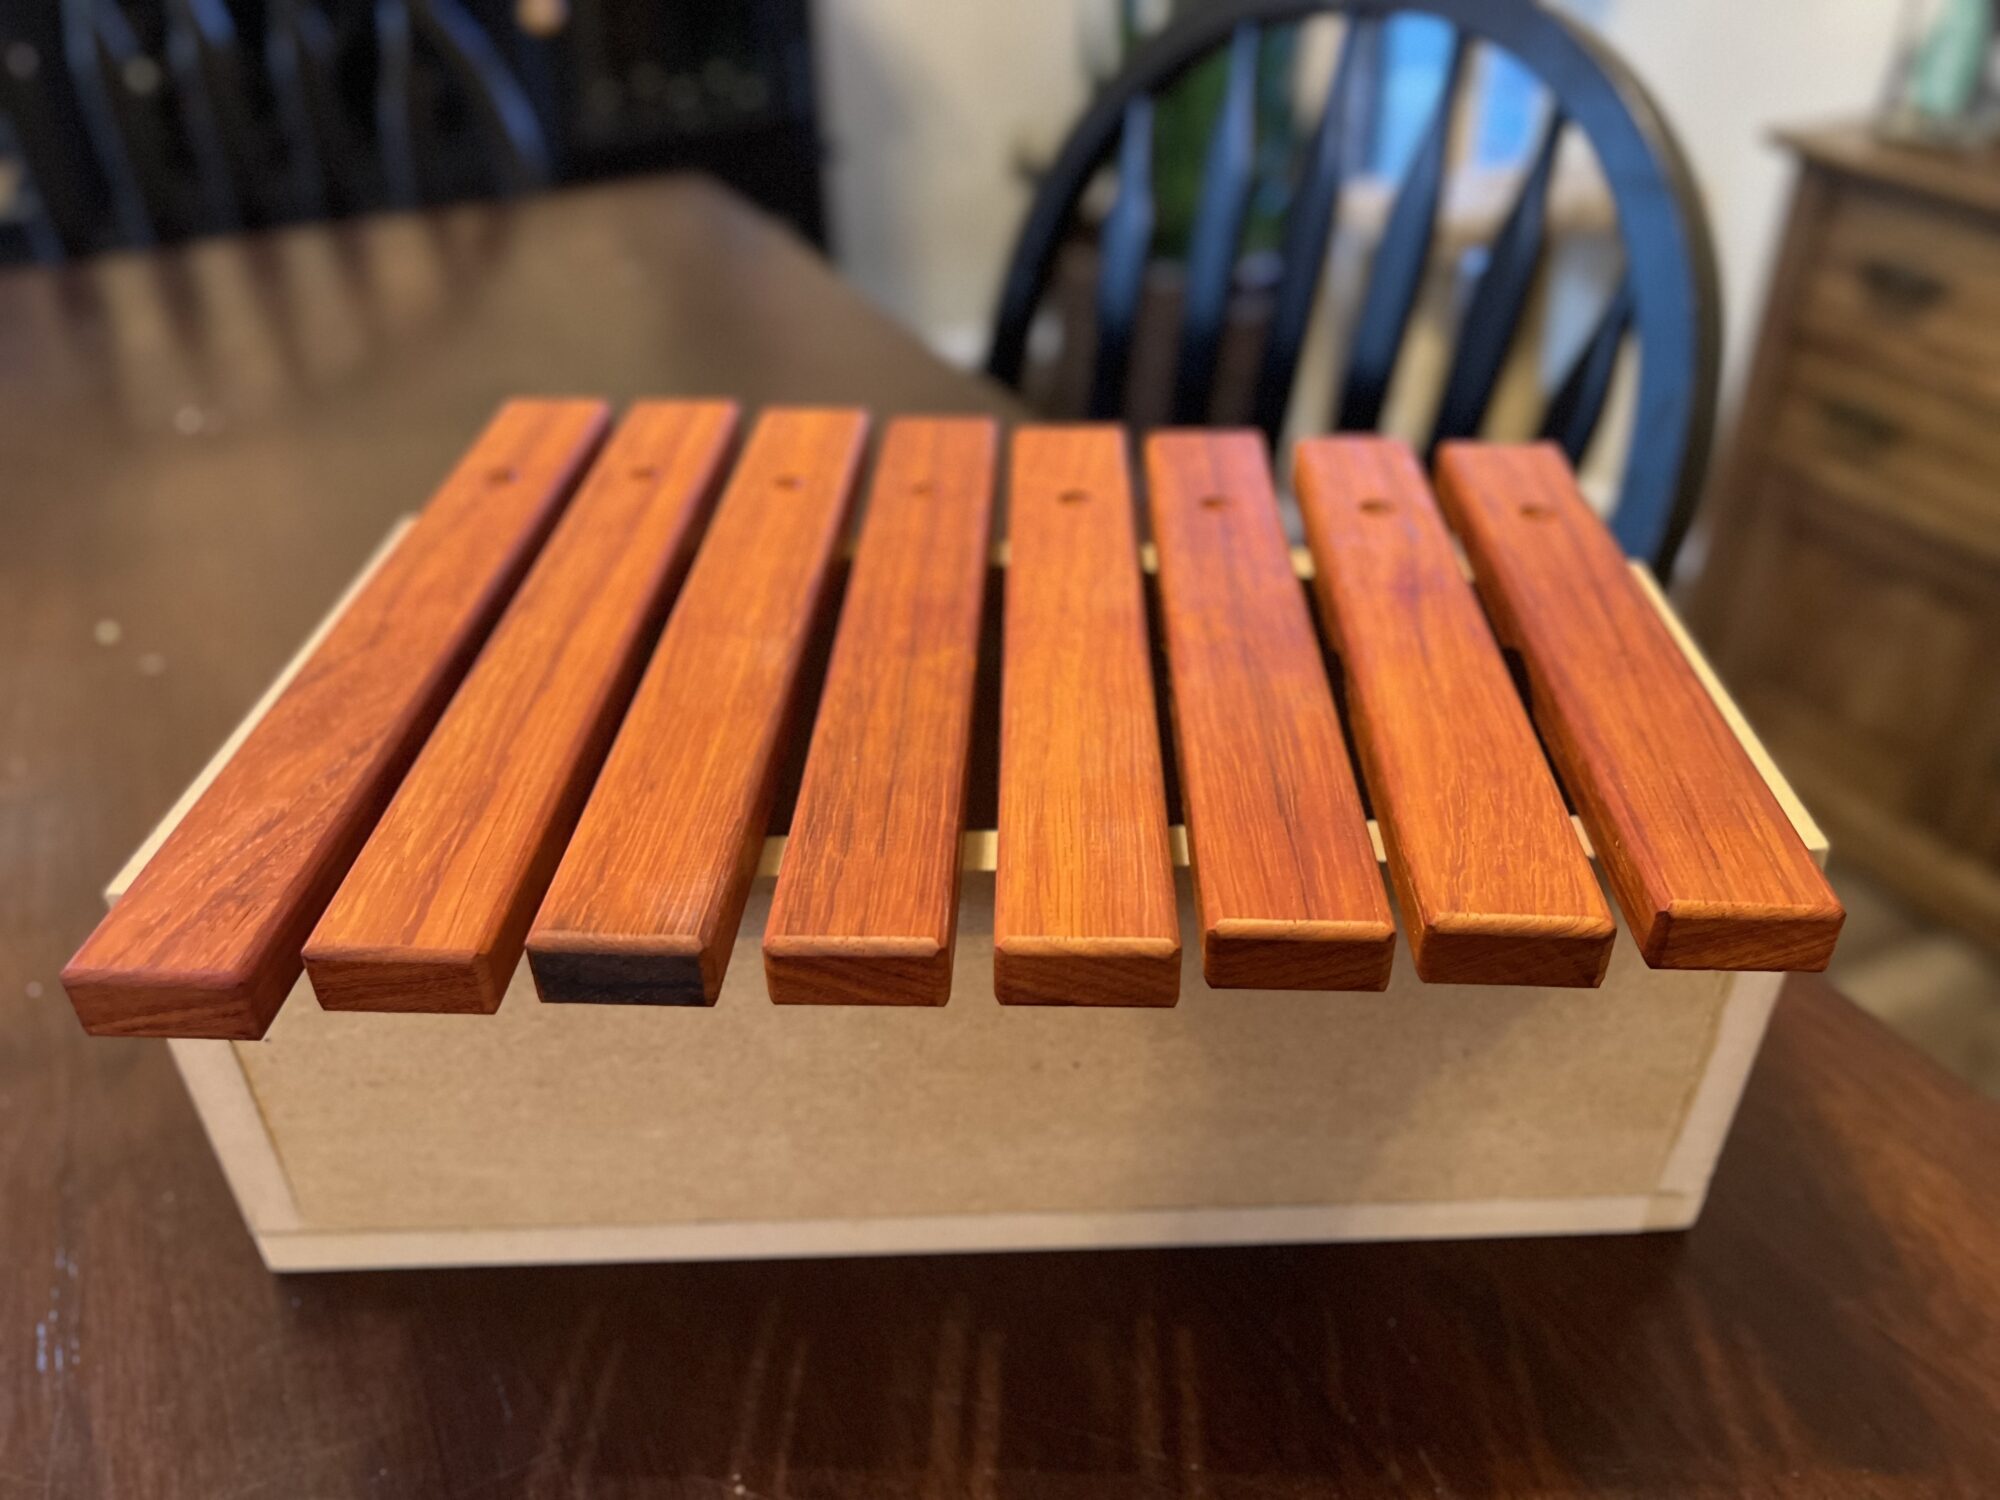
I knew from the very beginning of the semester that my final project was going to be a xylophone. I’ve tried to make a xylophone before when I was a sophomore in high school, and it didn’t turn out very well. When I attempted the project back in 2016, I chose a design to build that was too ambitious and complicated for my abilities. For this round, I decided to try something much more approachable and simple. Instead of making a 2-octave xylophone with a fully chromatic set of bars (think white and black keys on a piano), I instead went with a single octave with only the “white keys”, making for 8 bars in total. While I still have yet to paint the frame the “sage green” color I intended, I think this project serves as vindication for my past failure.
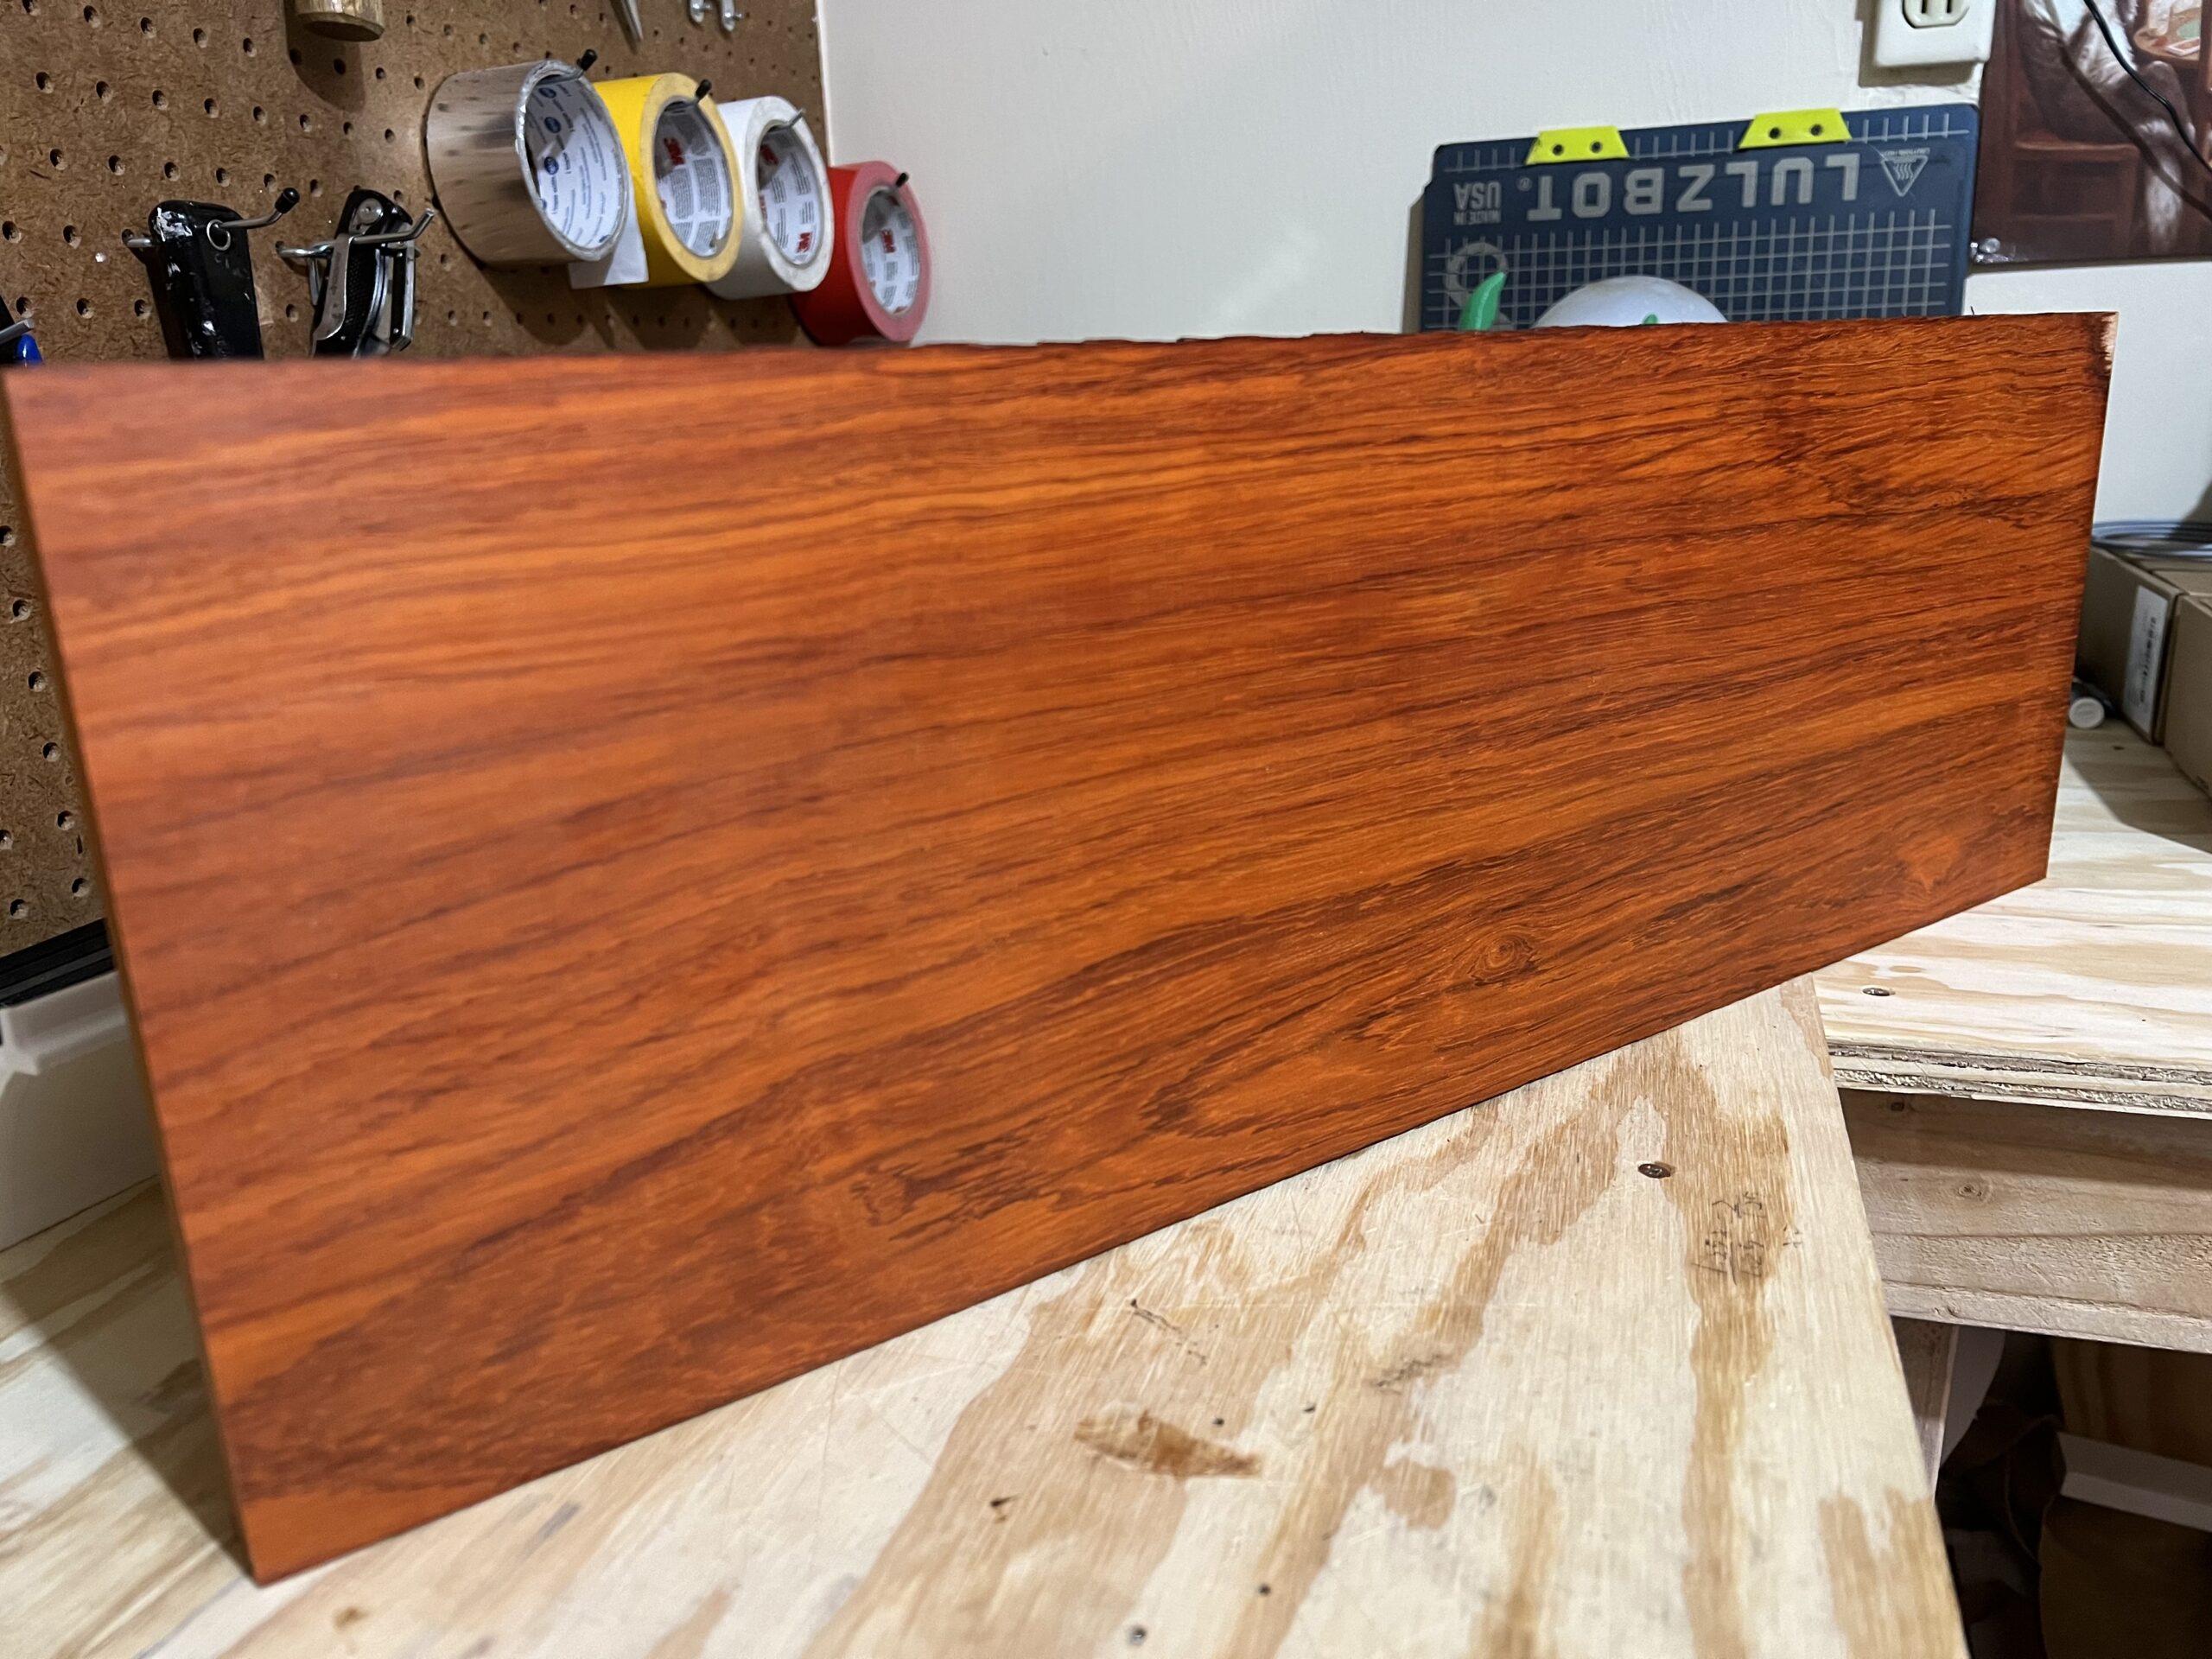
The most important part of designing a xylophone is the type of wood you use. Historically, xylophones and marimbas have been made out of Honduran rosewood. Since the Honduran rosewood tree is endangered and its wood is difficult to import into the United States, I decided to go with the next-best option: African Padauk (puh-dook). Not only does it have a beautiful orange color and is remarkably cheap, its grain density and material properties make it sound fantastic when it’s made into xylophone keys.
Choosing the size and shape you cut the keys into can be very difficult. Xylophone makers like Yamaha and Adams have proprietary dimensions that you can’t get unless you measure a set of their keys. Since I didn’t have a spare xylophone handy (and didn’t want to get a cease and desist from Yamaha for copyright infringement), I decided to buy a set of plans for a xylophone from a Canada-based marimba builder named Jim McCarthy. He actually helped advise me on my last xylophone project in high school, and he has a website called makeamarimba.com where he sells plans to make a variety of instruments. I bought his “P1 Xylophone” plans with the intention of modifying the shape of the frame and number of keys.
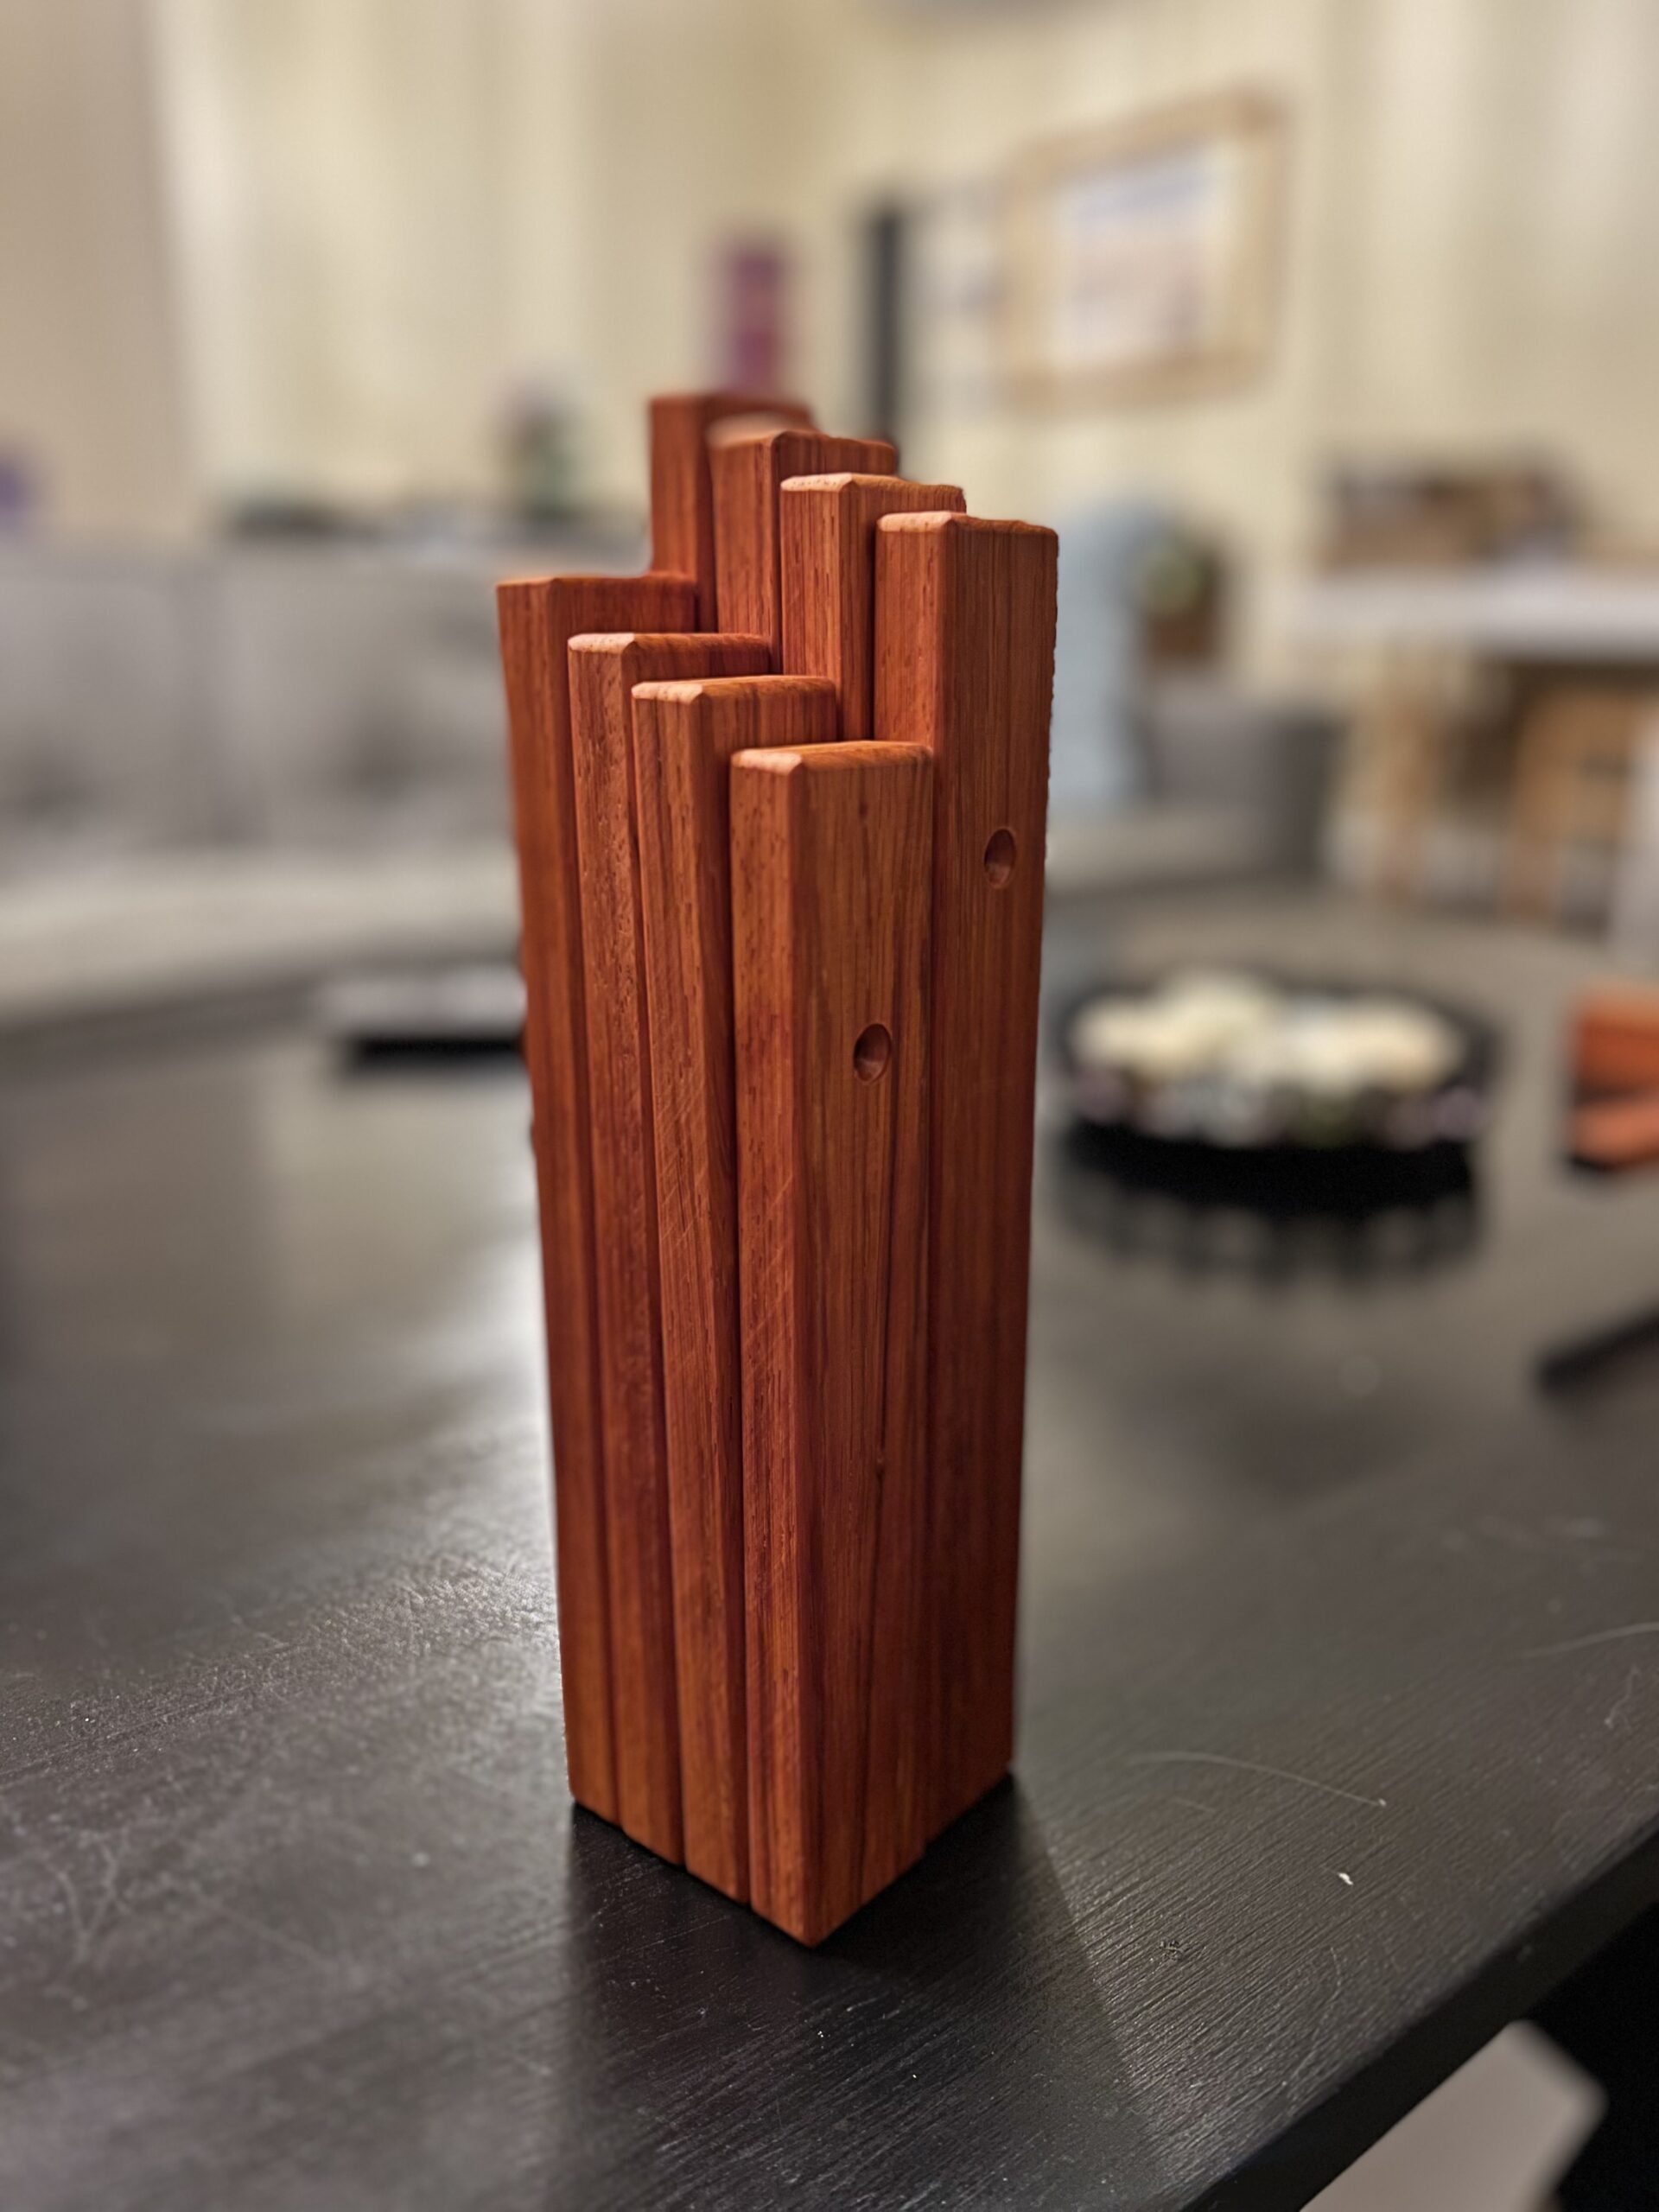
I owe a huge amount to Josh Colyer in the Idea Forge Makerspace for his guidance in the manufacturing phase of this project. I haven’t really done much woodworking since high school, and I couldn’t have done it without him. All manufacturing for this project was done in the Idea Forge Makerspace. I began by cutting the bars into their general shape. One characteristic about xylophones is that the bars get shorter as the notes get higher, but they are all the same width and thickness. For this xylophone, I chose to make the bars all 1 ¼” wide and ⅝” thick (slightly deviating from the McCarthy design). I cut 1 ¼” strips on a table saw, and then chopped them to length with a miter saw. To keep the bars from splintering, I rounded the corners with a router.
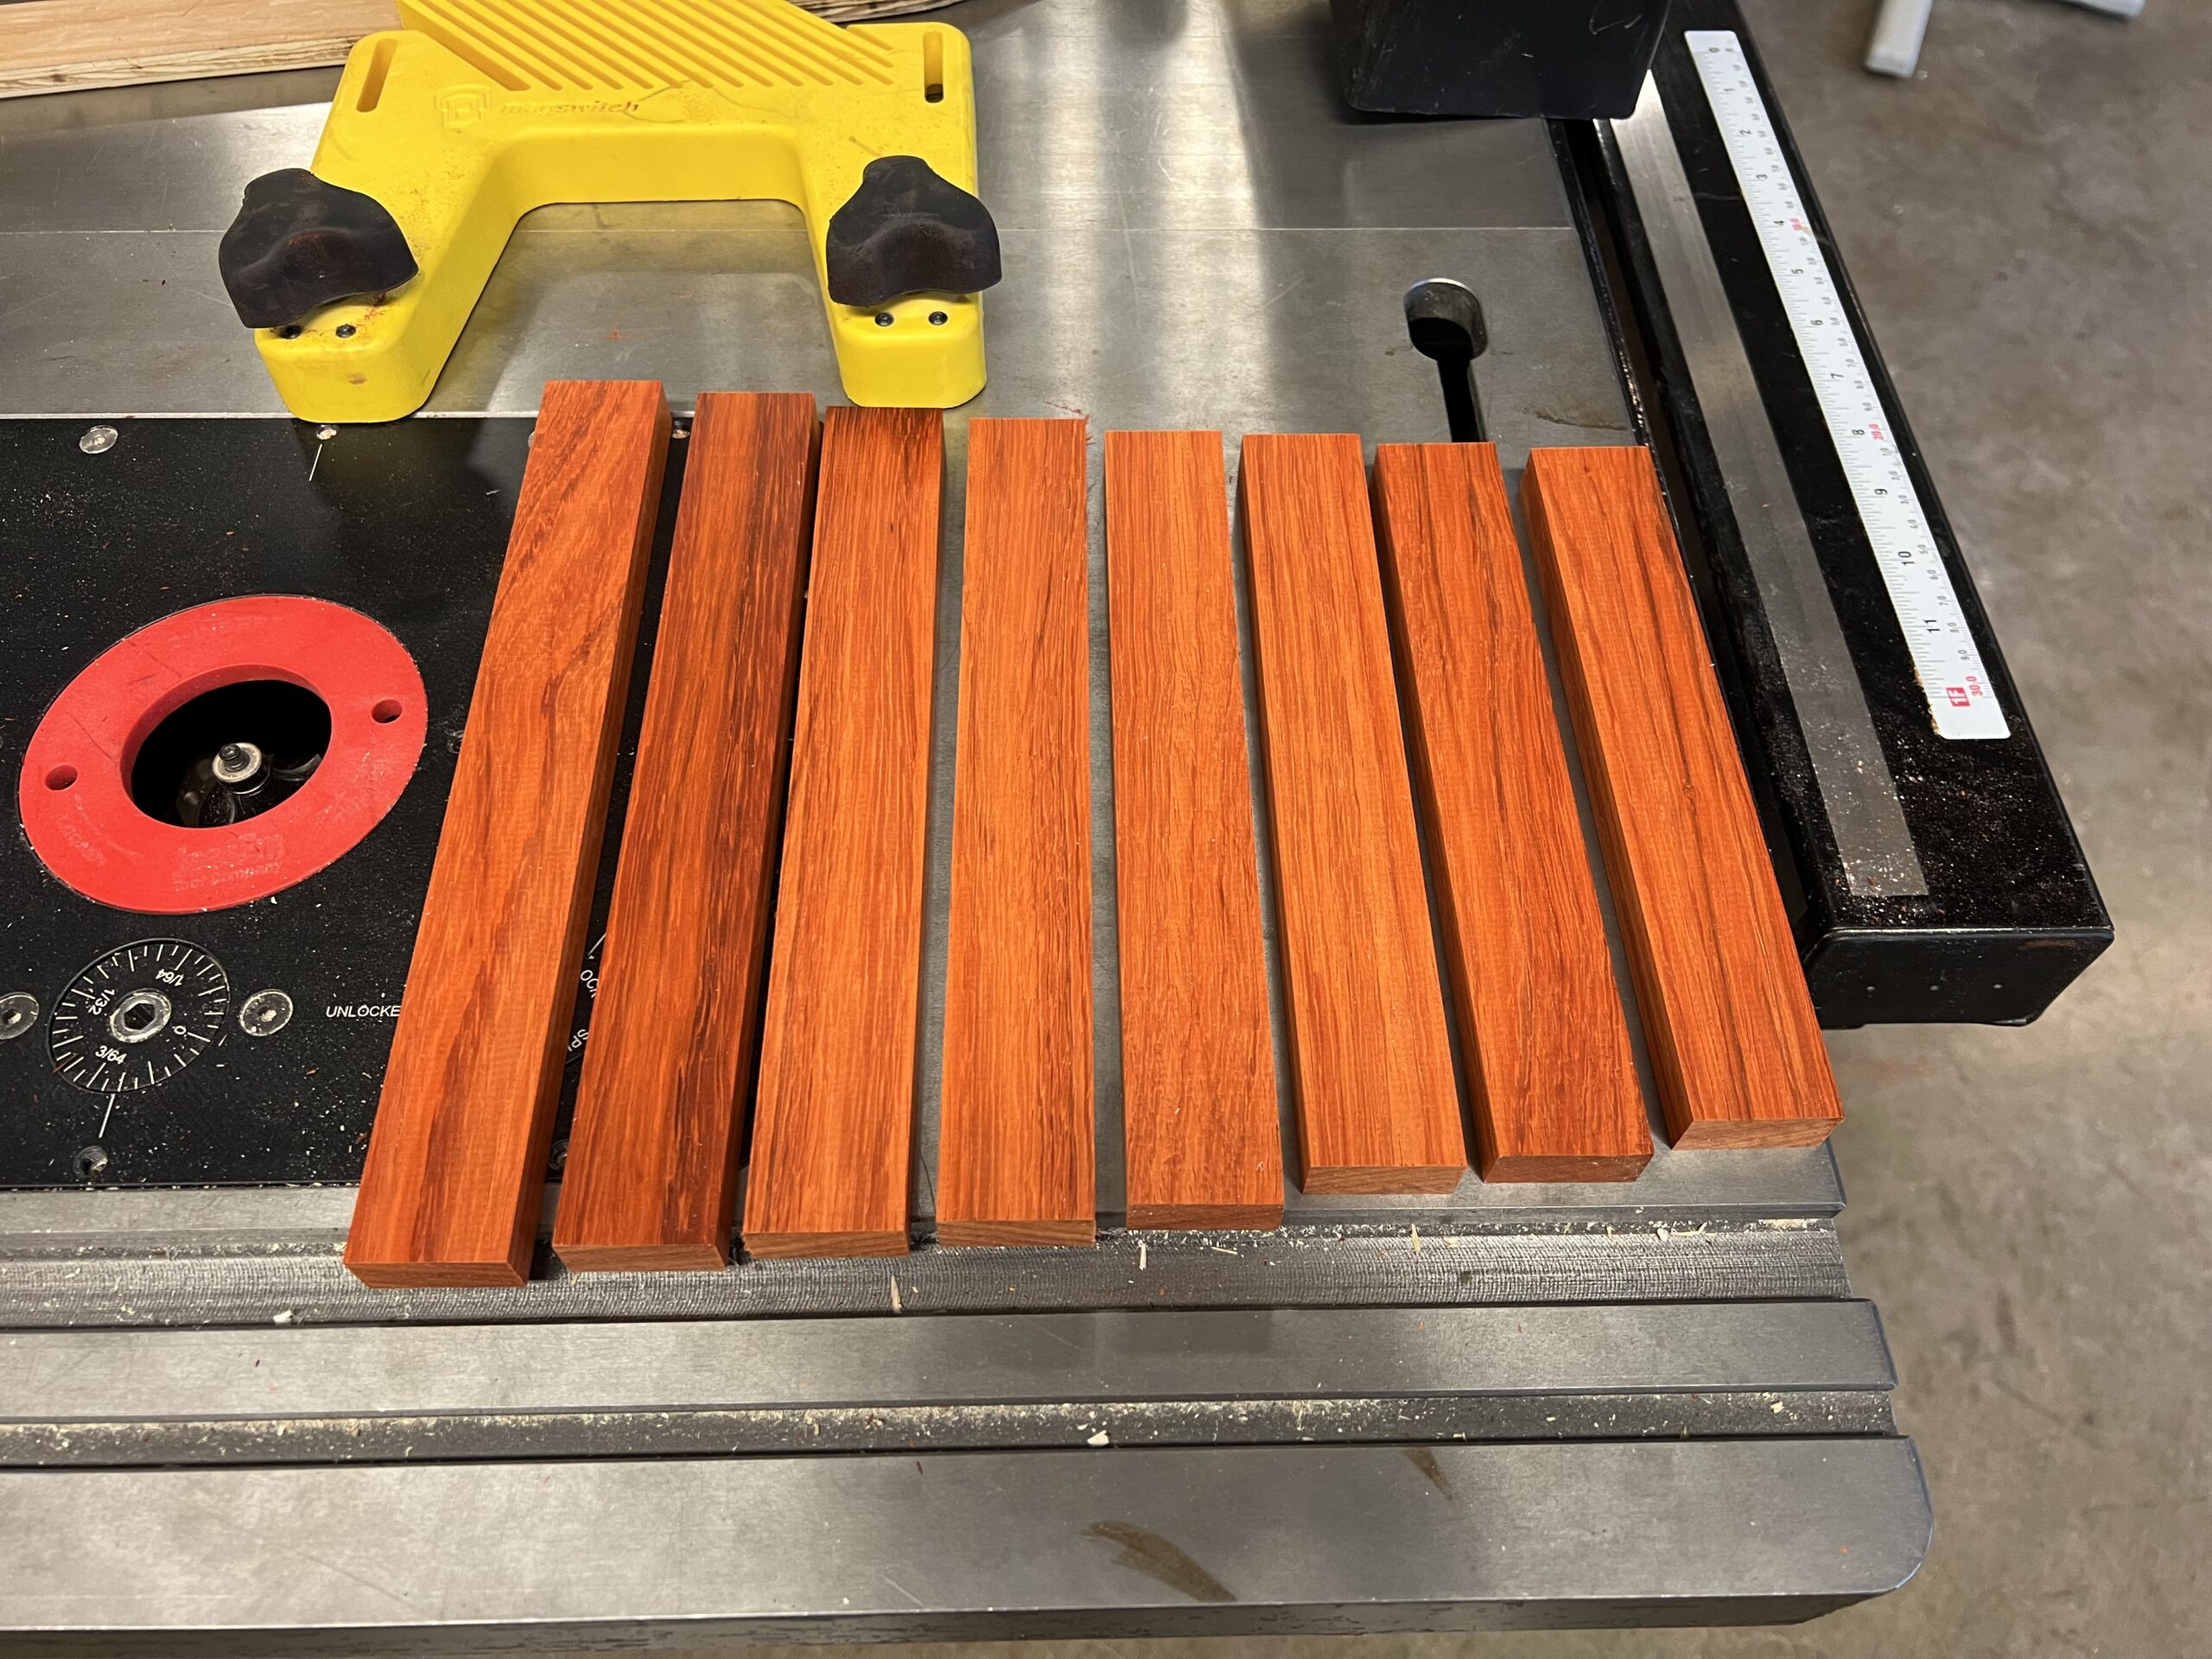
I also added a hole in the top of each of the bars at the “nodal point” to screw them all into the frame. I am very happy with how these turned out, and I haven’t even applied any finishing oil to them yet.
The most difficult part of this project was tuning the keys. I was surprised that the tuning went much quicker and was much easier than I expected it to be. I originally budgeted ten whole days to tune these keys, but in the end I was able to get them all done in an afternoon. I don’t have the time to go into the physics of tuning xylophone bars, but here’s the basics: the note you hear when you hit a xylophone key is the frequency of the first transverse mode of vibration (a sine wave propagating along the length of the bar). The peaks of this wave are in the center and at the ends, with two nodal points—one where the hole is and another in the same place on the other side of the bar. You can adjust this frequency by removing material from the underside of the middle of the bar, because removing material changes the tensile strength of the bar which lowers the frequency it resonates at. You can get way more into it than that by tuning other modes of vibration, but I do not have the ability or patience to try that just yet.

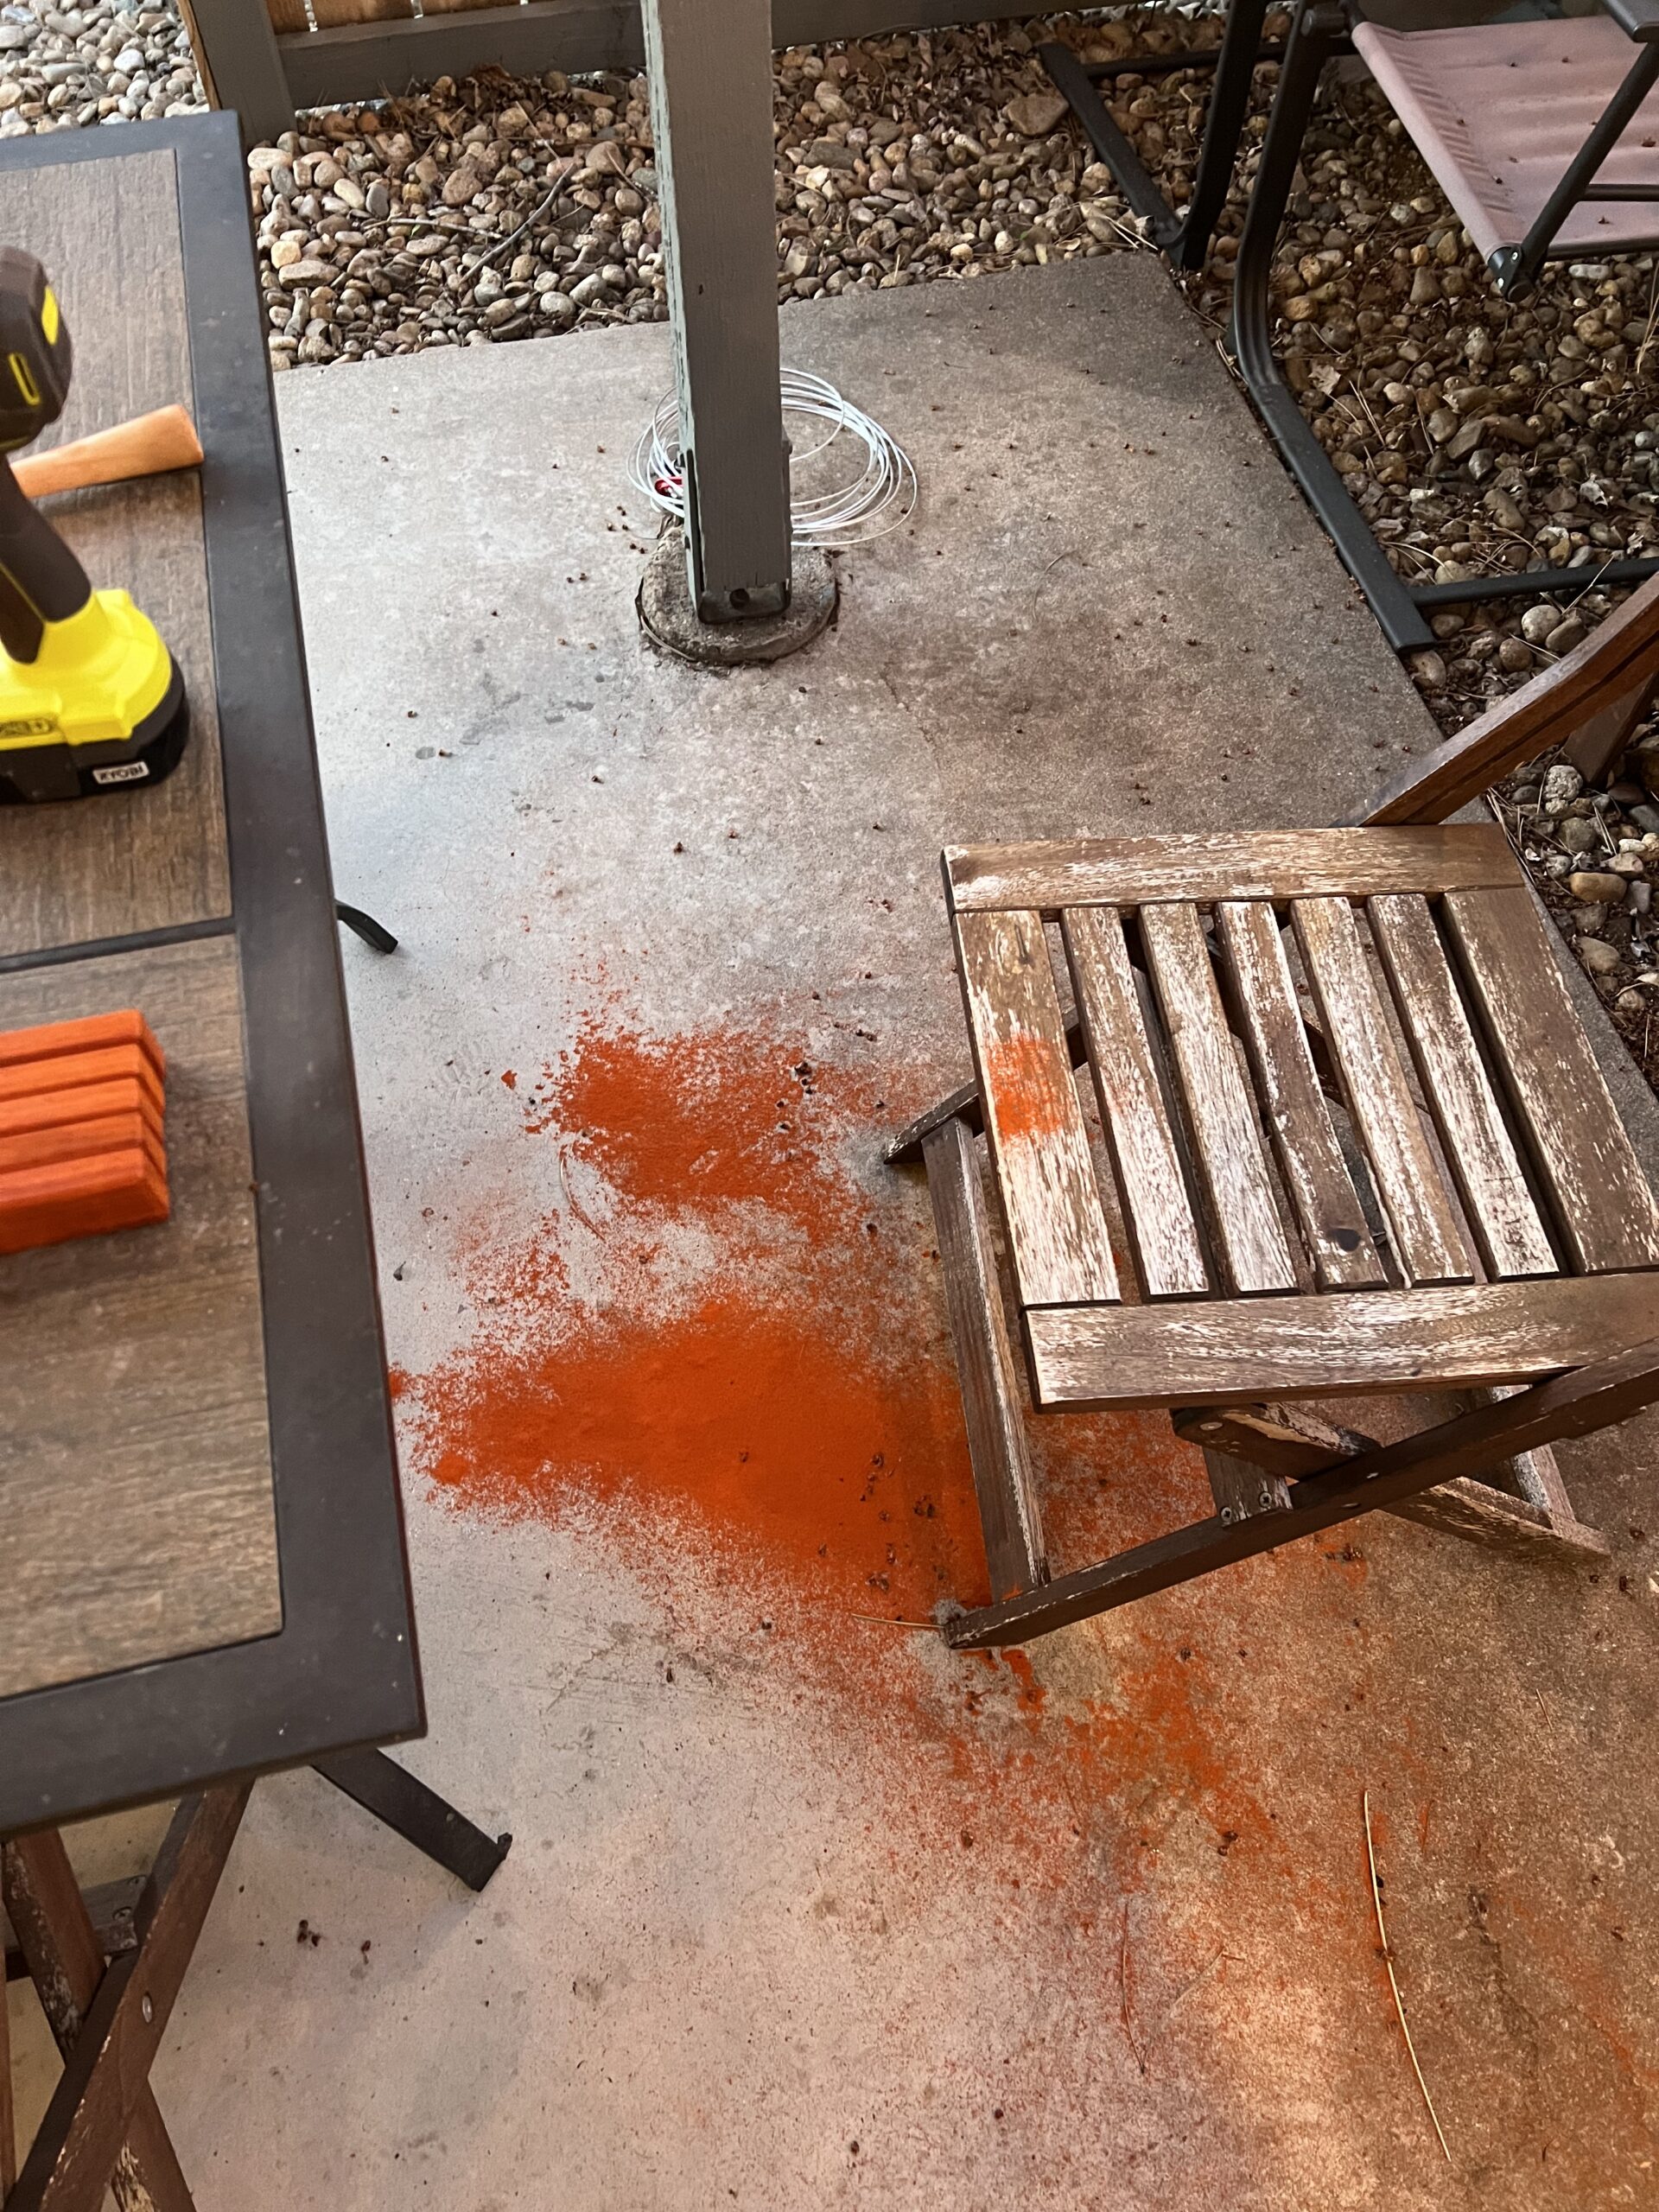
I could never have anticipated how orange my life was about to get by sanding these bars. I used a 1 ½” drum sanding drill attachment that I got from McGuckin’s for 69¢! It uses 36 grit sandpaper, so the sanding went by really quickly. I stopped every 10 seconds or so to make sure the wood didn’t burn and to check the pitch, and I got these all sanded over the course of about 4 hours. If I were to attempt this project again, I would have used a bandsaw to cut an arch out first to keep from having to do so much sanding. I ruined a pair of shorts and a shirt too, so I’d say this probably wasn’t the best setup. But it got the job done!
With the bars done, I needed to move onto the box resonator they’ll sit on. I had a great many setbacks getting into the woodshop to make the box, and I was only able to do so this week. However, I got the box built in an afternoon and I’m just waiting for the wood clue to cure so I can prime and paint it.
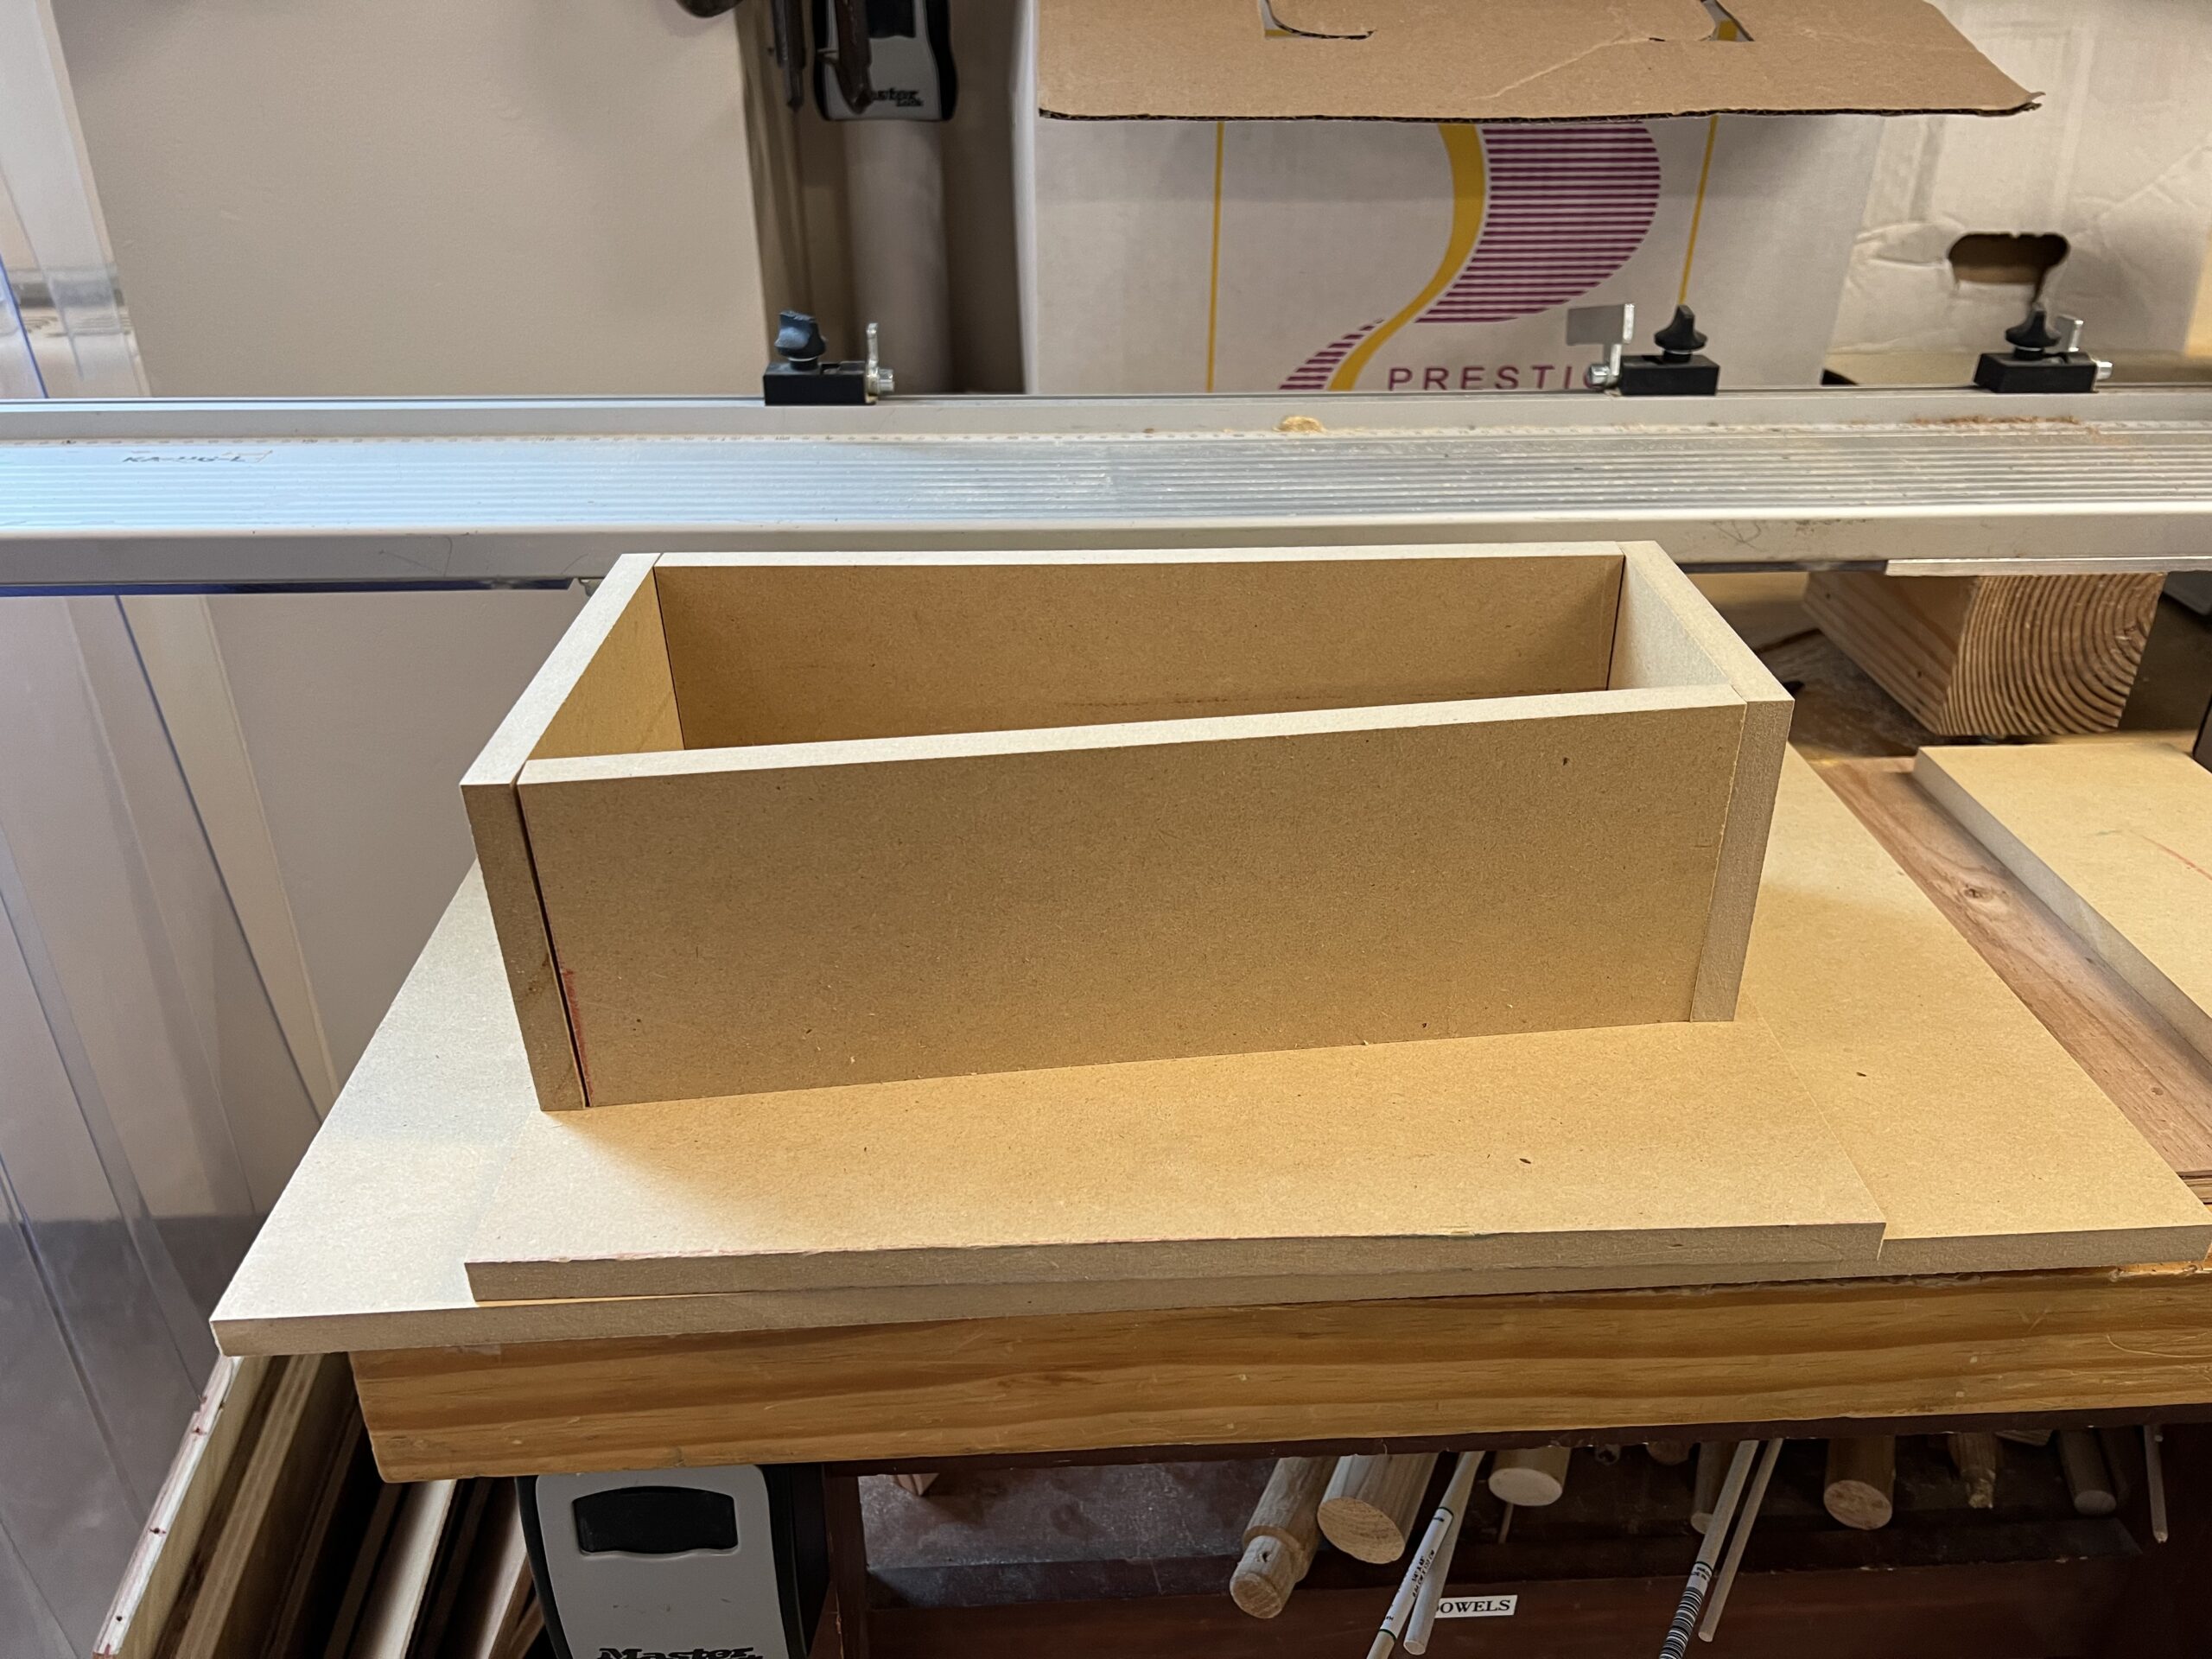
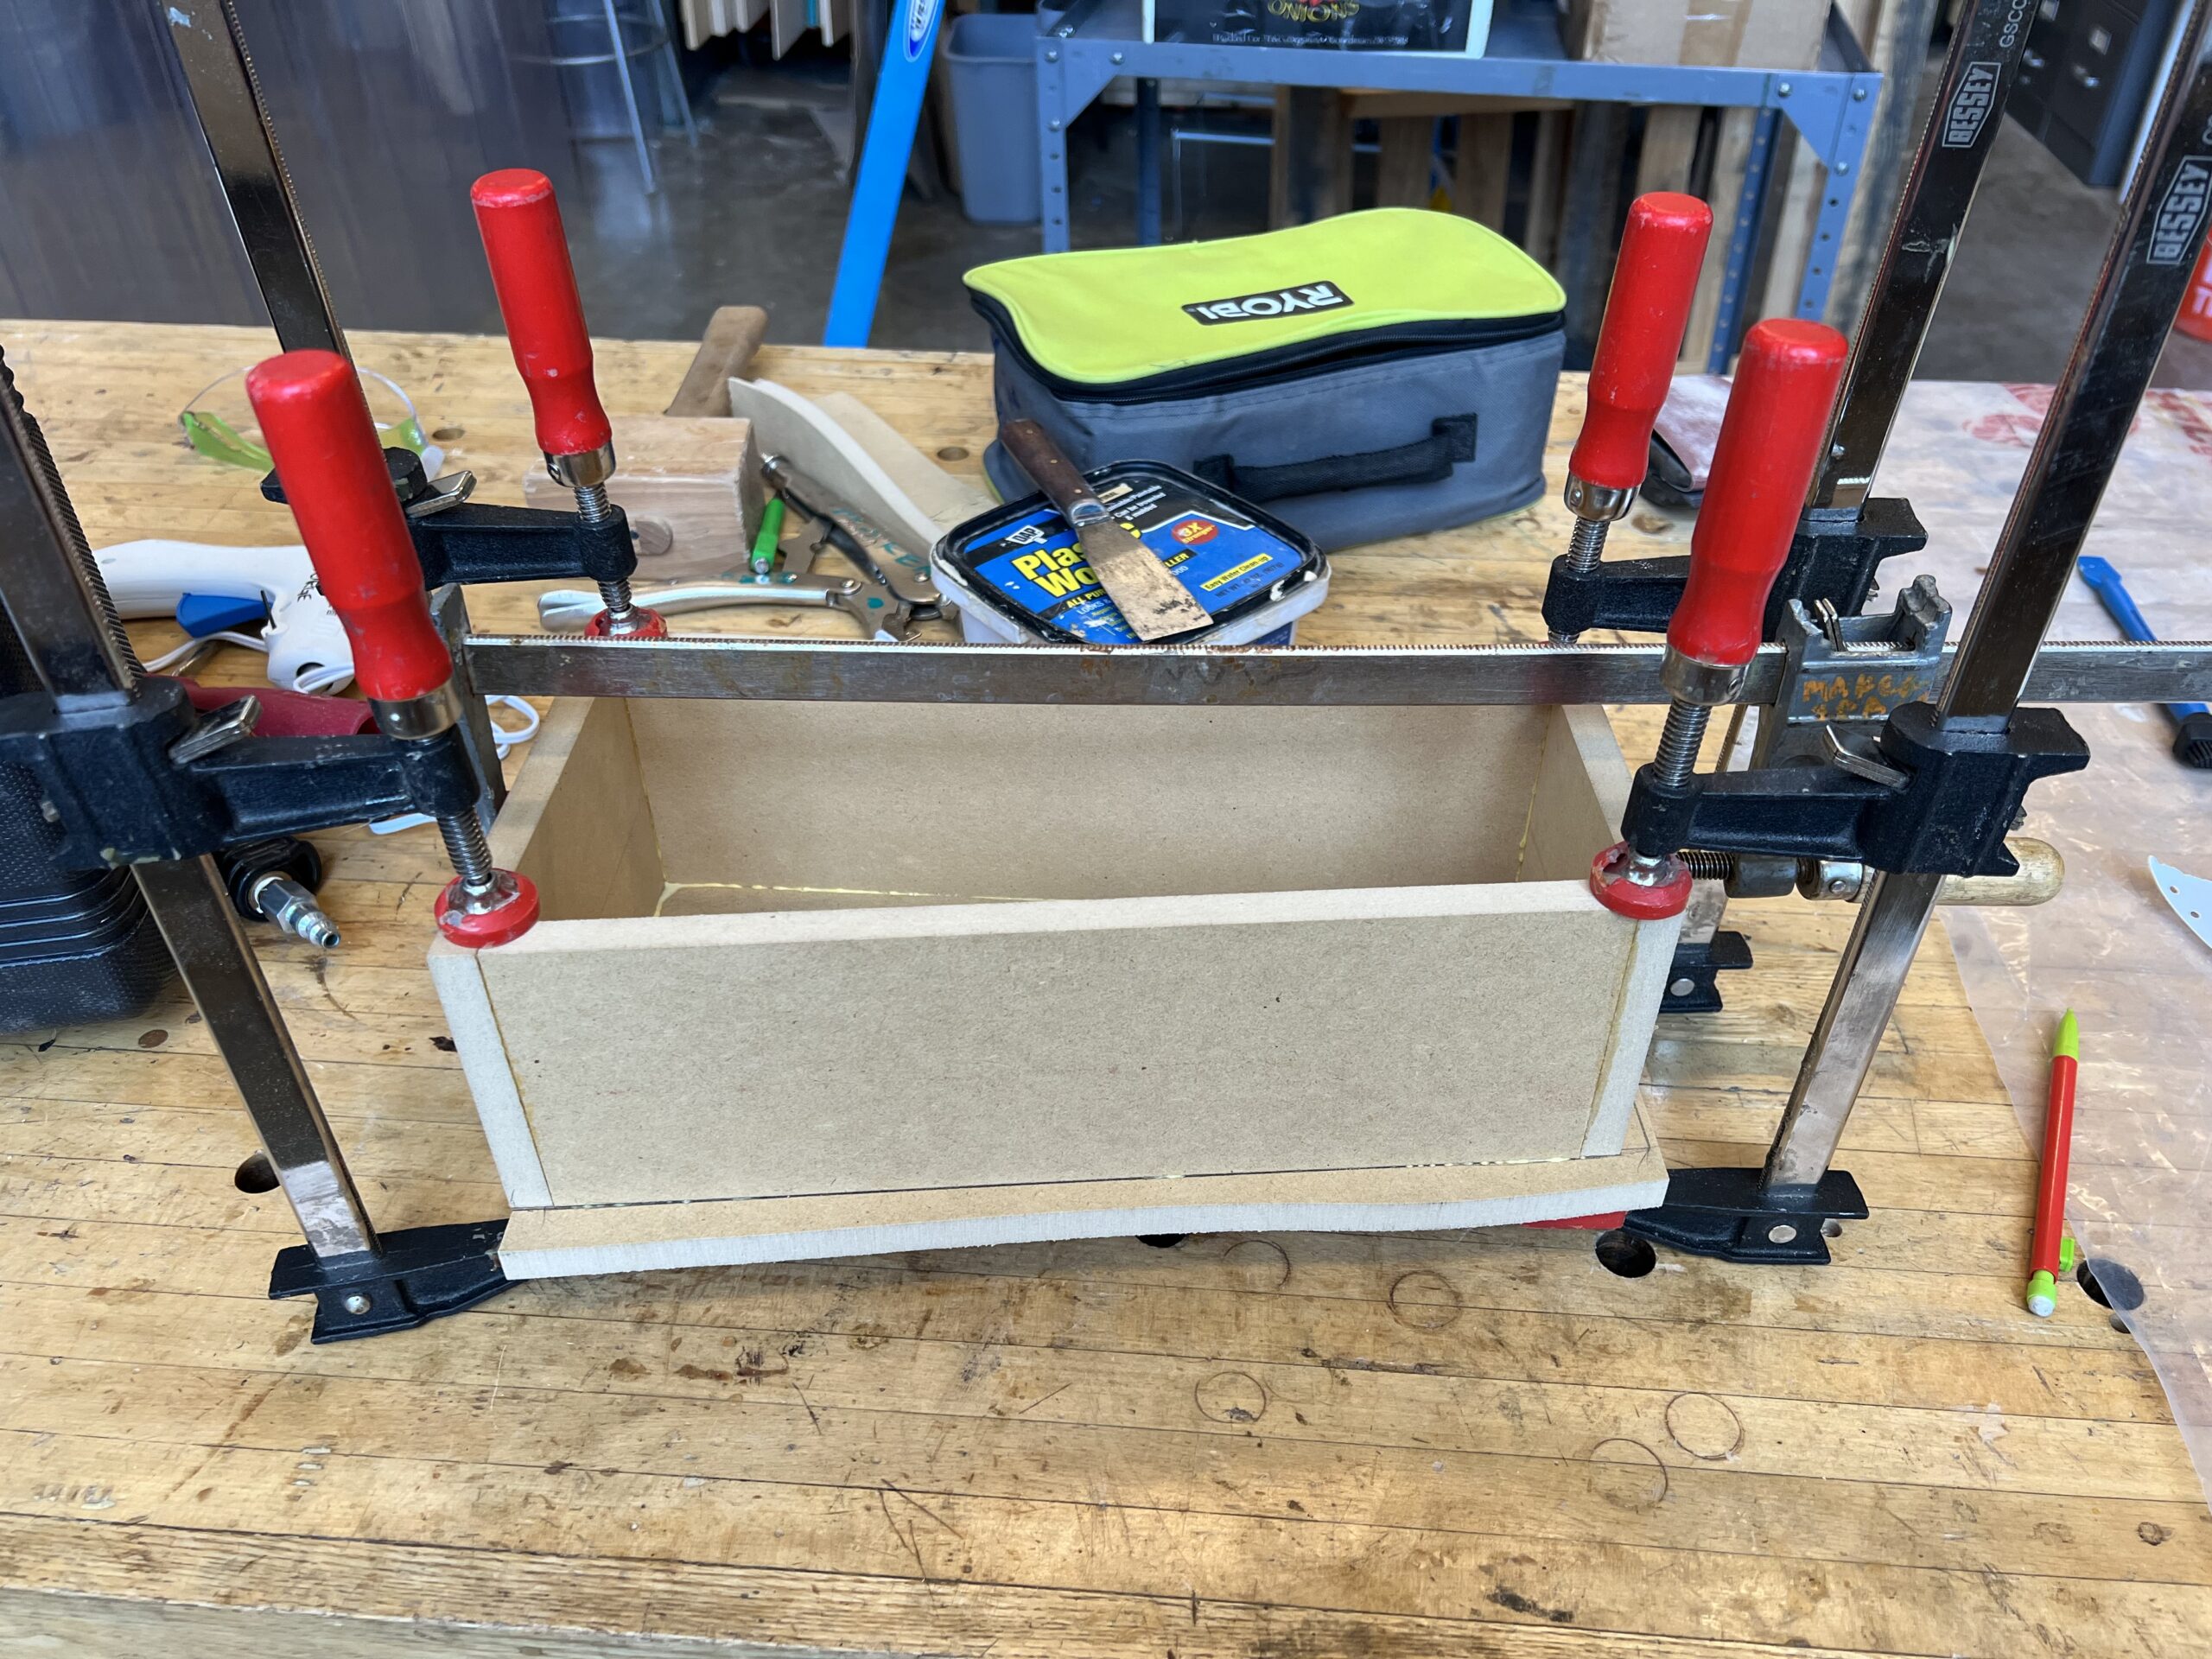
While I was originally going to make the box rectangular to go with the midcentury modern aesthetic, I realize that there would need to be a trapezoid inside it anyway to mount the bars where the screw holes are. So, I decided to ditch the rectangular box and make a trapezoid instead. I am very happy with the result, and I’m looking forward to painting this tomorrow. One design change I have made is that I am no longer going to have legs coming out of the box. Since I used MDF to make the box and the whole thing is kind of heavy, I’m worried about the legs breaking through the MDF.
Because most of the aesthetic relies on the paint job, I will be making a follow-up post before expo to show off the completed design. Until then, it’s time to get painting!
1 Comment. Leave new
Hi Josh, I really think you nailed the midcentury modern aesthetic here with the finished wood and white box. I am excited to hear this at expo! Do you play xylophone or are you just interested in building them?