
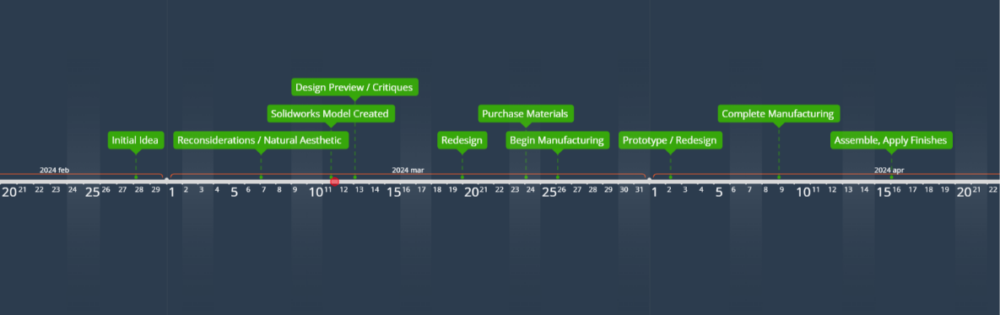
I created a timeline some time ago that laid out how exactly I would go about accomplishing my project. I planned to finish around the middle of April, with about two weeks allotted for the actual manufacturing. I discovered that this was rather ambitious, unfortunately, as I am still yet to add the finishing touches to my design.
The plan for my manufacturing consisted of buying my materials, laser cutting the gear shapes, cutting the backplate shapes, machining dowels down to size, gluing component layers, adding stain and finish, and assembling the components. My materials consist of one 0.875″ x 3′ wooden dowel, four 1/8″ x 4′ x 3′ sheets of hardwood walnut or oak, two 608 ball bearings (which I took from my skateboard after replacing with new bearings), two 1/4″ x 3″ x 5′ beach wood boards, one can of walnut stain, one can of oak stain, a stain brush, mineral oil, and some wood glue.
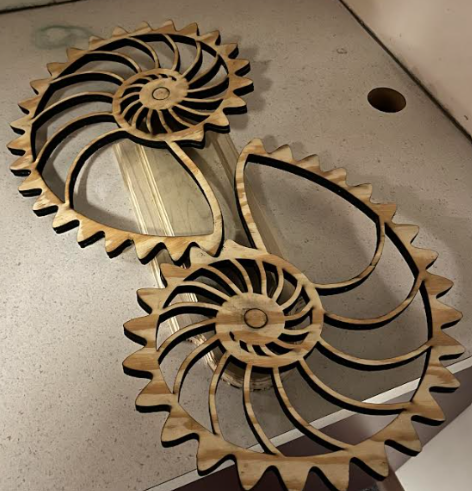
I quickly found, though, that 1/8″ hardwood sheets are difficult to come by, so after much search and little result I came to the conclusion that I would need to use plywood. I initially was against plywood because it tends to come with poor finishes and inconsistencies in the glue holding layers together which makes laser cutting difficult and unpredictable. I found some information online giving good recommendations for laser cutter settings for plywood, so I figured I could make it happen even though the speed would need to be unbearably low and I would have to watch out for fires. I found some sanded project boards that would work for me and had a decent woodgrain that I was looking for, so I moved forward with these.
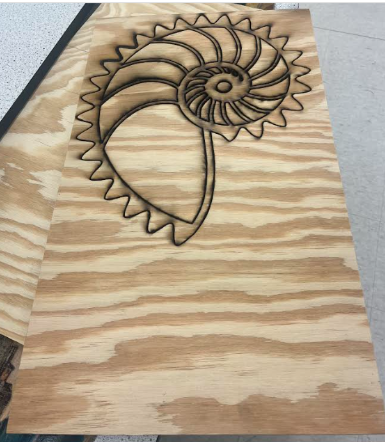
The cutting took far more effort than I had originally anticipated. I took the speed down to 5%, with frequency at 10% and power 100%. Each gear took 25 minutes to complete at this speed, and most of the time they would not come out of the mold. I struggled to remove a few of these attempts but often ended up breaking some part of it. You can see that the arms are very thin, and they are easily broken when trying to complete this.
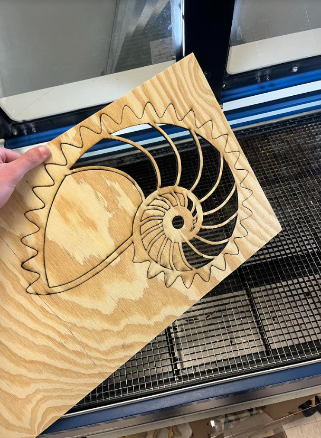
Finally, after some trial and error I brought the settings to 100% power, 3% speed, and 5% frequency. This would only cut one at a time, though, and only if the design was placed in the top left corner of the laser cutter. I think that a better laser cutter could have done it better.
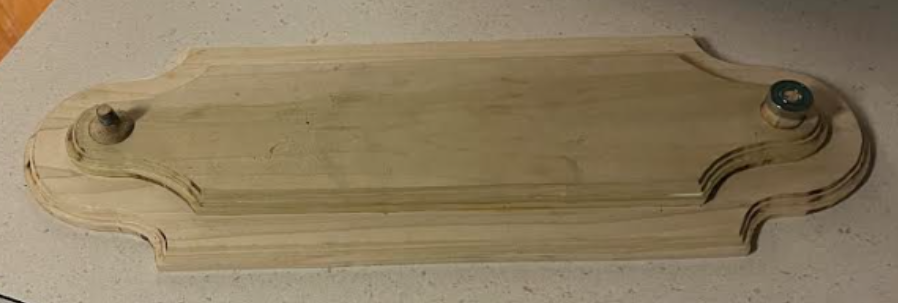
Moving on to the back plate, I laser engraved the beach wood with the design so that I could take it to the bandsaw where I made the most important cuts. I then took these to the drill press to cut out the holes for the bearings and dowels. I layered 2 sheets for the two parts of the back plate, for 4 total. These were glued together and then taken to a router to get a roman column edge to make it look kind of like a plaque. I wasn’t too sure about this process, but I think it turned out great.
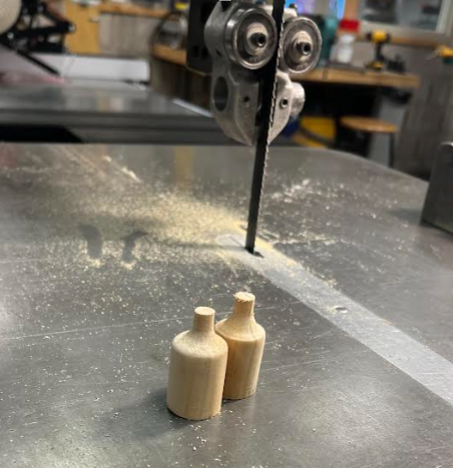
I had to use a lathe to bring the wooden dowels from a diameter of 22mm to 8mm so that one side would fit the back plate and the other would fit the bearing that interfaces with the gear. It took longer than expected, but once I reached the right diameter I pulled them off and used the band saw to remove excess material. These were inserted into the holes in the back plate and then all clamped and glued together.
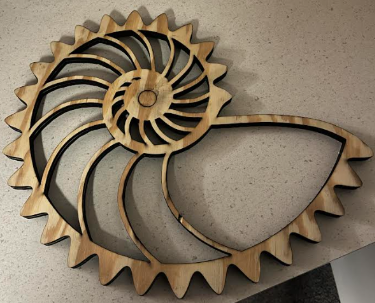
Finally, I assembled the pieces to check for functionality. I still need to sand the pieces and add stains and finish to bring out all of the wood grain accents but I think this is a pretty good product, even with all the wasted material. I just wish I had found the material I originally sought out for.
2 Comments. Leave new
Hey Noah, it’s been awesome seeing this project come to life and I love how it turned out! I really like how the wood has the burnt marks on the edges from the laser cutter I think that adds to the aesthetic and overall vibe.
Hey Noah, it’s been awesome seeing this project come to life and I love how it turned out! I really like how the wood has the burnt marks on the edges from the laser cutter I think that adds to the aesthetic and overall vibe.