
Since the last post, I have finalized the remaining hardware for my project and tested its full functionality. In terms of a timeline, the image below displays how I progressed through this project. Getting the software to work definitely took up the most amount of time but I am pleased with the final result.
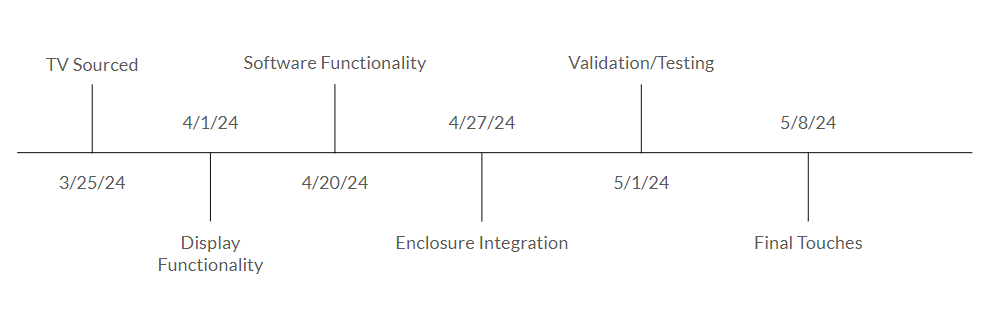
Project Timeline
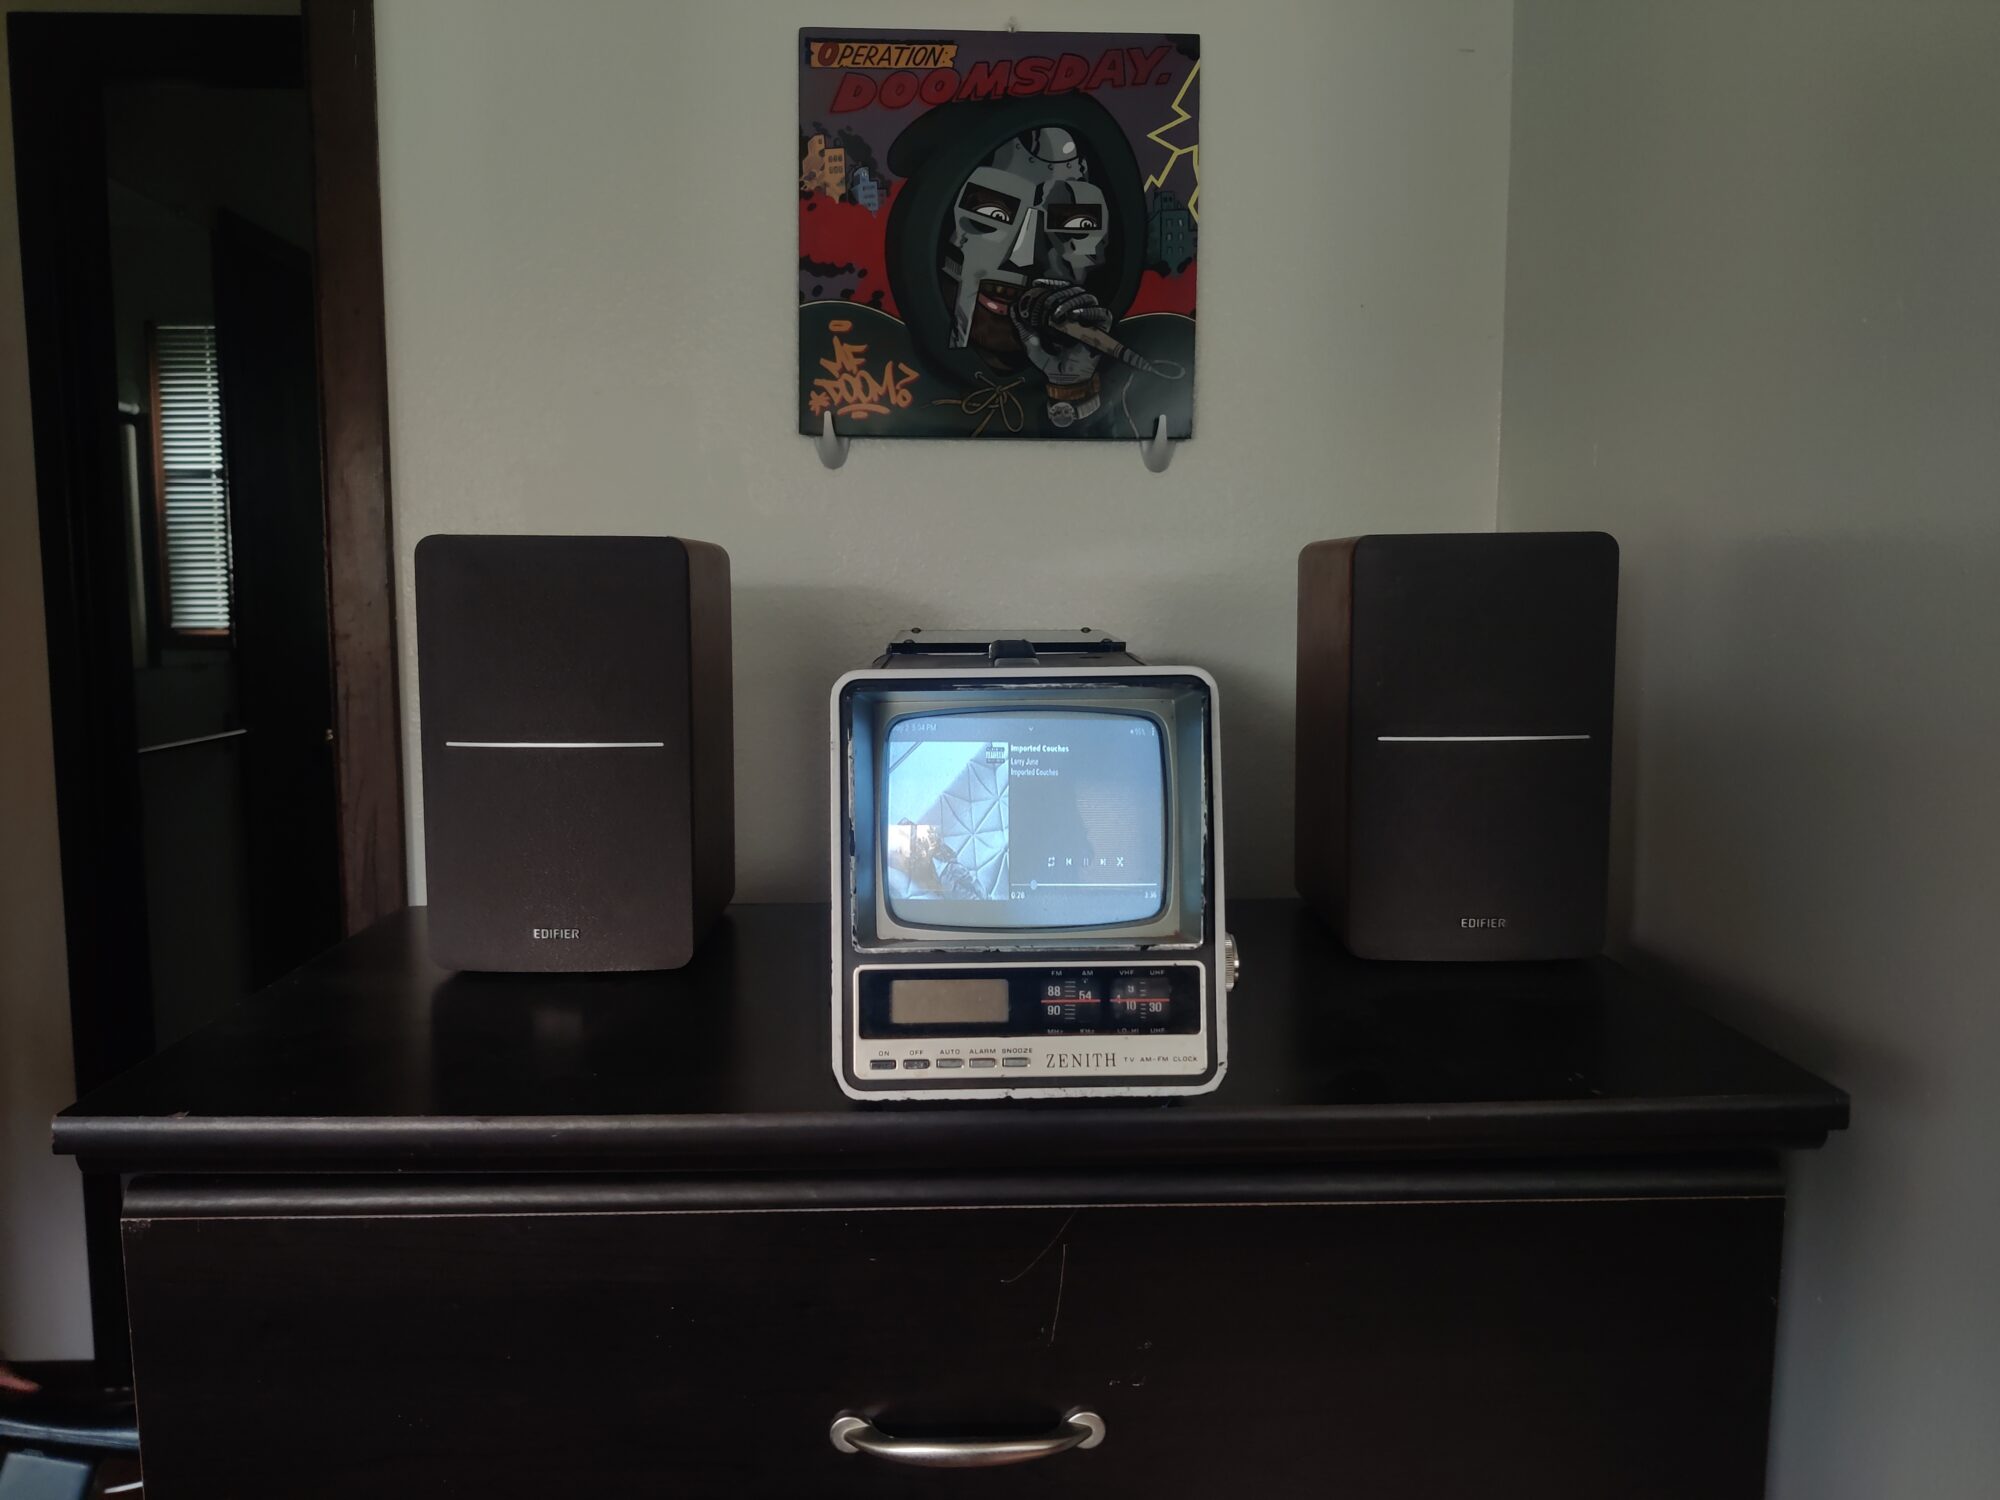
Previously, I was using the TV’s built-in speakers to see if the music was playing properly but I was able to get the system working with my external bookshelf speakers by connecting them over aux to the Raspberry Pi.

Raspberry Pi connected to speakers
I think that the way everything looks together really suits the cassette futurism aesthetic. The speakers themselves are boxy and have rounded corners so it produces a very cohesive setup.
Video of audio playing over external speakers
The video above shows the setup fully working. As you can see, the size of the TV with the extended enclosure fits well on my dresser and will also be a good size on my desk. The sound quality of the speakers is quite good and the music sounds great. Right now, I am only getting sound out of one of the speakers but this could be solved by adding an external DAC (digital-to-analog converter) or maybe playing around with some settings in Volumio.
I have already detailed how the display adapter hardware works in prior posts but I’ll focus now on the enclosure fabrication and integration.

Rear view of enclosure

Top corner view of enclosure

Front view of system

Portability
The enclosure was constructed using 3D-printed and laser-cut parts. The blue 3D-printed brackets are attached to the black acrylic panels using some nuts and bolts. I was able to use the ITLL 24-hour space to get the fasteners along with the ITLL laser cutter shop to create the acrylic panels. Luckily, I came across some good-quality black acrylic scrap that was just sitting in the shop. The blue 3D printed parts were printed in the IdeaForge using some filament from a friend.
As described in the last post, the enclosure is attached to the existing TV using two screws that previously held the TV’s back cover onto itself. This method worked well but I added a bit of foam under the back edge of the enclosure to make sure it didn’t sag and put excessive stress on these two screws.
In terms of the electronics, I used zip-ties and velcro to do some cable management and make sure everything was neatly organized and secure in the enclosure.
I noticed that the system is actually fairly portable with the TV’s handle and it may be interesting to explore a battery-powered version in the future.
Budget-wise, the total cost for the TV and electronics was about $110. The Raspberry Pi was free as it is being loaned out from the ITLL and the enclosure was made completely free using ITLL/IdeaForge resources.
All in all, I think that this project was a great learning opportunity and I was also able to hit a majority of my initial specifications. I hope to add some finishing touches such as the hardware buttons and polish the software interface a bit before the expo.
1 Comment. Leave new
I thought your title was very clever and I love how the final product has an old-fashioned sound as well as look. I can tell you really strived to be consistent with the aesthetic! In the future I think it would be really cool to integrate the volume and skip controls onto the TV itself.