
The final project for Aesthetics of design was a very fun one. Like the upcycle project, you can choose what your project will be as long as it meets a few criteria, but for the final project those criteria are more limited. The only requirements are that the project follows a chosen aesthetic, and that it serves some kind of functional purpose. I chose to make a gauge cluster cover for this, constructed out of leather and hiding wires while following the mid-century modern aesthetic. The design of the cover is minimally arranged with limited clutter and a clean appearance; this fact In combination with my choice of timeless materials (brass screws and light brown veg-tan leather, specifically), leads to my belief that my project not only came out looking good, but I also managed to follow the midcentury modern aesthetic quite well.
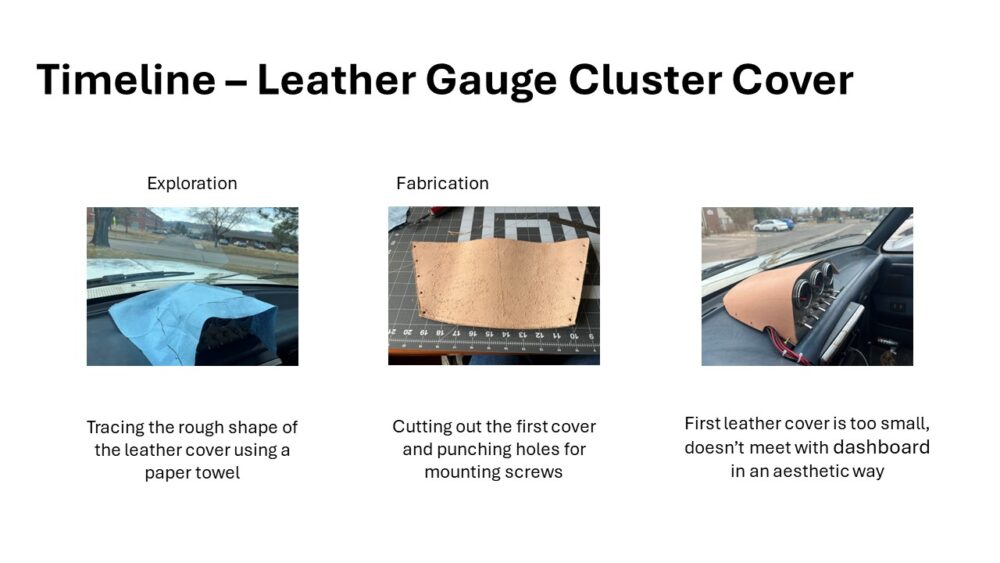
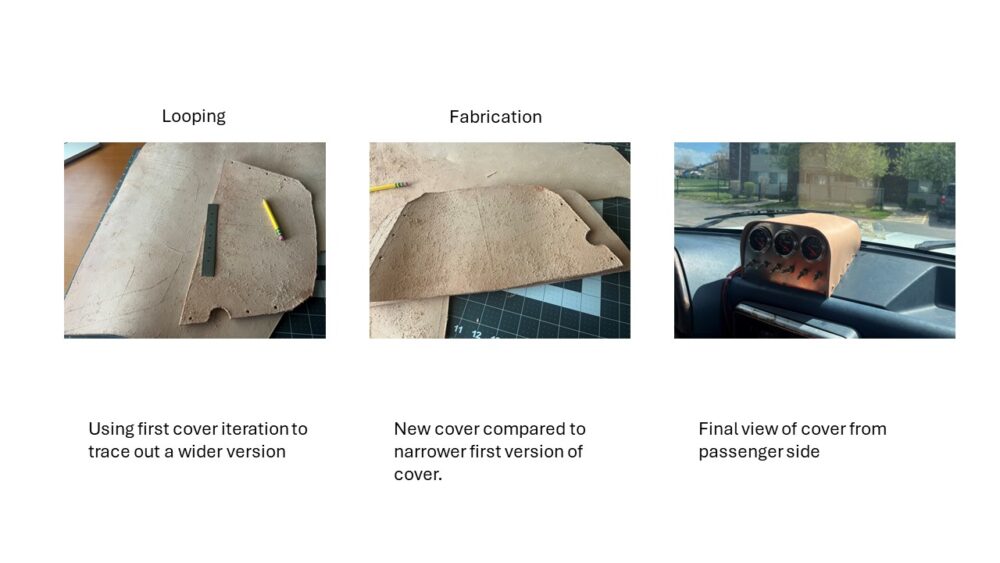
The timeline below shows the fabrication process for this project. It started with exploration; this involved staring at the uncovered gauge cluster, and thinking about what cover design would be the most aesthetic and rigid while matching the vehicle’s interior. I made use of the flexibility of a paper towel to simulate what space the cover would have to take up, as well as the angle at which to cut the sides of the cover. This angle was the critical part of the covers design and is what had me the most concerned. Since I decided that the cover will bend around the top of the cluster to make a smooth transition to the vertical portion, the angle of the side edges relative to the dash is not an obvious one to figure out. The width of the entire cover, the radius of the bend in the cover, and the choice to put the cover behind or on top of the cluster fascia, are all variables that affect the angle of these side edges that would make them sit cleanly on the dash. This is largely why I needed to conduct some looping, where I revised my first cover by making it wider to create revision B. The timeline shows detailed pictures of this process. Once revision B was created, I was able to bend it over the gauge cluster to see if the wider version fit nicely behind the fascia and sit nicely on the dashboard. It turned out that revision B was near perfect and sat parallel to the dash with little to no gap. However, it wasn’t perfect because I overshot slightly with my revision, making the cover slightly too wide to sit behind the stainless-steel fascia. I solved this problem by checking how the cover fit if it draped on top of the fascia, giving it a framed appearance. I ended up liking the way this looked far better than the alternative, which would have exposed edges of thin stainless steel that would not look as good in my opinion. I was happy with this outcome since it meant I didn’t have to create another iteration, and the aesthetic of the leather overhanging was unexpectedly cool. At last, I could use some small brass wood screws with wide heads to mount this final cover version to the wooden base of the gauge cluster, using the holes that I had already punched through the thick leather. The leather was about a quarter of an inch thick, and very firm, so this fabrication process took quite some time. The final product, however, is something that I’m happy to look at nearly every day.
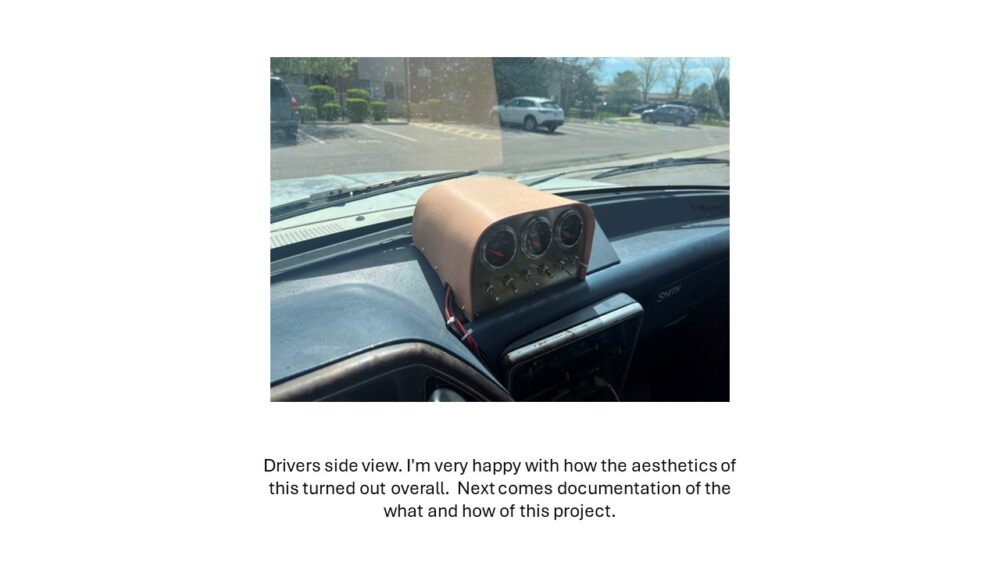
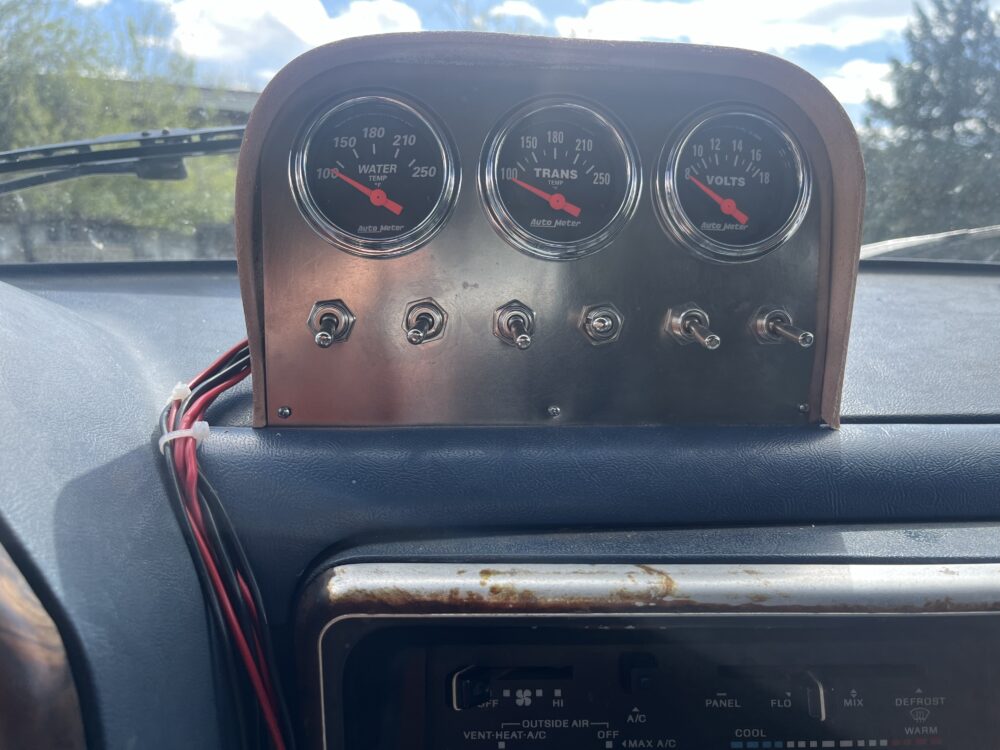
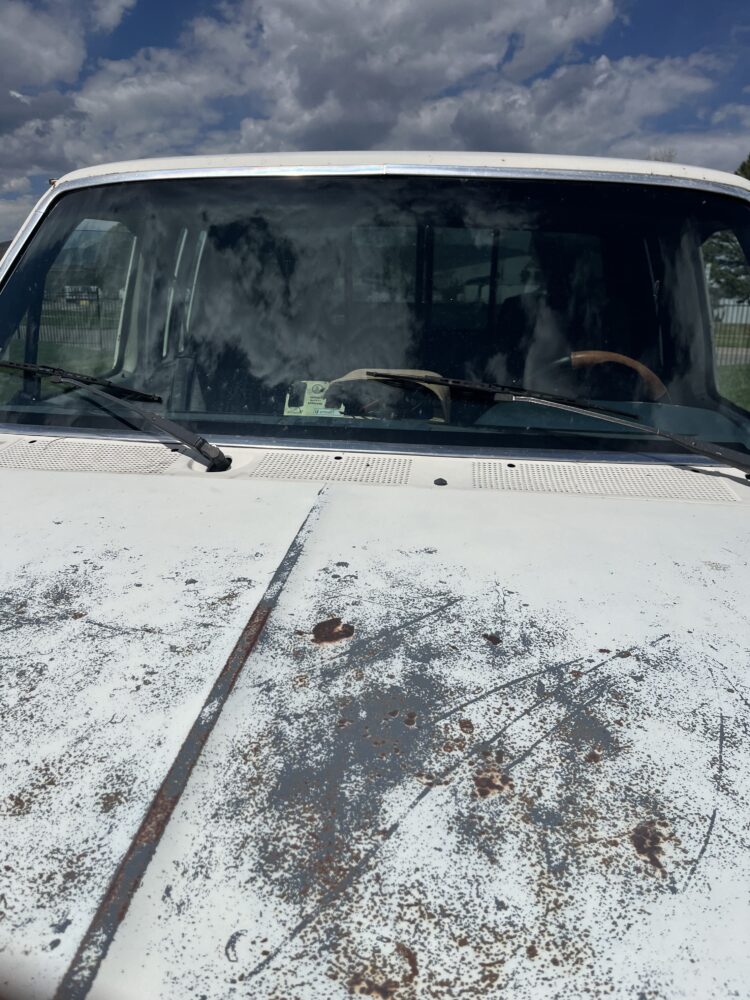
In conclusion, the final cluster cover came out almost exactly like I was hoping. I say almost for a few reasons; first, the leather doesn’t sit perfectly against the fascia, but instead bows outward at some spots (see the image below). My solution to this is to hot glue strips of flat, rigid wood along these edges; this should force the straight portions of the leather to be straight. Furthermore, the cluster cover doesn’t look great when viewed from the front (see image below). I may fix this by adding cuts in the rear of the cover to allow it to bend down, but I haven’t decided if I will. Both of these problems are minimal since from the normal view angles of this gauge cluster, they are not visible. Lastly, I originally planned on mounting a phone holder and an electric fan to this cluster. After seeing just the cover in place, I decided the aesthetic was too clean to be ruined by these additions jutting out the top. Also, there wasn’t enough space for the fan and the phone holder’s movement would be too limited. For these reasons, I stuck with the clean, mid-century modern aesthetic of a filleted leather cover and laser cut stainless steel fascia. To wrap it up, I’m thrilled with the appearance of the brass wooden screws; to me, they highlight the light brown cover and the mahogany-colored trim of the rest of my vehicle’s interior.
1 Comment. Leave new
[…] The main project for this class was another fun learning experience. Unlike the upcycle project, the main one had limited design requirements: we had to follow an aesthetic and ideally the project would serve a purpose. When choosing my project idea, I sought after fixing another problem with my vehicle. There are several gauges that I installed into my truck including an oil pressure gauge, water temperature gauge, transmission temperature gauge, and voltage gauge. The latter three of these gauges needed a dependable yet aesthetically pleasing way to mount them to the vehicle. Many truck owners achieve this by using an off-the-shelf vertical gauge cluster/pod, which mounts to the vehicle’s driver side A-pillar. This not only would not look great to me but would also hinder the driver’s visibility, especially when making left turns. Therefore, I chose to make a custom gauge cluster for the Aesthetics of Design main project, entirely from scratch. I started with a general design: a wooden base, hidden by a stainless-steel fascia which holds the gauges and a cover of some form to hide the wires. Once I had the general design in mind, I realized that the extra leather that I have from sheath making would be the perfect material to function as a cover, due to its durability and similar color to the existing brown dash components. Given the material choice of leather and stainless steel, in addition to an organic, smooth, filleted bend in the cover, I realized that my project would most closely follow the mid-century modern aesthetic. To me, this aesthetic will always stand the test of time due to its application of sleek lines, organic shapes, and minimal clutter. […]